Download
1 / 24
240 likes | 250 Views
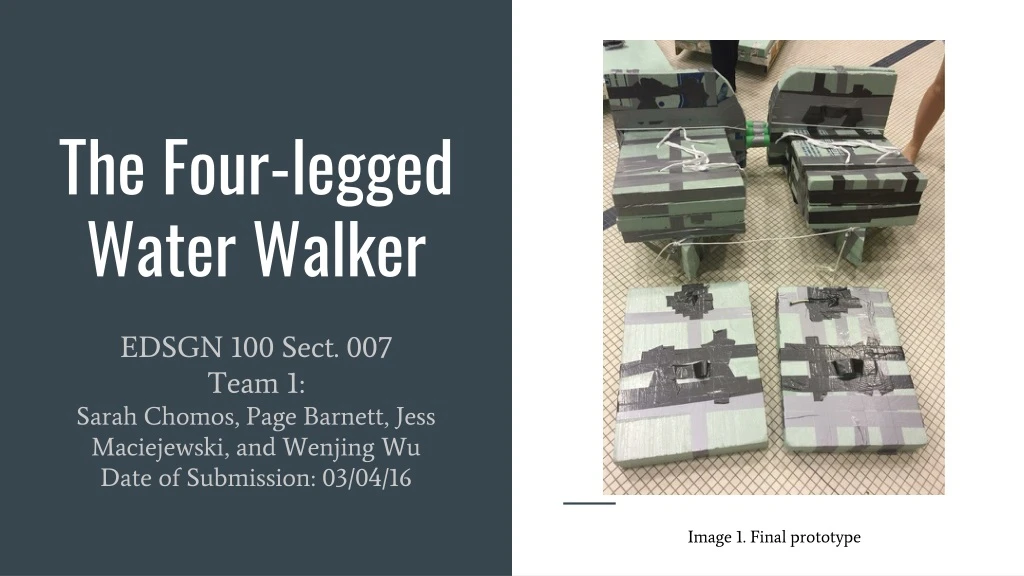
The Four-legged Water Walker. EDSGN 100 Sect. 007 Team 1: Sarah Chomos, Page Barnett, Jess Maciejewski, and Wenjing Wu Date of Submission: 03/04/16. Image 1. Final prototype. Table of Contents:. Mission Statement Stakeholder Needs & Specifications Design Generation

E N D
The Four-legged Water Walker EDSGN 100 Sect. 007 Team 1: Sarah Chomos, Page Barnett, Jess Maciejewski, and Wenjing Wu Date of Submission: 03/04/16 Image 1. Final prototype
Table of Contents: • Mission Statement • Stakeholder Needs & Specifications • Design Generation • Initial Comparison & Analysis of Design Ideas • Design Generation and Construction • Results of Testing and Modifications • Calculations • Summary • Questions
Mission Statement Our mission is to capitalize on an opportunity to design and market a device that allows for college-aged individuals to walk on water and transport a maximum amount of weight.
To create an appealing product for the market, a survey was created to gather information about consumers. Chart 2. Consumer weights. How tall are you? How much do you weigh? (lbs) 5’0”-5’11” 131-160 lbs Chart 1. Consumer heights.
To create an appealing product for the market, a survey was created to gather information about consumers. Chart 4. Consumer evaluation of important attributes. What price are you willing to pay? Which attribute is most important to you? $51-100 Safety $101-150 Chart 3. Consumer willingness to pay.
Based on the survey results, attributes were comparatively ranked in importance. Table 1. Pairwise Comparison
Design specifications were produced from stakeholder needs. Table 2. Specifications & Customer Needs Assessment
Our team generated concepts and brainstormed ideas based on stakeholder needs and specifications. Figure 3. Tread Design Figure 1. Block Design Figure 2. Noodle Design
Our team generated concepts and brainstormed ideas based on stakeholder needs and specifications. Figure 4. Bowl Design. Figure 5. Ski Design
Matrices comparing the design ideas allowed for systematic choosing of which designs to continue. Table 4. Screening Matrix
A weighted matrix further considered the remaining design ideas, ranking them from best to worst. Table 5. Weighted Matrix
After assessing specifications for the ideas and recognizing pros and cons, the team chose to move forward with the number one ranked design. Note: Scale: 1 block = 2 inches Figure 6. Continued block design
After the start of construction of the original design, a new design--incorporating the arms and legs--emerged from the frame of the original. Figure 7. Leg & Foot Piece NOTE: Each isometric drawing to the left was constructed twice--one for each leg and arm. The four separate pieces were conjoined by ropes. Figure 8. Arm & Hand Piece
The team constructed a prototype, tested it under final testing conditions, and made adjustments needed to optimize functionality. Prototype after modifications Prototype before modifications Image 2. Prototype before modifications. Image 3. Prototype with modifications.
The cost of our design materials was $121.89. Pool Noodles (1): $3.25 47” long Foam Boards (2): $69.96 2in x 4ft x 8ft Duct tape (3): $24.35 PVC Pipes (2): $8.94 1.5” x 5ft PVC Connectors: $12.90 Tees and Elbows for 1.5” diameter pipes Rope: $2.49 60ft Total: $121.89
To calculate the depth of our device in water we used this equation. Equation used to calculate depth: d = depth in water m = mass of device + person + extra weight p = density of pure water (1000 kg/m^3) A = Area of the device (Length * Width)
We utilized an Excel spreadsheet to see how the depth changed with different dimensions First: Table 6. Calculated dimensions. Second: Table 7. Calculated dimensions
Our design changed to two individually moving parts that held different amounts of weight. Buoyant Force Buoyant Force Center of Mass Center of Mass Force of Gravity Force of Gravity 30% of Weight 70% of Weight Figure 9. Free Body Diagram of relevant forces.
To account for weight distribution we used different weight inputs. Leg Device: Table 8. Calculated dimensions for leg device Arm Device: Table 9. Calculated dimensions for arm device
The utilization of a Gantt chart allowed for efficient project management throughout the design process. Table 10. Gantt chart.
Video of Trial Runs https://www.youtube.com/watch?v=OvhQZxtNbq0