Download
1 / 59
590 likes | 608 Views
Relief Sculpture: Drywall . What does relief mean?. How has relief sculpture been used historically?. How do contemporary artists use relief techniques?. Materials. Drywall. (12"x12" or smaller) 1” Gum Erasers Small Sponges Water and spray bottles Small Plastic Cups

E N D
Materials Drywall. (12"x12" or smaller) 1” Gum Erasers Small Sponges Water and spray bottles Small Plastic Cups Popsicle sticks, carving tools, ceramic tools Pencils, glue and paint if you have it.
Step 1. Buy and Cut Drywall A 4 ft. by 8 ft. piece of drywall should be cut into 12" (or smaller) squares. This can be done by scoring the drywall on the "right" side with a boxcutter, and then "snapping" it along the score line. I use a boxcutter on the reverse side to cut through the remaining paper that held the squares together
A Tip!!! Students can glue their square of drywall (back side down) to a piece of cardboard the same size. This will help to make sure that the piece stays together, even if it cracks while they are working on it.
Students should use sponges (wet, but not dripping) to soften and remove the paper on the front of the board. This takes a lot of time and patience!
Creating a design in pencil Students have created designs on newsprint or scrap paper. I have them transfer these designs in pencil onto their clean plaster surfaces. I encourage students to keep their designs simple and to keep raised lines or raised areas at least ½” thick due to the fragile nature of the plaster
Gum Erasers I have found that the junky 1” gum erasers that are often found in art rooms are really helpful in helping take the paper off. Just use it in a circular motion and you will see the paper magically come off and the smooth pristine plaster surface shining through!!!
Tip As they begin to carve, students should keep the surface slightly damp. This will make the drywall easier to carve and it seems to reduce chipping. If they get it too wet, however, it is much more likely to crack.
Once that is done, they should switch to a larger tool to more quickly remove areas that they intend to cut away.
More Helpful Hints • Add the plaster powder that is produced from the carving to watered down elmer’s glue to make a very thick, plastery paste that can be used to fill in cracks and repair breaks. • Put down newspaper on tables, so that cleanup is easy. • Use a bucket to rinse out sponges and clean tools. Plaster will clog your sinks. • Don’t let students carve too deep. It will make the drywall too fragile. It will break.
Students can experiment on scrap pieces of drywall to determine surface treatments that will enhance their pieces. • Acrylic Paint • Watercolor • Ink Washes • Shoepolish (rub on and off to create stain effect). • Spray paint • Metallic gold leaf, paints, etc…
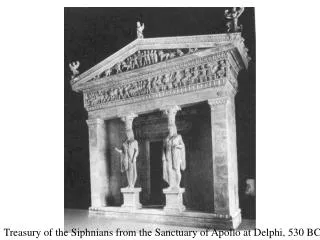
Professional Contemporary Relief Artist: Carving in Plaster and sealed
1. The relief tiles are carved from the students’ ideas into leather hard clay slabs.
3. The mold is used and the tile is hand-pressed and carefully dried.
Dry tiles for at least a week and bisque fire. Once done, glaze can be added and a glaze fire can take place.