Download
1 / 40
400 likes | 546 Views
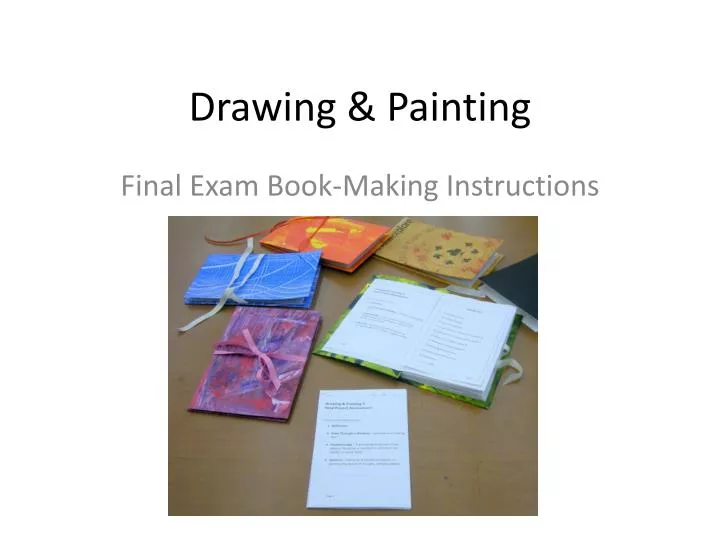
Drawing & Painting. Final Exam Book-Making Instructions. The Finished Book. These are examples of what your book will look like when finished. Let’s Make the Pages First. You need 3 pieces of 9” x 24” paper 1 piece of 9”x10 ½” paper White glue. Gluing the Pages together.

E N D
Drawing & Painting Final Exam Book-Making Instructions
The Finished Book • These are examples of what your book will look like when finished.
Let’s Make the Pages First • You need • 3 pieces of 9” x 24” paper • 1 piece of 9”x10 ½” paper • White glue
Gluing the Pages together • Apply a VERY THIN bead of white glue. • Position the next page to overlap the bead of glue ½”. Thin bead of glue
Continue Gluing • Continue gluing pages until you have one long strip.
Marking the folds • Use the provided template. • Place it the left edge of your strip of paper. • With a pencil, draw a line along the right edge of the template.
Continue Marking • Move the template to line up with the line you just drew. • Draw a line on the right side. • Continue until you have 14 sections.
Folding the Pages • Begin with a valley fold to fold your first page. Valley Fold
Continue Folding • You are making an accordion fold book. • Use your pencil lines as your guide for folding. • For each fold, reverse the direction of the book.
Continue Folding • Continue the back and forth folding until all pages are folded together.
Marking the Last Page • If your last page is a bit too big, you will need to trim it. • Line the template up and with a pencil, mark the last page.
Trimming the Last Page • With scissors, trim along your mark to cut away the excess paper.
Cutting the Handouts • Using Scissors, cut each page of your handouts in half along the dotted line.
Gluing the Handouts in Place • On the back of Page 1, apply a VERY THIN bead of glue only across the top edge of the page.
Gluing the Page in Place • Press page 1 into place on the first page of your booklet. • The page should only be glued across the top.
Continue Gluing • Continue gluing your pages in place until all 14 are glued in. • Be careful that you glue your pages in the correct order!
Painting the Covers • Put your name on the back of 2 pieces of 9”x12” paper. • To make abstractly painted front and back covers, you will need to use acrylic paint. • Select analogous colors. • Colors that are next to each other on the color wheel.
Putting Paint on the Paper • Once you have your colors selected, put a small dab of each color on one of your cover papers. • You may want to include black or white as well.
Moving the Paint Around • With a small piece of matt board, move the paint around. • The more you mix, the more the colors will blend together.
Keep Going • As you move the paint around, excess paint can be applied to your second sheet of paper.
Finished Covers • When both covers have been painted, put them on the drying rack or in a safe place to dry.
Making Paste Painted Covers • Paste paper is used to create a textured effect for your front and back covers.
Gathering Your Supplies • You will need the paste paper your teacher has prepared for you. • Select one color. • You will also need a couple of texture making tools.
Adding the Paste • Put a spoonful of paste on one of your cover papers.
Spreading the Paste • Use a small piece of matt board to spread the paste around so that your entire sheet of paper is covered.
Adding Texture • Use your tool to scrape and twist the paste around to make a desired texture. • You can always smooth the paste and retexture if you don’t like your first attempt.
Set Aside to Dry • The paste paper will need to dry overnight. • Set your cover papers on the drying rack or in a safe place to dry.
Putting the Covers Together • Place the piece of 10”x6 ½” matt board in the center of the back of your cover paper. • Trace around the matt board with a pencil.
Marking the Corners • Use a small scrap of matt board, lining up the edge of the board with the traced piece of matt board. • Trace the outer edge of the scrap piece from one edge of the paper to the next. • Repeat at all 4 corners.
Cutting the corners • Using scissors, cut the cover papers along the marked lines. • Save these corner pieces!
Gluing the Covers • Put a fair amount of glue on the paper in the traced rectangle. • Spread the glue to a THIN layer with a piece of matt board.
Press in Place • Turn the cover over, firmly rub to secure the paper in place.
Adding the Corners • Glue the cut corner pieces in place on the matt board, one at each corner.
Gluing the Flaps • Put a bead of glue on the flap and spread thinly with a piece of matt board. • Fold the flap over and press in place on the board.
The Finished Cover • Your finished cover should look something like this one.
Adding a Ribbon • You may want to add a ribbon to be able to tie your book closed. • Use a piece of ribbon that is 36” long. • On the BACK cover, across the center, apply a bead of glue. • Center your ribbon and press securely to the glue bead.
Finishing the Back Cover • On the back of page 14, squeeze out some glue. • Spread thinly on the back of the page using a scrap piece of matt board.
Finishing the Back Cover • Place the back of page 14 onto the back cover. • This will cover up the section of ribbon. • Press firmly in place with your hands.
Finishing the Front Cover • To protect your book, place a piece of newspaper or waxed paper under page 1 of your booklet. • Squeeze glue liberally onto the back of page 1 and spread thinly with a scrap piece of matt board. • Press your cover in place.
The Finished Book • Tie your ribbon and your book is done!