Download
1 / 20
701 likes | 3.29k Views
Tooth Whitening. DA 122 Dental Materials. Tooth-whitening. Background/History. Also called “Bleaching” Process discovered during WWI Soldiers developed “trench mouth” from poor diets Military dentists had them clean with carbamide perioxide solution to improve periodontal conditions

E N D
Tooth Whitening DA 122 Dental Materials
Background/History • Also called “Bleaching” • Process discovered during WWI • Soldiers developed “trench mouth” from poor diets • Military dentists had them clean with carbamideperioxidesolution to improve periodontal conditions • Noticed side effect: tooth color lightened • 1920’s dentists tried various combinations of perioxide solutions to light people’s teeth, for both cosmetic and therapeutic uses • Today: over 90% of dental offices offer some sort of whitening service
World War I Mobile dental clinic Mobile equipment
Reasons for Bleaching Teeth: Staining • Intrinsic Staining: • within the tooth • due to chemicals ingested during tooth development • Example: • Tetracycline staining • Fluoride staining • Dental decay, trauma (injury), endodontic treatment • Aging • Genetic predisposition • Extrinsic Staining • From outside the body • Chromogenic foods: • Coffee, tea, cola, red wine (blueberries, soy sauce, balsamic vinegar, tomato sauce) • Tobacco products • Poor oral hygiene
Intrinsic Staining Tetracycline Staining: blue-grey or brown shading Fluorosis: chalky-white to brown stains
Extrinsic Staining Chromogenic foods Tobacco Stains
Types of Bleaching Treatments • In-Office Non-vital • In-Office Vital • Home-Bleaching Treatment
In-office Non-vital • Tooth has had endodontic treatment and has darkened • Involves a single tooth • “walking bleach” • Sodium hydroxide paste placed into pulp chamber; left in for a period of time; may involve 2 or more visits
In-Office Vital • Usually involves all teeth • Can be single tooth or single arch • “power bleaching”(Zoom) • Sodium hydroxide paste placed on tooth surface and activated with a heat/curing lamp (sometimes) • Must use dental dam to protect gingiva
Home Bleaching Treatment • Custom tray is made for patient • Dentist dispenses gel for in-home use.Carbamide peroxide most common bleach used. • Patient does self-treatment at home with gel in custom tray • Patient may purchase tooth-whitening kits over-the-counter; results vary
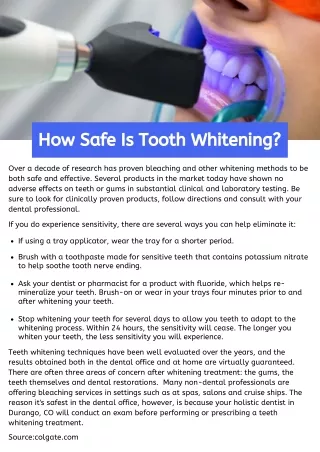
Side-Effects of Tooth-whitening • 1. thermal sensitivity • Teeth become sensitive to hot and cold • 2. gingival irritation • Localized irritation to gingival tissues • Gingiva appears white or reddened, as if burned
Patient Evaluation for Tooth-whitening • Evaluation by dentist BEFORE treatment is necessary • Patient must have good oral health, especially gingival health • Check medical history for • Allergies • TMJ disorders • Pregnancy or lactating (contraindicated) • Dental radiographs and examination • Dentist must evaluate condition of teeth, to determine if tooth-whitening is indicated: cause and degree of stains, vital/nonvital, presence of restorations or poor oral hygiene • Patient with gag reflex not good candidate
Pre-Treatment Visit • Take Intra-oral photos “before” shots • Select and record shade: • Beginning shade • Goal shade (about 3-5 shades lighter) • Dentist and patient should agree on reasonable shade goal • Take alginate impressions of arch or arches to be treated
Pre-Treatment Visit Intraoral Photograph Select and Record Shade
Fabrication of Custom Bleaching Tray • 1.Pour alginate impression without a base • 2.Trim model to horse-shoe shape • 3.Label model with • Patient full name • Date that impression was taken • Doctor’s name • BLEACH TRAY • 4.Trace gingival margins on model, with pencil or permanent marker • 5.Lightly spray model with silicone lubricant to prevent tray material from sticking to model during vacuformer process
Making the tray (steps continued) • Armamentarium: • Vacuformer • Plastic tray material (.020, .035, .040) • Prepared model • Lab scissors • Heated knife or surgical scissors • 6.Follow vacuformer directions • 7.Let tray cool completely before removing from model • 8.cut away excess tray material • Cut along gingival area (leaving 2mm beyond CEJ) with knife or scissors • 9. Check for roughness along edges, try onto model • 10.Disinfect tray before delivering to patient
Delivery of Custom Bleach Tray to Patient • Try-in tray in patient’s mouth • Check for fit and patient comfort • Review home-instructions with patient • Verbally • Give written copy • Demonstrate loading the tray with the gel (avoid overfilling) • Reappoint for follow-up visits
Patient care follow-up • Patient should be checked for progress every 1-2 weeks • Check for thermal sensitivity and gingival irritation, also • When patient has reached the goal shade: • Take and record shade • Take intra-oral photos • Make plans for maintenance and possible touch-ups • Give instructions for maintenance • To avoid relapse, caution patient about: • Chromogenic foods and beverages • Smoking