Download
1 / 59
590 likes | 756 Views
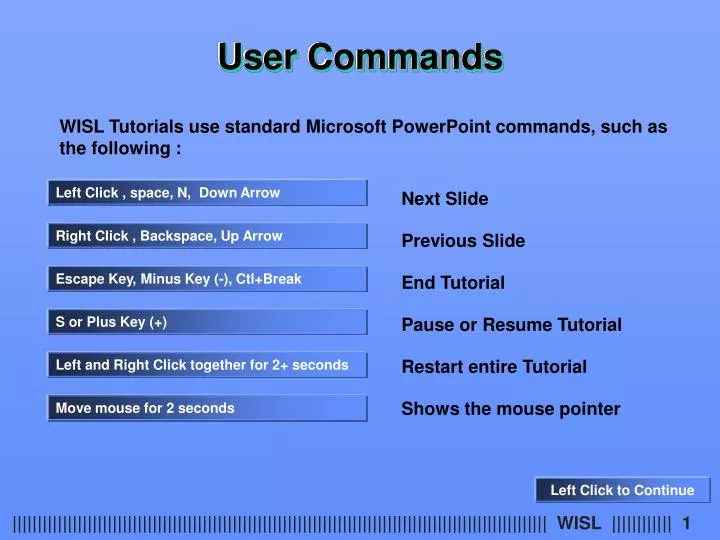
Next Slide. Previous Slide. End Tutorial. Pause or Resume Tutorial. Restart entire Tutorial. Shows the mouse pointer. WISL Tutorials use standard Microsoft PowerPoint commands, such as the following :. Left Click , space, N, Down Arrow. Right Click , Backspace, Up Arrow.

E N D
Next Slide Previous Slide End Tutorial Pause or Resume Tutorial Restart entire Tutorial Shows the mouse pointer WISL Tutorials use standard Microsoft PowerPoint commands, such as the following : Left Click , space, N, Down Arrow Right Click , Backspace, Up Arrow Escape Key, Minus Key (-), Ctl+Break S or Plus Key (+) Left and Right Click together for 2+ seconds Move mouse for 2 seconds Left Click to Continue
Waterloo Information Systems Limited presents WISL Branch Freight System Remote Installation The WISL Branch Freight System provides a branch operation with the capability to monitor and control freight costs during the shipping process. Left Click to Continue
Tutorial Menu Type ”4” <Enter> To Start WISL BFS Overview Type “9” <Enter> To Start WISL BFS Shipping Tutorial Type “33” <Enter> To Start WISL BFS Consolidation Tutorial “ESC” To Exit Left Click to begin Overview
Waterloo Information Systems Limited presents WISL BFS System Flow Through an interface with the corporate order entry and/or purchasing system, a data base keyed on customer reference number is established that contains information about shipment requests(both inbound and outbound). Interactive facilities are provided to record receiving information for inbound shipments and to record shipping information at the time an outbound shipment is sent. In both cases automatic rating is employed to identify preferred carrier(s) and allow for accrual and control reporting. Left Click to Continue
WISL Branch Freight System Purchase Order Purchasing System Order Entry System Shipment Request Form (in) Vendor WISL Branch Freight System Bill of Lading Packing Slip (outbound) Shipping Dept. Rating Authority (WISL BFS) Shipment (outbound) Receiving Data Entry Shipping Data Entry Left Click to Continue
Waterloo Information Systems Limited presents WISL BFS Remote Control WISL BFS may be installed to control shipping at remote sites. In such installations the rates and related data are maintained centrally via WISL's Freight Analysis Information System with updates provided as required through EDI to the remote server. The central rating authority receives completed shipment information from WISL BFS to effect centralized payment to carriers and facilitate reporting. Left Click to Continue
WISL BFS Remote Installation Internet Protocol Freight Management Server (Rates & Reporting Data Base) BFS Remote Server (Shipping Data Base) Corporate Server(s) Order Entry/Purchasing Systems Internet Protocol Internet or Intranet Internet or Intranet Internet or Intranet Internet Protocol Internet Protocol Internet Electronic Manifests To carriers Branch Shipper Workstation Document Printer (BOL, Packing List, Customs Doc, etc) Label Printer (Shipping Labels) Left Click to Continue
Tutorial Menu Type ”4” <Enter> To Start WISL BFS Overview Type “9” <Enter> To Start WISL BFS Shipping Tutorial Type “33” <Enter> To Start WISL BFS Consolidation Tutorial “ESC” To Exit Left Click to begin Overview
Waterloo Information Systems Limited presents WISL Branch Freight Shipping Tutorial This tutorial follows the shipping process from specification of a pick ticket to generation of labels and other documents. Left Click to Continue
WISL Branch Freight Tutorial Clicking on “Add Shipping Records” initiates the shipping process. Left Click to Continue
WISL Branch Freight Tutorial The Bill of Lading Maintenance routine handles data collection for all incoming and outgoing Bills of Lading passing through the branch. Each shipment is rated based on its individual characteristics and the rates provided by a centrally managed rating authority. The best carrier can be automatically determined, along with the expected freight cost. BOLs or Shipment Request documents, and any required supporting documents are printed at completion. Left Click to Continue
WISL Branch Freight Tutorial The pick ticket number, or the Non-Standard Code, of the desired record is entered. Left Click to Continue
WISL Branch Freight Tutorial Upon clicking the “Pick Ticket Lookup” button the relevant data is automatically transferred from the pick ticket record to the BOL record displayed. The shipping clerk may then supplement or override any field to prepare the BOL record for rating. Left Click to Continue
WISL Branch Freight Tutorial Note that the text boxes of 5 attributes are highlighted in light blue which means they are required to be completed before the screen may be exited for rating. Origin, destination, number of pieces, weight and connecting carrier indicator must be transferred from the pick ticket or entered by the shipping clerk. Left Click to Continue
WISL Branch Freight Tutorial The data imported from the pick ticket corresponds to the desired shipping specifications and rating may now be invoked by pressing the “Rate” to allow selection of the carrier. Left Click to Continue
WISL Branch Freight Tutorial The list presented includes all rates applicable to the specified shipment characteristics. The desired rate may be selected by clicking on the carrier name. In this case the first Purolator rate is selected. Left Click to Continue
WISL Branch Freight Tutorial Note that “Purolator” has been inserted into the “Main Carrier” box. At this point the shipper may override any of the ship parameters listed below. Left Click to Continue
WISL Branch Freight Tutorial Once the shipper is satisfied with the ship parameters the “Ship” button is pressed to initiate generation of documents. Left Click to Continue
WISL Branch Freight Tutorial The B\L is printed. Left Click to Continue
WISL Branch Freight Tutorial A bar coded shipping label is printed. Carriers such as Purolator have specifications for the layout of the label that is printed and WISL BFS will print a label that corresponds to these specifications. Left Click to Continue
WISL Branch Freight Tutorial Once the documents are printed the screen is re-initialized to await input of the next pick ticket number. Left Click to Continue
WISL Branch Freight Tutorial Multiple items can be added to a shipment by Clicking on the ‘Add Multiple Items’ button beside the Units prompt. This would open up a new window for data entry of Multiple Items Left Click to Continue
WISL Branch Freight Tutorial Details of Multiple items can be entered on this screen. Commodity and Product type can be selected from the drop-down lists. Click on the ‘Update Record’ button to save the information. Left Click to Continue
WISL Branch Freight Tutorial After the Multiple Item information are updated, the ‘M’ for Multiple in Units and total weight in Weight prompt will be filled in on the main screen. The default ‘Shipped From Branch’ is filled by a parameter. The other information can entered as usual. Left Click to Continue
WISL Branch Freight Tutorial When a Shipping Record is added, a Bill of Lading is assigned to it. A Bill of Lading record can be maintained by clicking on “Maintain Bill of Lading”. Left Click to Continue
WISL Branch Freight Tutorial Specification of the bill of lading number or any combination of other criteria on the screen will result in a list of possible matching bills or if only one bill is selected it will be displayed in the maintenance screen. Left Click to Continue
WISL Branch Freight Tutorial The main screen for BOL record maintenance is presented at this point. Left Click to Continue
WISL Branch Freight Tutorial The most commonly maintained data attributes in the BOL record are displayed for maintenance on this screen . Left Click to Continue
WISL Branch Freight Tutorial Separate buttons invoke maintenance of additional charges or Supplementary Info(less commonly maintained attributes) . Left Click to Continue
WISL Branch Freight Tutorial This is the screen invoked by the “Additional Charges” button that provides for maintenance of accessorial charges. Left Click to Continue
WISL Branch Freight Tutorial The re-rating of the bill may be initiated by pressing the “Re-Rate” button. Re-rating is handled in the same manner as in the shipping procedure. Left Click to Continue
WISL Branch Freight Tutorial The BOL or shipping label may be re-printed by pressing the corresponding button.. Left Click to Continue
WISL Branch Freight Tutorial When all maintenance is complete the”Update Record” is pressed to initiate the BOL record update. Left Click to Continue
WISL Branch Freight Tutorial The Main Menu also provides access to other functions including reprinting of shipping documents and the maintenance of consolidations. Left Click to Continue
Tutorial Menu Type ”4” <Enter> To Start WISL BFS Overview Type “9” <Enter> To Start WISL BFS Shipping Tutorial Type “33” <Enter> To Start WISL BFS Consolidation Tutorial “ESC” To Exit Left Click to begin Overview
Waterloo Information Systems Limited presents WISL Branch Freight Consolidation Tutorial This tutorial follows the activities involved in consolidation. Left Click to Continue
WISL BFS Consolidation Tutorial Clicking on “Consolidation List” initiates the consolidation function. Left Click to Continue
WISL BFS Consolidation Tutorial The consolidated list, sorted by best carrier, is presented the drop down list shows the other available options(Status or Open Date). Left Click to Continue
WISL BFS Consolidation Tutorial This is the list sorted by “Open Date”. Left Click to Continue
WISL BFS Consolidation Tutorial The BL Number is clicked to initiate maintenance. 100000000102 is used for this demo. Left Click to Continue
WISL BFS Consolidation Tutorial The consolidated record can be maintained from this screen. The “Actual Carrier” may be specified or the “Rate” button may be selected which will offer a list of applicable carrier/rates. We will select the “Rate” button. Left Click to Continue
WISL BFS Consolidation Tutorial The first rate(lowest) is selected for this demo. Left Click to Continue
WISL BFS Consolidation Tutorial The carrier name and associated attributes are populated from the rating. Left Click to Continue
WISL BFS Consolidation Tutorial When we add a second shipping record for any destination, for which we have already created a BOL with the same service level, the existing carrier for the given destination is selected. After the carrier is selected, the ‘Add to existing consolidation’ is set to ‘Yes’. Left Click to Continue
WISL BFS Consolidation Tutorial “Shipped” is specified in the drop down list and upon selecting the “Update Record” button the record will be updated and documents generated. Left Click to Continue
WISL BFS Consolidation Tutorial Consolidated B\L for Purolator Courier. Left Click to Continue
WISL BFS Consolidation Tutorial Label for Consolidated B\L for Purolator Courier. Left Click to Continue
WISL BFS Consolidation Tutorial If it is not desired to add the next shipping record to the existing consolidation then the ‘Add To Existing Cons’ indicator is set to ‘No’. For this record the selected carrier is ‘Loomis Courier Service’ and this indicator is set to ‘No’. Left Click to Continue
WISL BFS Consolidation Tutorial This is the updated Consolidated List after some new shipments were added for customer ‘CHEMICO ELECTRIC’ (Line # 14) and for customer ‘GAL POWER SYSTEM’ (Line # 18 and Line # 20). For ‘CHEMICO ELECTRIC’ (Line # 14) after we added the Bill No ‘100000000105’ (Line # 15), we added next two bills (100000000107 and 100000000108) to the existing consolidation. For customer ‘GAL POWER SYSTEM’ we did not add the 2nd bill to the existing consolidation, So this customer has two separate consolidated bills. Left Click to Continue
WISL BFS Consolidation Tutorial From this Consolidated List screen, you can also create a separate consolidation for any given bill of lading or you can merge together two bills from different consolidations. For demonstration purpose we have selected line number 17 (Bill No 100000000108) to create a separate consolidation for this bill of lading. We will click on ‘Re-Consolidated/Merge’ button to do the processing. Left Click to Continue