Download
1 / 11
110 likes | 235 Views
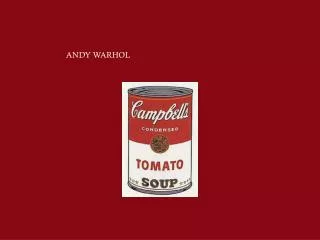
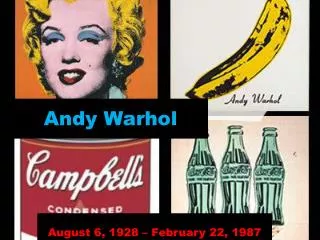
Andy Warhol Tutorial. Prepared by: Ms. Benack. Before you start…. Make sure to look at Andy Warhol artwork for inspiration. Pick a common object to use for this tutorial Ex. Campbells Soup can, Coke soda bottle, banana You will need to apply this effect to two different original images.

E N D
Andy Warhol Tutorial Prepared by: Ms. Benack
Before you start…. • Make sure to look at Andy Warhol artwork for inspiration. • Pick a common object to use for this tutorial • Ex. Campbells Soup can, Coke soda bottle, banana • You will need to apply this effect to two different original images. • Make sure to reference the blog for specific requirements.
Step 1: Open the beginning image. In the layers panel, right click and select Duplicate Layer to create a copy of your original layer. • Step 2: Click the Create a New Fill or Adjustment Layer icon (as shown). • Step 3: Select Channel Mixer Step 3 Step 2
Step 4: Check off the Monochrome option in your layers panel. This will change your image to a grayscale.
Step 5: You may need to scroll down, but drag the Red, Green, and Blue sliders to improve the grayscale image and contrast (as shown). • Some of your computers will open theses options in an extended windows which you can minimize when you’re done working in this layer Step 5
Step 6: Again, click the Create a New Fill or Adjustment Layer icon (as shown). • Step 7: Select Posterize. • Step 8: Set the Levels to 4. Step 8 Step 6
Step 9: Again, click the Create a New Fill or Adjustment Layer icon (as shown). • Step 10: Select Gradient Map. (Make sure you are NOT selecting just the normal Gradient option) • Step 11: Double click inside the gradient to open the Gradient Editor Dialog box. Step 11 Step 9
Step 12: Click BELOW the gradient bar to add new color stops (you will need to add 4 stops total for this picture). • You can change the color by double clicking the color stops and then selecting a color using the color picker. • The number of stops should always match the level number you used for Posterize (which in this example was four). Step 12
Step 13: Repeat step 12 until you have four colors selected. Click OK to close the dialog box. • Step 14: You may reopen the Channel Mixer layer in the layers panel • Drag the Red, Blue, and Green sliders to adjust the areas of color to your liking. Adjust as necessary Step 14
AND YOU’RE DONE!!! Make sure to save the “before” and “after” and add them to your Varity Project.