Download
1 / 26
260 likes | 271 Views
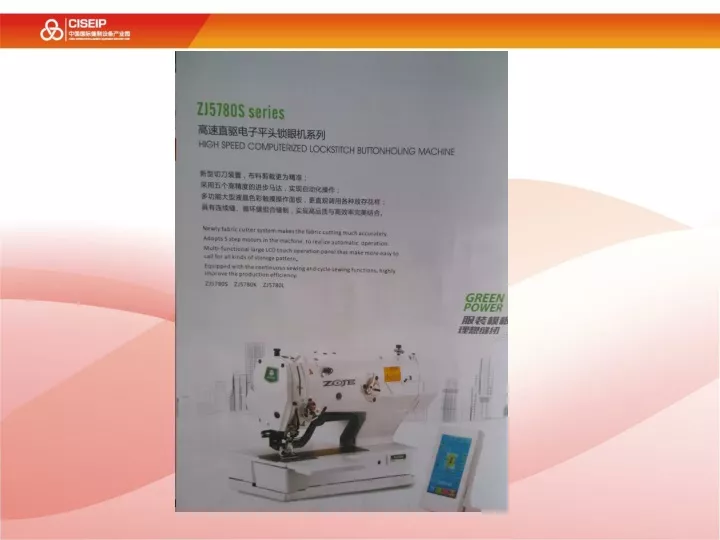
The ZJ5780 series includes three models suitable for different fabrics and buttonhole sewing needs. They feature stepper motor drive, electronic thread clamp device, and adjustable needle bar height for precise stitching. The machine also has adjustable cutter and presser foot positions for optimal performance.

E N D
ZJ5780 series high speed computerized lockstitch buttonholing machine ZJ5780S:Suitable for all kinds of shirts, overalls, such as cotton material buttonhole sewing,woven materials。 ZJ5780K:Suitable for knitting materials, elastic materials form variables such as larger buttonhole sewing materials。 ZJ5780L:A kind of special presser foot series configuration 120 mm button flat sewing machine, has a strong function of continuous sewing and circular sewing.
ZJ5780 adjustment and maintenance ZJ5780The main features: 1、Using the stepper motor and synchronous belt drive,lower noise 2、Electronic thread clamp device, make more balanced in the tension of each line 3、Repeated cutting, just set a parameter can be according to the need for several cutting
Positioning needle bar height 12mm 2 1 The height of the needle bar, the height of the needle bar set is different according to different fabrics, standard S = 11.4 mm, knitting K = 9.6 mm. The factory is equipped with a gauge, 1 is the lowest position, 2 is hook start working position
needle and hook‘s position hook start working position adjust screw adjust:when finish setting the needle bar lowest position, the needle bar rise to gauge "2" position, make the hook tip in the center of the needle groove ,means the hook tip on the top of the needle hole 1.6~1.8mm。 needle groove and hook tip distance is 0.01~ 0.04mm。finished ,tighten the screws
Cutter replacement knife size screw 1 ~2mm Replace directly to loosen the screw ,when you change the knife ,pay attention the knife should be fallen in the center of the needle plate,the knife blade should be higher than the needle plate 1 ~ 2 mm. when you need to change the knife , directly to loosen the screw ,make the knife fall in the lowest place ,then make the knife is flush with the needle plate.fastening the screw。and according the knife size adjust the parameter U18(parameter you can check with the manual)
The function of the cutter Incised on the button holing machine, knife quality, directly affects the performance of the use.Get a up (or down) cutting knife, make the knife to open and close ,check the strength of the knife .And then watch the clamp line performance, it is required clamp the line first then cutting , Requirement is first line between the principle of tangent, look from the cutter, thread clamp in the leading edge of spring plate at least more than fixed knife more than 1 mm, that is to say, when the moving knife and fixed knife in front of the mesh, the face of the moving knife with leaf spring has been around 1 mm mesh, but also for leaf spring and moving knife meshing surface without any gaps
The origin of the needle bar adjustment adjust open the machine,press the bobbin wiper button ,the needle will find the origin automatically,make the needle bar in the center of the plate。if it is not in the center ,please loosen the screw ,move the needle bar to the center ,and fasten the screw (you need open the bobbin wiper first)
adjust the presser foot origin press down screw open the machine,press the bobbin wiper button ,the presser foot will find the origin automatically。loosen the screw and make the presser foot bar down,keep the presser foot and needle plate completely contact.then fasten the screw
feed synchronous belt adjustment adjust the screw press and check we should make the belt have a proper tightness,too loosen will influence the feed,too tight will speed up the wear and tear,tension of general requirement of 70 ~ 80 N。when it need adjust,loosen the screw,and adjust a propre tighten
synchronous belt adjustment adjust screw synchronous belt idler wheel idler wheel screw up axis and down axis synchronous cog belt,loosen or tighten is important for the machine working, Its elastic consists of idler wheel to adjust, idler is fixed by screw, by the adjusting screw to adjust the synchronous belt tightness, adjust an appropriate amount。
electronics clamp device adjustment adjust rod nut adjust nut 1~1.5mm Open electronic thread clamp device shell can see internal structure, open electronic thread clamp device can be adjusted rod nut to adjust, open for 1 ~ 1.5 mm.。
Adjust thread break protection switch screw plastic gasket when the machine running,thread break in the midway ,thread break protection switch willworking generally in adjusting as long as pay attention to the disconnect switch, not in contact with the casing or thread clamp device, screw plastic gasket does not break, and metal.
upper thread knife position adjustment adjust screw 4~6mm pressbutton、start in B,now you can check the distance of the knife and needle plate holing is 4~6mm.
upper knife opening size adjustment adjust screw for big for small upper knife components have adjust screw, this screw can adjust the knife opening size in step 3,when adjust to right,the knife opening size for big ,left for small
Test mode In the setup mode under the level 2, press Key can enter the test mode interface (pictured at right). Each icon function specification as bellow:
upper knife adjustment test mode press (I01upper knife) adjustment interface choose the position you want to adjust, button choose(A、B、C、D),And then by pressing the switch to adjust the required value F button back to origin
clamp the needle adjust screw 1~3mm Move up the needle making trimming action once again to see its walking routes, in the final position, and the location of the cutter groove is 1 ~ 3 mm.Or adjust the above screws. Make the needle down,simulation the upper knife working whether can clamp the needle ,if can not,you need adjust the upper knife。
down knife position adjustment Origin inspection, to see the opening Angle of knife, knife can be folded, started sewing, knife can release the bottom line, the whole mechanism motion is flexible.The Allen screw loosening, rotating eccentric pin, the front end of the knife for the bottom line from the needle plate cutter gap 0-1 mm, adjustment, then tighten the Allen screw the knife notexceeding the needle groove not exceeding the needle hole down knife position adjustment the knife opening size adjust screw
down knife adjustment test mode press (I02 down knife) adjustment interface choose the position you want to adjust, button choose(A、B、C、D),And then by pressing the switch to adjust the required value
the position of presser foot In sewing mode, pressor key, can test the machine needle and the clearance on both sides of the presser foot.If not appropriate, can loosen screw 1 and 2, adjusting the position of the parts 4 right. after make the parts 3 closely to parts 4, then tighten the screw 1. adjust the position of the pin 5 light to the rightmost, tighten the screw 2. After shutdown, pull the feed plate with the hand, confirm the conveying mechanism is flexible.Presser foot position before and after, by adjusting the feed sensor position to adjust
Enter the primary and secondary operation parameters Press can switch data interface and input mode interface (pictured at right), under which can carry out some detailed Settings and edit operation. Note: some key need to long press a key to open.
Enter the primary and secondary operation parameters pressEnter the primary(pictured at right)。 pressout theoperation parameters
Enter the primary and secondary operation parameters setting mode leve 3,press secondary operation parameters(pictured at right)。 ressout theoperation parameters
Restore the factory Settings K200 parameter,Restore the factory Settings。(This option is password protected)