Download
1 / 4
0 likes | 9 Views
Master face retouching in Photoshop to create flawless, natural portraits. Start with high-res images, duplicate layers, and use tools like Spot Healing, Clone Stamp, and Frequency Separation for seamless edits. Enhance features with Dodge & Burn, refine details with Liquify, and adjust overall tones for a polished look. Subtlety is key to stunning, authentic results.

E N D
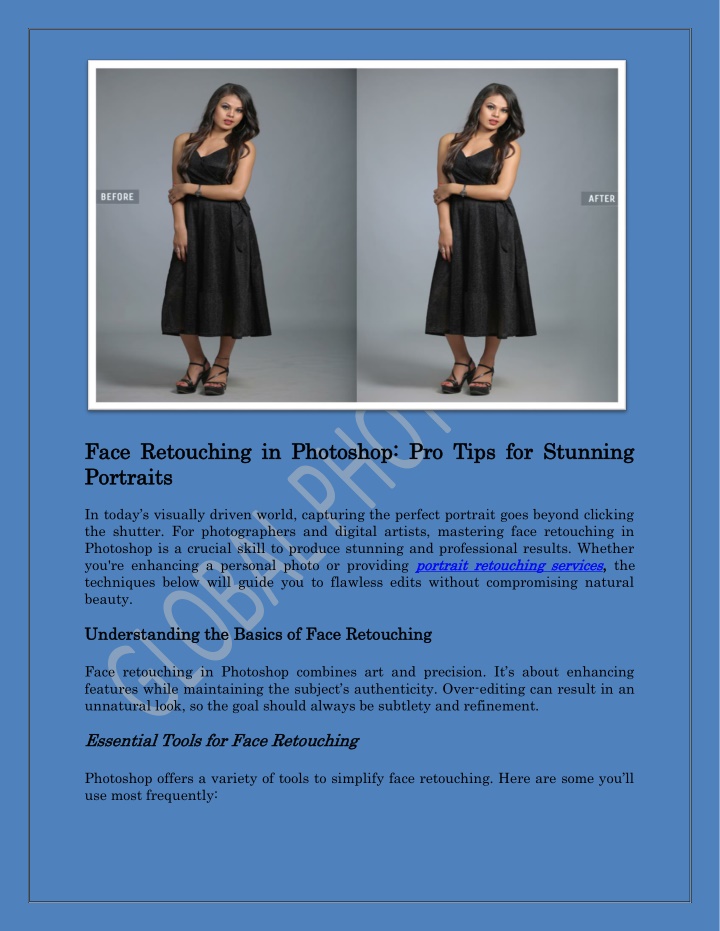
Face Retouching in Photoshop: Pro Tips for Stunning Face Retouching in Photoshop: Pro Tips for Stunning Portraits Portraits In today’s visually driven world, capturing the perfect portrait goes beyond clicking the shutter. For photographers and digital artists, mastering face retouching in Photoshop is a crucial skill to produce stunning and professional results. Whether you're enhancing a personal photo or providing portrait retouching services techniques below will guide you to flawless edits without compromising natural beauty. portrait retouching services, , the Understanding the Ba Understanding the Basics of Face Retouching sics of Face Retouching Face retouching in Photoshop combines art and precision. It’s about enhancing features while maintaining the subject’s authenticity. Over-editing can result in an unnatural look, so the goal should always be subtlety and refinement. Essential Tools for Face Retouching Essential Tools for Face Retouching Photoshop offers a variety of tools to simplify face retouching. Here are some you’ll use most frequently:
1.Spot Healing Brush Tool Spot Healing Brush Tool: Ideal for removing blemishes, pimples, and small imperfections. 2.Clone Stamp Tool Clone Stamp Tool: Useful for duplicating textures or blending skin tones seamlessly. 3.Dodge and Burn Tool Dodge and Burn Tool: Helps to highlight or darken specific areas for added depth and definition. 4.Liquify Filter Liquify Filter: Useful for adjusting facial features subtly, such as smoothing jawlines or reshaping lips. 5.Frequency Separation Frequency Separation: A professional technique for separating textures from colors to achieve a smooth yet realistic finish. Step Step- -by by- -Step Guide to Face Retouching Step Guide to Face Retouching Follow these steps to retouch faces like a pro and deliver impeccable results, whether for personal projects or portrait retouching services portrait retouching services: 1. Start with a High Start with a High- -Resolution Image Resolution Image High-quality images provide more data to work with, making retouching smoother and less destructive. Low-resolution images can pixelate when zoomed in, leading to poor results. 2. Duplicate the Original Layer Duplicate the Original Layer Always duplicate the original image layer to preserve the untouched version. This allows you to compare your edits with the original and make adjustments without losing critical details. 3. Fix Skin Imperfections Fix Skin Imperfections Use the Spot Healing Brush Tool or Clone Stamp Tool to remove blemishes, acne, or stray hairs. Be gentle and avoid overusing these tools to prevent losing natural textures. 4. Smooth the Skin with Frequency Separation Smooth the Skin with Frequency Separation Frequency separation is a technique that divides the image into two layers: one for texture and another for color. This allows you to smooth out uneven skin tones without compromising fine details like pores. Create two copies of your image. Apply a Gaussian Blur to one layer (color layer) to soften the colors. Use the High Pass filter on the second layer (texture layer) to retain details. Blend the layers using the Linear Light blend mode.
Retouch each layer separately for precise control. 5. Enhance the Eyes Enhance the Eyes Eyes are the focal point of most portraits. Here’s how to make them pop: Use the Dodge Tool to lighten the whites of the eyes. Enhance the iris by increasing contrast and saturation. Remove red-eye using Photoshop’s Red Eye Tool if necessary. 6. Whiten th Whiten the Teeth e Teeth A bright smile adds charm to any portrait. Use the following steps: Select the teeth using the Lasso Tool. Apply a Hue/Saturation adjustment layer. Reduce the yellow tones by adjusting the “Yellow” slider. Avoid over-whitening to keep the teeth looking natural. 7. Shape and Define Features Shape and Define Features Subtly reshape facial features if necessary using the Liquify Tool. Common adjustments include: Slimming a jawline. Smoothing uneven eyebrows. Enhancing the fullness of lips. 8. Refine Hair Details Refine Hair Details Hair can be tricky to edit, but it’s crucial for a polished look. Use the Clone Stamp Tool to fix stray hairs and the Dodge and Burn Tools to add dimension to the strands. 9. Apply Final Touches with Dodge and Burn Apply Final Touches with Dodge and Burn Dodge and Burn techniques can elevate your retouching to a professional level. Highlight areas like the cheekbones, forehead, and bridge of the nose while darkening the areas under the cheekbones or jawline to add depth. 10. Adjust Overall Color and Tone Adjust Overall Color and Tone Finally, enhance the overall appearance of your portrait by:
Applying a Curves Adjustment Layer to tweak brightness and contrast. Using Color Balance to correct any color casts. Adding a subtle vignette for a professional finish. Best Practices for Natural Best Practices for Natural- -Looking Retouching Looking Retouching While Photoshop offers powerful tools, over-editing can lead to unrealistic results. Follow these best practices to maintain a natural appearance: Work Non Work Non- -Destructively edits can be undone or refined. Zoom In and Out Frequently Zoom In and Out Frequently: Check your work at different zoom levels to maintain perspective. Use Subtle Changes Use Subtle Changes: Small adjustments often make a big difference. Avoid heavy-handed edits that compromise realism. Follow the Golden Ratio Follow the Golden Ratio: Keep proportions balanced when reshaping features. Destructively: Use adjustment layers and masks to ensure your Why Choos Why Choose Professional Portrait Retouching Services? e Professional Portrait Retouching Services? Although these tips can help you master Photoshop face retouching, many people prefer to leave their portraits in the hands of professionals. Portrait retouching services services offer expertise, advanced techniques, and time-saving solutions for those who want flawless results without the effort. Portrait retouching Here are some advantages of hiring professional services: High High- -Quality Results Quality Results: Professionals use advanced techniques like frequency separation and advanced masking for polished results. Time Efficiency Time Efficiency: Outsourcing retouching saves time, allowing you to focus on other aspects of your project or business. Consistency Consistency: Professional editors ensure uniform quality across multiple images, making them ideal for photographers, brands, and businesses. Conclusion Conclusion Mastering face retouching in Photoshop is a valuable skill that can transform ordinary portraits into stunning masterpieces. By following the steps and tips outlined above, you’ll achieve professional-quality results that highlight your subject’s natural beauty. Whether you’re editing personal photos or offering portrait retouching services retouching services, the key is to balance enhancement with authenticity. portrait