Download
1 / 37
0 likes | 6 Views
To get the complete manual, please open the home page website.<br><br>https://www.aservicemanualpdf.com/

E N D
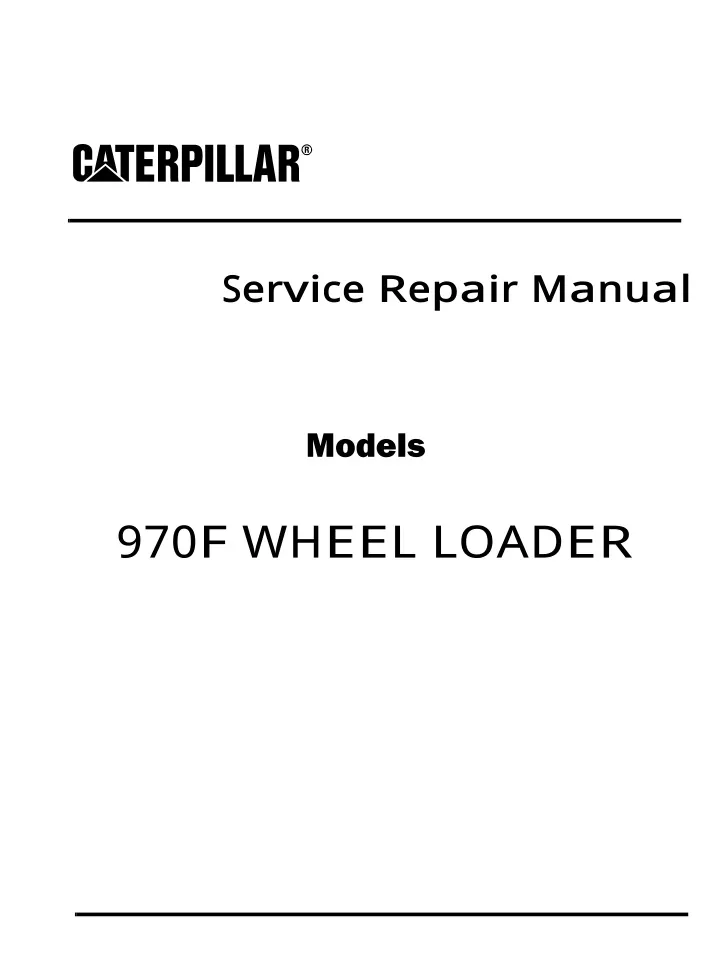
Service Repair Manual Models 970F WHEEL LOADER
970F Wheel Loader 9JK00359-UP (MACHINE) POWERED BY 3306 Engine(SEBP2... 1/12 Shutdown SIS Previous Screen Product: WHEEL LOADER Model: 970F WHEEL LOADER 9JK Configuration: 970F Wheel Loader 9JK00359-UP (MACHINE) POWERED BY 3306 Engine Disassembly and Assembly SUPPLEMENT FOR WHEEL LOADERS & INTEGRATED TOOLCARRIERS - LIM Media Number -SENR5785-00 Publication Date -16/07/1997 Date Updated -11/02/2011 SENR57850003 Limited Slip Differential (918F, IT18F, 924F, IT24F, & 924G) SMCS - 3263-015; 3263-016 Disassemble Limited Slip Differential (918F, IT18F, 924F, IT24F, & 924G) Start By: a. remove differential NOTE: The following procedure is for the disassembly of TRACTECH INC. Limited Slip Differentials. https://127.0.0.1/sisweb/sisweb/techdoc/techdoc_print_page.jsp?returnurl=/sis... 2021/10/28
970F Wheel Loader 9JK00359-UP (MACHINE) POWERED BY 3306 Engine(SEBP2... 2/12 1. Remove twenty bolts (1). 2. Remove bevel gear (2) from case housing (3). 3. Invert bevel gear (2) and remove thrust washer (4). 4. Measure the end play gap, as follows: a. Install Tooling (A) on the differential assembly, as shown. NOTE: The center pusher bolt of Tooling (A) must have M16 × 2.0 thread to apply the proper preload on the disc packs. b. Tighten the center bolt of Tooling (A) to a torque of 27 N·m (20 lb ft) to apply 900 kg (2000 lb) of preload on the disc packs. https://127.0.0.1/sisweb/sisweb/techdoc/techdoc_print_page.jsp?returnurl=/sis... 2021/10/28
970F Wheel Loader 9JK00359-UP (MACHINE) POWERED BY 3306 Engine(SEBP2... 3/12 c. Mount the magnetic base of Tooling (B) on Face A of the case housing. d. Zero the dial indicator on Face A, as shown. e. Carefully rotate the magnetic base of Tooling (B) until the dial indicator is touching Face B (the disc pack). f. Record the indicator reading. g. Record two additional indicator readings from different areas of Face B. h. Average the three indicator readings. This is the measured end play gap. i. If the end play gap in Step 4h was greater than 0.81 mm (.032 in), replacement of the existing disc packs is necessary. 5. Remove the disc pack from the case housing. The disc pack consists of two friction discs (5) and two plates (6). https://127.0.0.1/sisweb/sisweb/techdoc/techdoc_print_page.jsp?returnurl=/sis... 2021/10/28
970F Wheel Loader 9JK00359-UP (MACHINE) POWERED BY 3306 Engine(SEBP2... 4/12 6. Remove actuator housing (7) and gear (8) from case housing as shown. 7. Remove pinion shaft (10) and two pinion gears (9). 8. Remove remaining pinion shaft (12) and two pinion gears (11). https://127.0.0.1/sisweb/sisweb/techdoc/techdoc_print_page.jsp?returnurl=/sis... 2021/10/28
https://www.aservicemanualpdf.com/ My Dear Friend! Thank you very much for visiting. Full manual if required, please enter the following URL into your browser. https://www.aservicemanualpdf.com/
970F Wheel Loader 9JK00359-UP (MACHINE) POWERED BY 3306 Engine(SEBP2... 5/12 9. Remove two pinion gears (9) from pinion shaft (10). Repeat for the remaining pinion shaft (12) and pinion gears (11). 10. Remove gear (13) from the case housing. 11. Remove actuator housing (14) from the case housing by lifting straight upward, as shown. https://127.0.0.1/sisweb/sisweb/techdoc/techdoc_print_page.jsp?returnurl=/sis... 2021/10/28
970F Wheel Loader 9JK00359-UP (MACHINE) POWERED BY 3306 Engine(SEBP2... 6/12 12. Remove the disc pack from the case housing. The disc pack consists of two friction discs (16) and two plates (15). 13. Remove thrust washer (17). Assemble Limited Slip Differential (918F, IT18F, 924F, IT24F, & 924G) 1. Clean and inspect all parts of the differential. If any of the parts are worn or damaged, use new parts for replacement. 2. Install thrust washer (17) in the case housing. Lubricate the thrust washer face with clean axle oil. 3. Replace the disc packs if: https://127.0.0.1/sisweb/sisweb/techdoc/techdoc_print_page.jsp?returnurl=/sis... 2021/10/28
970F Wheel Loader 9JK00359-UP (MACHINE) POWERED BY 3306 Engine(SEBP2... 7/12 a. The stack heights of the disc packs are NOT symmetrical within 0.10 mm (.004 in). b. The disc friction material is worn such that the discs, or areas of the discs, are running steel on steel. 4. When replacement of the disc packs is required, replace with disc packs of the same type. If THIN is marked on the case housing, replace with two new THIN disc packs. If THICK is marked on the case housing, replace with two new THICK disc packs. Do not mix disc packs. Use two THIN or two THICK. Do not use one of each. NOTE: Use clean axle oil to thoroughly lubricate plates and friction discs, prior to assembly. 5. Install two friction discs (16) and two plates (15) in alternate order in the case housing starting with a plate and ending with a friction disc, as shown. https://127.0.0.1/sisweb/sisweb/techdoc/techdoc_print_page.jsp?returnurl=/sis... 2021/10/28
970F Wheel Loader 9JK00359-UP (MACHINE) POWERED BY 3306 Engine(SEBP2... 8/12 6. Align the keys of actuator housing (14) with the slots of the case housing and install as shown. 7. Install gear (13) in the case housing. NOTE: Turn gear slowly until the spline engages with the two friction discs installed in Step 5. Make sure the gear is fully seated. 8. Install two pinion gears (9) on pinion shaft (10). Repeat for remaining pinion shaft (12) and two pinion gears (11). Lubricate with clean axle oil. 9. Install pinion shaft (12) and two pinion gears (11) in the case housing as shown. 10. Rotate pinion gears (11) slightly until the pinion shaft rests in the V-slots of the actuator housing. https://127.0.0.1/sisweb/sisweb/techdoc/techdoc_print_page.jsp?returnurl=/sis... 2021/10/28
970F Wheel Loader 9JK00359-UP (MACHINE) POWERED BY 3306 Engine(SEBP2... 9/12 11. Install remaining pinion shaft (10) and two pinion gears (9) in the case housing, as shown. 12. Assemble gear (8) and actuator housing (7) on bench, as shown. Align the keys of the actuator housing with the slots in the case and install, as shown. NOTE: Use clean axle oil to thoroughly lubricate plates and friction discs, prior to assembly. https://127.0.0.1/sisweb/sisweb/techdoc/techdoc_print_page.jsp?returnurl=/sis... 2021/10/28
970F Wheel Loader 9JK00359-UP (MACHINE) POWERED BY 3306 Engine(SEB... 10/12 13. Install two friction discs (5) and two plates (6) in alternate order in the case housing starting with a friction disc and ending with a plate. NOTE: Steps 14 through 21 describe the proper procedure for measuring end play gap. 14. Install Tooling (A) on the differential assembly, as shown. NOTE: The center pusher bolt of Tooling (A) must have M16 × 2.0 thread to apply the proper preload on the disc packs. 15. Tighten the center bolt of Tooling (A) to a torque of 27 N·m (20 lb ft) to apply 900 kg (2000 lb) of preload on the disc packs. 16. Mount the magnetic base of Tooling (B) on Face A of the case housing. 17. Zero the dial indicator on Face A, as shown. https://127.0.0.1/sisweb/sisweb/techdoc/techdoc_print_page.jsp?returnurl=/sis... 2021/10/28
970F Wheel Loader 9JK00359-UP (MACHINE) POWERED BY 3306 Engine(SEB... 11/12 18. Carefully rotate the magnetic base of Tooling (B) until the dial indicator is touching Face B (the disc pack). 19. Record the indicator reading. 20. Record two additional indicator readings from different areas of Face B. 21. Average the three indicator readings. This is the measured end play gap. NOTE: If the existing disc packs were installed in Step 4, continue with Step 22. If new disc packs were installed in Step 4, continue with Step 23. 22. If the end play gap in Step 21 was greater than 0.81 mm (.032 in), replacement of the existing disc packs is necessary. NOTE: Steps 23 through 28 are for new replacement disc packs. 23. When replacement of the disc packs is required, replace with disc packs of the same type. If THIN is marked on the case housing, replace with two new THIN disc packs. If THICK is marked on the case housing, replace with two new THICK disc packs. Do not mix disc packs. Use two THIN or two THICK. Do not use one of each. 24. With new disc packs installed in the limited slip differential, measure the end play gap as described in Steps 14 through 21. The measured end play gap must fall between 0.203 and 0.508 mm (.0080 and .0200 in). 25. If the measured end play gap is greater than 0.508 mm (.0200 in) and two THIN disc packs were installed, remove two THIN disc packs and install two THICK disc packs. Measure the end play gap again to determine if it falls between 0.203 and 0.508 mm (.0080 and .0200 in) to meet specifications. 26. If the measured end play gap still does not meet specifications, replace the pinion shafts and or both actuator housings. Install either two THIN or two THICK disc packs to obtain a end play gap that falls between 0.203 and 0.508 mm (.0080 and .0200 in) to meet specifications. 27. If the disc packs were changed from the kind marked on the outside surface of the housing, replace the existing mark with either THICK or THIN for future reference. https://127.0.0.1/sisweb/sisweb/techdoc/techdoc_print_page.jsp?returnurl=/sis... 2021/10/28
970F Wheel Loader 9JK00359-UP (MACHINE) POWERED BY 3306 Engine(SEB... 12/12 28. Install thrust washer (4) in bevel gear (2). Lubricate the thrust washer face with clean axle oil. NOTE: Apply a small amount of grease to the back side of the thrust washer prior to installing. This will retain the thrust washer in place while installing the bevel gear. 29. Invert bevel gear (2) and install on case housing (3). NOTE: The bevel gear is a light press fit to the case housing. It is important to tighten bolts (1) evenly, to properly seat the bevel gear. 30. Install twenty bolts (1). Tighten bolts (1) to a torque of 120 ± 20 N·m (90 ± 15 lb ft). End By: a. install differential Copyright 1993 - 2021 Caterpillar Inc. Thu Oct 28 01:49:27 UTC+0800 2021 All Rights Reserved. Private Network For SIS Licensees. https://127.0.0.1/sisweb/sisweb/techdoc/techdoc_print_page.jsp?returnurl=/sis... 2021/10/28
970F Wheel Loader 9JK00359-UP (MACHINE) POWERED BY 3306 Engine(SEBP2... 1/13 Shutdown SIS Previous Screen Product: WHEEL LOADER Model: 970F WHEEL LOADER 9JK Configuration: 970F Wheel Loader 9JK00359-UP (MACHINE) POWERED BY 3306 Engine Disassembly and Assembly SUPPLEMENT FOR WHEEL LOADERS & INTEGRATED TOOLCARRIERS - LIM Media Number -SENR5785-00 Publication Date -16/07/1997 Date Updated -11/02/2011 SENR57850004 Limited Slip Differential (928F, IT28F, 928G & IT28G) SMCS - 3263-015; 3263-016 Disassemble Limited Slip Differential (928F, IT28F, 928G & IT28G) Start By: a. remove differential NOTE: The following procedure is for the disassembly of TRACTECH INC. Limited Slip Differentials. https://127.0.0.1/sisweb/sisweb/techdoc/techdoc_print_page.jsp?returnurl=/sis... 2021/10/28
970F Wheel Loader 9JK00359-UP (MACHINE) POWERED BY 3306 Engine(SEBP2... 2/13 1. Remove two bolts (1). 2. Remove case cover (2) from case housing (3). 3. Invert case cover (2) and remove thrust washer (4). 4. Measure the end play gap, as follows: a. Install Tooling (A) on the differential assembly, as shown. NOTE: The center pusher bolt of Tooling (A) must have M16 × 2.0 thread to apply the proper preload on the disc packs. b. Tighten the center bolt of Tooling (A) to a torque of 27 N·m (20 lb ft) to apply 900 kg (2000 lb) of preload on the disc packs. https://127.0.0.1/sisweb/sisweb/techdoc/techdoc_print_page.jsp?returnurl=/sis... 2021/10/28
970F Wheel Loader 9JK00359-UP (MACHINE) POWERED BY 3306 Engine(SEBP2... 3/13 c. Mount the magnetic base of Tooling (B) on Face A of case cover (2). d. Zero the dial indicator on Face B, as shown. e. Carefully remove Tooling (B) from the case cover. f. Mount the magnetic base of Tooling (B) on Face C of the differential case housing. Touch the dial indicator on the disc pack Face D. g. Record the indicator reading. h. Record two additional indicator readings from different areas of Face D. i. Average the three indicator readings. This is the measured end play gap. j. If the end play gap in Step 4i was greater than 0.81 mm (.032 in), replacement of the existing disc packs is necessary. https://127.0.0.1/sisweb/sisweb/techdoc/techdoc_print_page.jsp?returnurl=/sis... 2021/10/28
970F Wheel Loader 9JK00359-UP (MACHINE) POWERED BY 3306 Engine(SEBP2... 4/13 5. Remove the disc pack from the case housing. The disc pack consists of two friction discs (5) and two plates (6). 6. Remove actuator housing (7) and gear (8) from the case housing, as shown. 7. Remove pinion shaft (10) and two pinion gears (9). https://127.0.0.1/sisweb/sisweb/techdoc/techdoc_print_page.jsp?returnurl=/sis... 2021/10/28
970F Wheel Loader 9JK00359-UP (MACHINE) POWERED BY 3306 Engine(SEBP2... 5/13 8. Remove the remaining pinion shaft (12) and two pinion gears (11). 9. Remove two pinion gears (9) from pinion shaft (10). Repeat for the remaining pinion shaft (12) and pinion gears (11). 10. Remove gear (13) from the case housing. 11. Remove actuator housing (14) from the case housing by lifting straight upward, as shown. https://127.0.0.1/sisweb/sisweb/techdoc/techdoc_print_page.jsp?returnurl=/sis... 2021/10/28
970F Wheel Loader 9JK00359-UP (MACHINE) POWERED BY 3306 Engine(SEBP2... 6/13 12. Remove the disc pack from the case housing. The disc pack consists of two friction discs (16) and two plates (15). 13. Remove thrust washer (17). Assemble Limited Slip Differential (928F, IT28F, 928G & IT28G) https://127.0.0.1/sisweb/sisweb/techdoc/techdoc_print_page.jsp?returnurl=/sis... 2021/10/28
970F Wheel Loader 9JK00359-UP (MACHINE) POWERED BY 3306 Engine(SEBP2... 7/13 1. Clean and inspect all parts of the differential. If any of the parts are worn or damaged, use new parts for replacement. 2. Install thrust washer (17) in the case housing. Lubricate the thrust washer face with clean axle oil. 3. Replace the disc packs if: a. The stack heights of the disc packs are NOT symmetrical within 0.10 mm (.004 in). b. The disc friction material is worn such that the discs, or areas of the discs, are running steel on steel. 4. When replacement of the disc packs is required, replace with disc packs of the same type. If THIN is marked on the case cover, replace with two new THIN disc packs. If THICK is marked https://127.0.0.1/sisweb/sisweb/techdoc/techdoc_print_page.jsp?returnurl=/sis... 2021/10/28
970F Wheel Loader 9JK00359-UP (MACHINE) POWERED BY 3306 Engine(SEBP2... 8/13 on the case cover, replace with two new THICK disc packs. Do not mix disc packs. Use two THIN or two THICK. Do not use one of each. NOTE: Use clean axle oil to thoroughly lubricate plates and friction discs, prior to assembly. 5. Install two friction discs (16) and two plates (15) in alternate order in the case housing starting with a plate and ending with a friction disc, as shown. 6. Align the keys of actuator housing (14) with the slots of the case housing and install as shown. https://127.0.0.1/sisweb/sisweb/techdoc/techdoc_print_page.jsp?returnurl=/sis... 2021/10/28
970F Wheel Loader 9JK00359-UP (MACHINE) POWERED BY 3306 Engine(SEBP2... 9/13 7. Install gear (13) in the case housing. NOTE: Turn the gear slowly until the spline engages with the two friction discs installed in Step 5. Make sure the gear is fully seated. 8. Install two pinion gears (9) on pinion shaft (10). Repeat for the remaining pinion shaft (12) and two pinion gears (11). Lubricate with clean axle oil. 9. Install pinion shaft (12) and two pinion gears (11) in the case housing, as shown. 10. Rotate pinion gears (11) slightly until the pinion shaft rests in the V-slots of the actuator housing. 11. Install the remaining pinion shaft (10) and two pinion gears (9) in the case housing, as shown. https://127.0.0.1/sisweb/sisweb/techdoc/techdoc_print_page.jsp?returnurl=/sis... 2021/10/28
970F Wheel Loader 9JK00359-UP (MACHINE) POWERED BY 3306 Engine(SEB... 10/13 12. Assemble gear (8) and actuator housing (7) on bench, as shown. Align the keys of the actuator housing with the slots in the case housing and install, as shown. NOTE: Use clean axle oil to thoroughly lubricate plates and friction discs, prior to assembly. 13. Install two friction discs (5) and two plates (6) in alternate order in the case housing starting with a friction disc and ending with a plate. NOTE: Steps 14 through 22 describe the proper procedure for measuring end play gap. https://127.0.0.1/sisweb/sisweb/techdoc/techdoc_print_page.jsp?returnurl=/sis... 2021/10/28
970F Wheel Loader 9JK00359-UP (MACHINE) POWERED BY 3306 Engine(SEB... 11/13 14. Install Tooling (A) on the differential assembly, as shown. NOTE: The center pusher bolt of Tooling (A) must have M16 X 2.0 thread to apply the proper preload on the disc packs. 15. Tighten the center bolt of Tooling (A) to a torque of 27 N·m (20 lb ft) to apply 900 kg (2000 lb) of preload on the disc packs. 16. Mount the magnetic base of Tooling (B) on Face A of case cover (2). 17. Zero the dial indicator on Face B, as shown. 18. Carefully remove Tooling (B) from the case cover. https://127.0.0.1/sisweb/sisweb/techdoc/techdoc_print_page.jsp?returnurl=/sis... 2021/10/28
970F Wheel Loader 9JK00359-UP (MACHINE) POWERED BY 3306 Engine(SEB... 12/13 19. Mount the magnetic base of Tooling (B) on Face C of the differential case housing. Touch the dial indicator on the disc pack Face D. 20. Record the indicator reading. 21. Record two additional indicator readings from different areas of Face D. 22. Average the three indicator readings. This is the measured end play gap. NOTE: If the existing disc packs were installed in Step 4, continue with Step 23. If new disc packs were installed in Step 4, continue with Step 24. 23. If the end play gap in Step 22 was greater than 0.81 mm (.032 in), replacement of the existing disc packs is necessary. NOTE: Steps 24 through 28 are for new replacement disc packs. 24. When replacement of the disc packs is required, replace with disc packs of the same type. If THIN is marked on the case cover, replace with two new THIN disc packs. If THICK is marked on the case cover, replace with two new THICK disc packs. Do not mix disc packs. Use two THIN or two THICK. Do not use one of each. 25. With new disc packs installed in the limited slip differential, measure the end play gap as described in Steps 14 through 22. The measured end play gap must fall between 0.203 and 0.508 mm (.0080 and .0200 in). 26. If the measured end play gap is greater than 0.508 mm (.0200 in) and two THIN disc packs were installed, remove two THIN disc packs and install two THICK disc packs. Measure the end play gap again to determine if it falls between 0.203 and 0.508 mm (.0080 and .0200 in) to meet specifications. 27. If the measured end play gap still does not meet specifications, replace the pinion shafts and or both actuator housings. Install either two THIN or two THICK disc packs to obtain an end play gap that falls between 0.203 and 0.508 mm (.0080 and .0200 in) to meet specifications. 28. If the disc packs were changed from the kind marked on the outside surface of the case cover, replace the existing mark with either THICK or THIN for future reference. https://127.0.0.1/sisweb/sisweb/techdoc/techdoc_print_page.jsp?returnurl=/sis... 2021/10/28
970F Wheel Loader 9JK00359-UP (MACHINE) POWERED BY 3306 Engine(SEB... 13/13 29. Install thrust washer (4) in case cover (2). Lubricate the thrust washer face with clean axle oil. NOTE: Apply a small amount of grease to the back side of the thrust washer prior to installing. This will retain the thrust washer in place when the case cover is installed. 30. Align case housing and cover stamp marks. Install case cover (2) on case housing (3). 31. Install two bolts (1). Tighten bolts (1) to a torque of 31 ± 3 N·m (23 ± 2 lb ft). End By: a. install differential Copyright 1993 - 2021 Caterpillar Inc. Thu Oct 28 01:50:23 UTC+0800 2021 All Rights Reserved. Private Network For SIS Licensees. https://127.0.0.1/sisweb/sisweb/techdoc/techdoc_print_page.jsp?returnurl=/sis... 2021/10/28
970F Wheel Loader 9JK00359-UP (MACHINE) POWERED BY 3306 Engine(SEBP2... 1/13 Shutdown SIS Previous Screen Product: WHEEL LOADER Model: 970F WHEEL LOADER 9JK Configuration: 970F Wheel Loader 9JK00359-UP (MACHINE) POWERED BY 3306 Engine Disassembly and Assembly SUPPLEMENT FOR WHEEL LOADERS & INTEGRATED TOOLCARRIERS - LIM Media Number -SENR5785-00 Publication Date -16/07/1997 Date Updated -11/02/2011 SENR57850005 Limited Slip Differential (936F, 938F & IT38F) SMCS - 3263-015; 3263-016 Disassemble Limited Slip Differential (936F, 938F & IT38F) Start By: a. remove differential NOTE: The following procedure is for the disassembly of TRACTECH INC. Limited Slip Differentials. https://127.0.0.1/sisweb/sisweb/techdoc/techdoc_print_page.jsp?returnurl=/sis... 2021/10/28
970F Wheel Loader 9JK00359-UP (MACHINE) POWERED BY 3306 Engine(SEBP2... 2/13 1. Remove two bolts (1). 2. Remove case cover (2) from case housing (3). 3. Invert case cover (2) and remove thrust washer (4). 4. Measure the end play gap, as follows: a. Install Tooling (A) on the differential assembly, as shown. NOTE: The center pusher bolt of Tooling (A) must have M16 × 2.0 thread to apply the proper preload on the disc packs. b. Tighten the center bolt of Tooling (A) to a torque of 27 N·m (20 lb ft) to apply 900 kg (2000 lb) of preload on the disc packs. https://127.0.0.1/sisweb/sisweb/techdoc/techdoc_print_page.jsp?returnurl=/sis... 2021/10/28
970F Wheel Loader 9JK00359-UP (MACHINE) POWERED BY 3306 Engine(SEBP2... 3/13 c. Mount the magnetic base of Tooling (B) on Face A of case cover (2). d. Zero the dial indicator on Face B, as shown. e. Carefully remove Tooling (B) from the case cover. f. Mount the magnetic base of Tooling (B) on Face C of the differential case housing. Touch the dial indicator on the disc pack Face D. g. Record the indicator reading. h. Record two additional indicator readings from different areas of Face D. i. Average the three indicator readings. This is the measured end play gap. j. If the end play gap in Step 4i was greater than 0.81 mm (.032 in), replacement of the existing disc packs is necessary. https://127.0.0.1/sisweb/sisweb/techdoc/techdoc_print_page.jsp?returnurl=/sis... 2021/10/28
970F Wheel Loader 9JK00359-UP (MACHINE) POWERED BY 3306 Engine(SEBP2... 4/13 5. Remove the disc pack from the case housing. The disc pack consists of two friction discs (5) and two plates (6). 6. Remove actuator housing (7) and gear (8) from the case housing, as shown. 7. Remove pinion shaft (10) and two pinion gears (9). https://127.0.0.1/sisweb/sisweb/techdoc/techdoc_print_page.jsp?returnurl=/sis... 2021/10/28
970F Wheel Loader 9JK00359-UP (MACHINE) POWERED BY 3306 Engine(SEBP2... 5/13 8. Remove the remaining pinion shaft (12) and two pinion gears (11). 9. Remove two pinion gears (9) from pinion shaft (10). Repeat for the remaining pinion shaft (12) and pinion gears (11). 10. Remove gear (13) from the case housing. 11. Remove actuator housing (14) from the case housing by lifting straight upward, as shown. https://127.0.0.1/sisweb/sisweb/techdoc/techdoc_print_page.jsp?returnurl=/sis... 2021/10/28
GET MORE OTHER MANUALS https://www.aservicemanualpdf.com/ Thank you very much for your reading. Please Click Here. Then Get COMPLETE MANUAL. NO WAITING NOTE: If there is no response to click on the link above, please download the PDF document first and then click on it. GET MORE OTHER MANUALS https://www.aservicemanualpdf.com/
970F Wheel Loader 9JK00359-UP (MACHINE) POWERED BY 3306 Engine(SEBP2... 6/13 12. Remove the disc pack from the case housing. The disc pack consists of two friction discs (16) and two plates (15). 13. Remove thrust washer (17). Assemble Limited Slip Differential (936F, 938F & IT38F) https://127.0.0.1/sisweb/sisweb/techdoc/techdoc_print_page.jsp?returnurl=/sis... 2021/10/28
970F Wheel Loader 9JK00359-UP (MACHINE) POWERED BY 3306 Engine(SEBP2... 7/13 1. Clean and inspect all parts of the differential. If any of the parts are worn or damaged, use new parts for replacement. 2. Install thrust washer (17) in the case housing. Lubricate the thrust washer face with clean axle oil. 3. Replace the disc packs if: a. The stack heights of the disc packs are NOT symmetrical within 0.10 mm (.004 in). b. The disc friction material is worn such that the discs, or areas of the discs, are running steel on steel. 4. When replacement of the disc packs is required, replace with disc packs of the same type. If THIN is marked on the case cover, replace with two new THIN disc packs. If THICK is marked https://127.0.0.1/sisweb/sisweb/techdoc/techdoc_print_page.jsp?returnurl=/sis... 2021/10/28
970F Wheel Loader 9JK00359-UP (MACHINE) POWERED BY 3306 Engine(SEBP2... 8/13 on the case cover, replace with two new THICK disc packs. Do not mix disc packs. Use two THIN or two THICK. Do not use one of each. NOTE: Use clean axle oil to thoroughly lubricate plates and friction discs, prior to assembly. 5. Install two friction discs (16) and two plates (15) in alternate order in the case housing starting with a plate and ending with a friction disc, as shown. 6. Align the keys of actuator housing (14) with the slots of the case housing and install as shown. https://127.0.0.1/sisweb/sisweb/techdoc/techdoc_print_page.jsp?returnurl=/sis... 2021/10/28
https://www.aservicemanualpdf.com/ My Dear Friend! Thank you very much for visiting. Full manual if required, please enter the following URL into your browser. https://www.aservicemanualpdf.com/