Download
1 / 15
150 likes | 376 Views
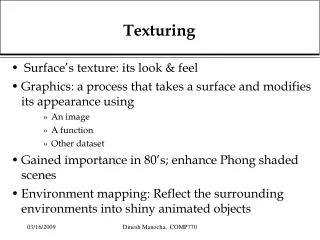
Unreal Texturing. Unreal Texture Specifications. Texture Format Unreal supports five texture formats DirectX Texture Compression (DXTC) 8-bit palettized (P8) 32-bit RGBA textures 8-bit and 16-bit greyscale heightmaps. Creating Texture. Creating Texture DXTC ( .dds)

E N D
Unreal Texture Specifications • Texture Format • Unreal supports five texture formats • DirectX Texture Compression (DXTC) • 8-bit palettized (P8) • 32-bit RGBA textures • 8-bit and 16-bit greyscale heightmaps..
Creating Texture • Creating Texture • DXTC ( .dds) • convert image file to the DXTC DDS format (DirectDrawSurface, the native DirectX texture format) for importing into UnrealEd. • Tool • NVIDIA DXT Compression Tools
Creating Texture • Creating Texture • How to Use NVIDIA DXT Compression Tools • Download • http://udn.epicgames.com/Two/TextureSpecifications/DXT_TOOLS.zip • Photo-Shop Plug-in • 받은 파일중 dds.8bi 를 포토샵이 설치된폴더\Plug-Ins\File Formats 에 복사 • Ex) C:\Program Files\Adobe\Adobe Photoshop CS2 \Plug-Ins\File Formats dds.8bi 복사 • 포토샾 실행후 불러온 이미지를 dds 포맷으로 저장
Importing Texture • Importing Texture • Texture Browser • File New • 새로운 패키지 생성 • FileImport • dds로 저장한 파일 추가 • Brush에 추가한 텍스춰맵 적용
Animating textures • Animating textures • The easiest way to create a sequence of animating textures • import a bunch of textures with names that end in _A## (where ## is the number of the animation frame, starting at zero). • Ex) MyAnim_A00.bmp MyAnim_A01.bmp MyAnim_A02.bmp MyAnim_A03.bmp • Texture properties • AnimNext: The next texture in the animation sequence, or None • PrimeCount: For procedural animating textures, the texture internally animates itself PrimeCount times before it's first rendered. • MinFrameRate: The minimum frame rate for the animation. The texture will always animate this fast, or faster • MaxFrameRate: The maximum frame rate for the animation. The texture will always animate this fast, or slower. .
Alpha Texture • Alpha Texture • RGBA Format (32Bits)으로 저장 • Alpha 채널에 알파값 편집 • Unreal Edit로 import
Projective Texture • Projective Texture • The Projector is in the Actor Class Browser --> Projector • Add Projector • Right Mouse Click Add Projector Here • The texture should be a square texture, for example 256*256
Projective Texture • Select Texture • Project Properties ProjTexture • FOV(Field Of View) setting to something higher than 0 • 1일 경우 almost parallel. • Ex) 30 보는 시야각을 30도로 설정 FOV
Projective Texture • see a yellow box and a blue frustum when you selected the Projector. • The blue frustum : the rays of the projector • The yellow box : bounding box of the projector
Projective Texture • ClampMode • Texture Properties • UClampMode • VClampMode • TC_Warp (반복) • TC_Clamp (한번) UClampMode: TC_Warp VClampMode: TC_Warp UClampMode: TC_Clamp VClampMode: TC_Warp UClampMode: TC_Warp VClampMode: TC_Clamp UClampMode: TC_Clamp VClampMode: TC_Clamp
Static Mesh • Static Mesh Browser • Select the Static Mesh • Unreal Space • Right Mouse Click • “Add Static Mesh Here” • Importing a Static Mesh • You can import *.ase files into the Static Mesh Browser. • Open the File Menu • choose Import... • browse to your *.ase file. Using 3D Modeling Tool (Ex. 3DS Max)