Download
1 / 12
180 likes | 514 Views
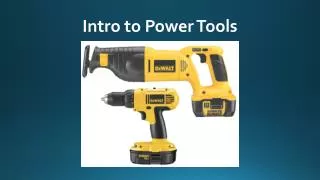
POWER TOOLS. Electric drills Common electric drills have the capacity for drilling holes from 1/16” up to 3/4” in diameter The size of an electric drill is usually determined by the capacity of it’s chuck

E N D
POWER TOOLS • Electric drills • Common electric drills have the capacity for drilling holes from 1/16” up to 3/4” in diameter • The size of an electric drill is usually determined by the capacity of it’s chuck • A 1/2” drill is equipped with a chuck that will take a twist drill 1/2” in diameter and no larger • Once the hole has been drilled, pull the drill straight out until the twist drill is completely withdrawn from the hole before shutting off the motor
POWER TOOLS • Drill press • Used for large and medium type work • The two common types are floor and bench-mounted • The size of a drill press is based on the maximum thickness of work it is capable of drilling (i.e. a 10” drill press can drill to the center of a 10” work piece)
POWER TOOLS • The drilling speeds may vary and may be as high as 5000 rpm • Proper drill press operation • Ensure the drill speed is correct for the material being drilled; normally, the harder the material, the higher the drill speed • Set the drill table at the proper height (about chest high) • Select a sharp bit of the correct size and center it in the drill chuck ensuring that no cutting edge of the twist drill is located in the chuck jaws
POWER TOOLS • Lower the drill bit to where the point will just clear the work and set the stop nuts at that position • After marking a pilot point with a center punch, attach the drill bit and secure the work • Apply power and lower the drill to the work • Once the bit begins to enter the material, raise the bit to recheck the alignment and adjust if necessary • Continue drilling until the bit is completely through the material, raise the bit, turn off the drill press and remove the work • Clean the drill press after use (do not remove shavings with your bare hands)
POWER TOOLS • Twist drills • Commonly called “drill bits” • Available in a wide range of sizes, shapes, and materials • Come in four size categories: • Fractional-inch sizes • These sizes begin at 1/64” and increase to 4” or more • Smaller bits increase in size by 64th’s • Mid sized bits increase in size by 32nd’s • Larger sized bits increase in size by 16th’S
POWER TOOLS • Wire-gauge numbers • These sizes run from No. 80 (smallest) to No. 1 (largest) • All sizes are less than 1/4” and correspond to standard wire sizes • Used where precise hole dimensions are required (i.e. tapping threads) • Decimal-fraction equivalent sizes • Begin at 0.2340” (A) and increase to 0.4062” (Z) • The largest size is smaller than 7/16” • Allow for sizes in between common fractional sizes • Used where exact hole dimensions are required
POWER TOOLS • Metric sizes • Use metric numbering system rather than decimal system • Allows for smaller sizes without complicated numbering or lettering system • There are many conversion charts showing how metric numbers compare to decimal • Twist drills also come in various lengths • Length will depend upon purpose • “screw machine” is the most common length and is what you will most likely use
POWER TOOLS • Common twist drill materials include: • High speed steel (HSS) • Suitable for drilling most materials • Excellent for metal cutting because it will stand up to high temperature • Carbon steel • Specially ground for drilling wood • Should not be used for metal because they tend to be more brittle and less flexible • May have special coatings to increase hardness or add self-lubricating properties
POWER TOOLS • Bench grinder • Used for grinding operations such as sharpening chisels, screwdrivers, drill bits, and punches • Usually has both a medium and fine-grain abrasive wheel • May also have a wire brushing wheel, buffing wheel or polishing wheel • Each wheel has an eye shield over the work area and a work rest in front of the wheels • The rest serves to stabilize the work held against it and should be kept about 1/8” from the wheel
POWER TOOLS • Bench grinder precautions • Before applying power to the grinder ensure the grinding wheels are securely attached to the shaft • Ensure the wheel is free of cracks and breaks • Ensure the grinder is mounted securely • Adjust the work rest to the proper angle for the work being done making sure the work cannot be placed between the work rest and the grinding wheel
POWER TOOLS • Bench grinder operation • Hold the work securely and do not push it against the wheel • Be sure the wheels are completely stopped before touching them • As often as possible, cool off the edges of the work being ground to prevent drawing of heat • Power tool safety precautions • Use personal protective equipment (PPE) such as eye and ear protection, gloves, and/or safety shoes • Dress properly for the occasion – no loose fitting clothing, long sleeves, ties, jewelry, etc • Attach work to a bench or vise if possible
POWER TOOLS • Never handle the cutting edge of any tool • Ensure power switches are turned off before plugging in a tool • Ensure that a portable tool has stopped running before laying it down • Never remove safety shields or disable safety features • Always ensure you have adequate room to work • Turn power off and unplug a tool to clear jams or clean debris from the work area • Ensure the area around the work area is free of oil, grease or other loose material that could cause poor footing