Download
1 / 28
280 likes | 363 Views
Digital Media & TV Production Training. The One Thing & The Main Thing. There is only one common experience that all staff and students at each school can collectively experience at one time. Utilizing Video & Digital Media Curriculum to achieve “The Main Thing”.

E N D
The One Thing & The Main Thing • There is only one common experience that all staff and students at each school can collectively experience at one time. • Utilizing Video & Digital Media Curriculum to achieve “The Main Thing”
Components of Digital Media Curriculum • Electronic Graphics • Web Design • TV Production (Studio Production, Cinema & Editing) • Animation • Audio Production • Interactive Media
Industry Connections • Advertising Agencies • Broadcasting • Corporate Communication Divisions • Entertainment • Graphic Design Firms • Production Houses • Training and Education
Where do we begin? • Training opportunities • Guest presenters, mentors • Field Trips (actual and virtual) • Online Resources • Producing Content • So here we go!
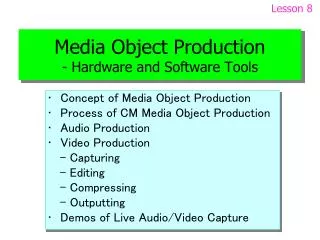
Adobe Premiere Editing Workshop • Setting up connections to the computer and play/record device • Capturing Video • Editing • Outputting project to tape, DVD or a file • Question and answer session
What You Need • miniDV video camera or VCR • Firewire Cable • PC Desktop or Laptop that meets the system requirements to run the software • Tape with your footage • Still graphics (digital or scanned photos, Photoshop images, clip art, etc. • Audio files (music, voice overs) • Tape or DVD to record to
Setting Up • Connect computer to camera/VCR with firewire • Turn camera/VCR ON • Turn on computer • Set up Files & folders • Create a storyboard or script or outline • Launch Premiere
Firewire Connections 4 Pin Connector found on camera or VCR 4 or 6 Pin connector on rear or front of computer This is NOT the same as USB!
Project Organization Project Organization is a key element. This is very important when multiple students and staff members are using the same machine.
Project Settings Always check your Project Settings before you begin!
Log and Capture Window The Capture window allows you to capture live, using time code to an offline log, or by setting in and out points and capturing one clip at a time. CAPTURE ONLY WHAT YOU NEED!
Project to Timeline Drag clips from the project window to the timeline to make a sequence.
Transitions and Rendering Transitions and Rendering
You can render as you go or render the entire work area at once. You will have playback problems to your output device if your project is not rendered. Render Time
Creating Titles Lower Third name CGs or “Supers” must be on track 2 or higher. Use the opacity or transition to fade in and out. Key frames can be set to create an effect.
Output to Tape Output to tape will export your project to the camera or VCR
Output to DVD Export to DVD will Create a simple DVD. You can include chapter markers for submenus.
Output to file Exporting a file is useful for archiving or using your project in other multimedia projects. Watch those Settings!
Additional Resources • http://itv.leeschools.net/video_prod.html • www.adobe.com • www.wwug.com • www.videouniversity.com • www.dvpa.com • www.cybercollege.com
Al Shilling, Assistant Director Emerging TechnologiesCareer & Technical Education337-8603als@leeschools.net