Download
1 / 44
490 likes | 770 Views
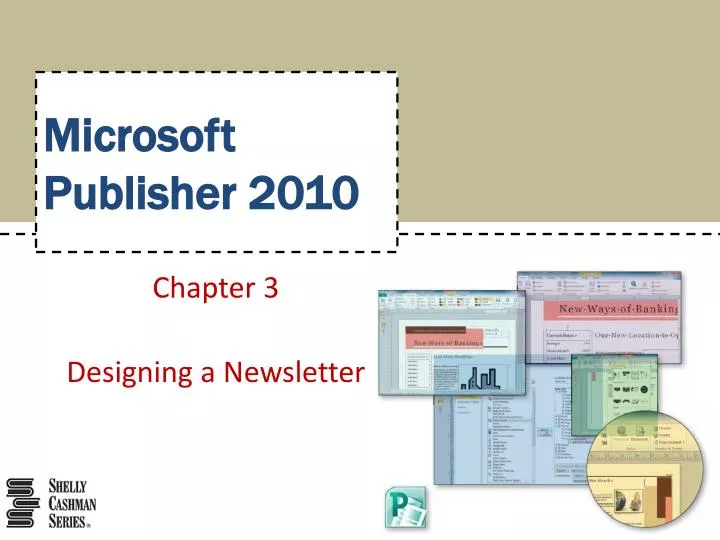
Microsoft Publisher 2010. Chapter 3 Designing a Newsletter. Objectives. Describe the advantages of using a newsletter medium and identify the steps in its design process Edit a newsletter template and navigate pages Set page options Edit a masthead Import text files

E N D
Microsoft Publisher 2010 Chapter 3 Designing a Newsletter
Objectives • Describe the advantages of using a newsletter medium and identify the steps in its design process • Edit a newsletter template and navigate pages • Set page options • Edit a masthead • Import text files • Continue a story across pages and insert continued notices • Customize the Ribbon Designing a Newsletter
Objectives • Use Publisher’s Edit Story in Microsoft Word feature • Select adjacent objects by dragging • Insert Page Parts • Edit sidebars and pull quotes • Insert and edit coupons and patterns • Duplicate a graphic and flip it • Drag and drop text • Hyphenate stories • Create a template with property changes Designing a Newsletter
Project – Newsletter Designing a Newsletter
General Project Guidelines • Decide on the purpose and audience • Plan for the layout and printing • Research the topic as it relates to your purpose, and gather data • Create the first draft • Proofread and revise the newsletter Designing a Newsletter
Setting Page Options • Click the Options button (Page Design tab | Template group) to display the Page Content dialog box • Click the Columns box arrow to display the choices • Select the desired number of columns • Click the OK button to change the options for the page Designing a Newsletter
Setting Page Options Designing a Newsletter
Editing Text • Click the placeholder text to select it • Type the desired text Designing a Newsletter
Importing a Text File • Click the text to replace with the imported text • Click the Insert File button (Insert tab | Text group) to display the Insert Text dialog box • Navigate to the desired insert location • Double-click the file containing the text you wish to insert • If the story is too long to fit in the text box, click the No button in the Microsoft Publisher dialog box Designing a Newsletter
Importing a Text File Designing a Newsletter
Continuing a Story across Pages • As Publisher moves from story to story, click the No button until you arrive at the desired text box to include the remainder of the story • Click the Yes button to continue the story in the selected text box Designing a Newsletter
Continuing a Story across Pages Designing a Newsletter
Manually Continuing the Story across Pages • Scroll to the lower-right corner of the page, and if necessary, click the last column nearest the bottom-right of the page • Click the Text in Overflow button to display the pitcher mouse pointer • Display the page on which you wish to continue the story • Click the text in the story you wish to continue the original story Designing a Newsletter
Manually Continuing the Story across Pages Designing a Newsletter
Formatting with Continued Notices • Right-click the text that will be continued on the next page to display the shortcut menu • Click Format Text Box to display the Format Text Box dialog box • Click the Text Box tab to display its settings • Click to display a check mark in the Include “Continued on page …” check box • Click the OK button to insert the continued notice • Right-click the text box where the story flows to display the shortcut menu Designing a Newsletter
Formatting with Continued Notices • Click Format Text Box on the shortcut menu to display the Format Text Box dialog box • Click the Text Box tab to display its settings • Click to display a check mark in the Include “Continued from page …” check box • Click the OK button to insert the continued from notice Designing a Newsletter
Formatting with Continued Notices Designing a Newsletter
Customizing the Publisher Ribbon • Click File on the Ribbon to open the Backstage view and then click the Options command to display the Publisher Options dialog box • Click the Customize Ribbon button to display the Customize the Ribbon gallery • Click the ‘Choose commands from’ box arrow to view the list of commands • Click Commands Not in the Ribbon to display the list Designing a Newsletter
Customizing the Publisher Ribbon • Select the command you wish to add • Click the location in the list of tabs on the right to choose the tab group for the new button • If desired, click the New Group button to create a new group • Click the Add button to add the selected command to the new group • Click the OK button to close the dialog box and create the custom group Designing a Newsletter
Customizing the Publisher Ribbon Designing a Newsletter
Editing a Story in Microsoft Word • Add the Edit Story in Microsoft Word button to the Ribbon • Select the text to update • Click the Edit Story in Microsoft Word button on the Ribbon to open the selected story in Microsoft Word Designing a Newsletter
Quitting Word and Returning to Publisher • Click the Close button on the title bar of the document to quit Word • Right-click the text to display the shortcut menu and then click Best Fit to autofitthe text Designing a Newsletter
Deleting and Widening Columns • Point to the column you wish to delete • When the boundary appears, click it and then press the DELETE key • To resize a column, click the text box and then drag a sizing handle to widen it • The current width is noted on the status bar Designing a Newsletter
Deleting and Widening Columns Designing a Newsletter
Replacing a Graphic Using the Shortcut Menu • Click the graphic to replace • Right-click the graphic to display the shortcut menu, and then point to Change Picture to display its submenu • Click Change Picture on the submenu to display the Insert Picture dialog box • Navigate to the desired insert location • Double-click the file to insert • Click outside the picture to view the insertion Designing a Newsletter
Replacing a Graphic Using the Shortcut Menu Designing a Newsletter
Selecting Adjacent Objects by Dragging • Starting above and to the left of the first object to select, drag down and to the right to select all desired objects Designing a Newsletter
Inserting a Pull Quote • Click the Page Parts button (Insert tab | Building Blocks group) to display the gallery • Click the desired pull quote to insert it Designing a Newsletter
Inserting a Pull Quote Designing a Newsletter
Duplicating a Graphic • CTRL+SHIFT+DRAG the graphic from the original location to the location to which you wish to copy it Designing a Newsletter
Flipping a Graphic • With the graphic to flip selected, click the Rotate button (Drawing Tools Format tab | Arrange group) to display the gallery • Click Flip Horizontally or Flip Vertically to flip the selected graphic Designing a Newsletter
Flipping a Graphic Designing a Newsletter
Inserting and Formatting a Coupon • Click the Advertisements button (Insert tab | Building Blocks group) to display the gallery • Click the desired coupon in the Coupons area • Drag the border of the coupon to the desired location • Drag the sizing handle to resize the coupon Designing a Newsletter
Inserting and Formatting a Coupon Designing a Newsletter
Dragging and Dropping Text • Select the text you wish to drag and drop • Drag the selection to the desired location • Release the mouse button to move the selected text to the location of the mouse pointer Designing a Newsletter
Dragging and Dropping Text Designing a Newsletter
Checking Hyphenation • Click the Hyphenation button (Text Box Tools Format tab | Text group) to display the Hyphenation dialog box • Click to remove the check mark in the ‘Automatically hyphenate this story’ check box • Click the Manual button to hyphenate the story manually • As Publisher moves through the story, click the Yes or No button using the hyphenation rules Designing a Newsletter
Checking Hyphenation Designing a Newsletter
Creating a Template with Property Changes • Click File on the Ribbon to open the Backstage view • Click the Save As command to display the Save As dialog box • Type the desired publication name in the File name text box • Click the ‘Save as type’ box arrow to display the list of file types • Click Publisher Template (*.pub) to choose to save the publication as a template Designing a Newsletter
Creating a Template with Property Changes • Navigate to the desired save location • If your name does not appear next to the word, Authors, in the lower portion of the dialog box, double-click the text and then type your name to replace the text • Click the Tags box and then type the desired tag words • Click the Save button to save the template Designing a Newsletter
Creating a Template with Property Changes Designing a Newsletter
Chapter Summary • Describe the advantages of using a newsletter medium and identify the steps in its design process • Edit a newsletter template and navigate pages • Set page options • Edit a masthead • Import text files • Continue a story across pages and insert continued notices • Customize the Ribbon Designing a Newsletter
Chapter Summary • Use Publisher’s Edit Story in Microsoft Word feature • Select adjacent objects by dragging • Insert Page Parts • Edit sidebars and pull quotes • Insert and edit coupons and patterns • Duplicate a graphic and flip it • Drag and drop text • Hyphenate stories • Create a template with property changes Designing a Newsletter
Microsoft Publisher 2010 Chapter 3 Complete