Download
1 / 15
150 likes | 167 Views
Download the upgraded HP Envy 5544 printer driver & software.123.hp.com setup 5544 is done with the help of our user manual.<br>

E N D
123hp.co HP ENVY 5544 HOW TO COPY ANDSCAN
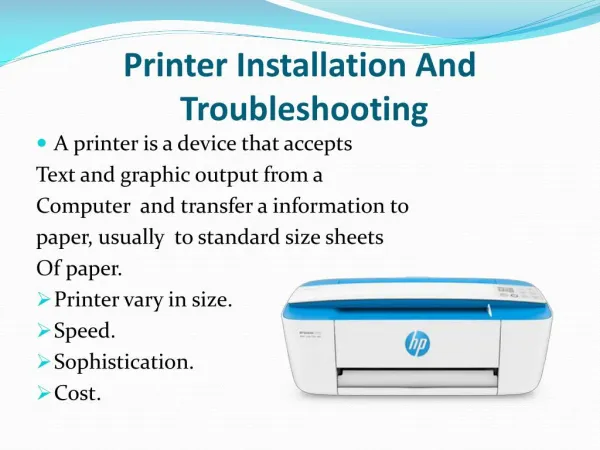
CopyDocuments: • The Copy menu on the printer display allows you to easily select number of copies and color or black and white for copying on plain paper. You can also easily access advanced settings, such as changing the paper type and size, adjusting the darkness of the copy, and resizing the copy. Make a1-sided copy • Load the original print side down on the right front corner of the scannerglass. • Specify number of copies andsettings. • From the Home screen, touch Copy.Flick to the desired number of copies. • If the value for the 2–Sided option is 1:2, touch to select 1:1. • Touch Settings to specify paper size, paper type,quality, or other settings. • Touch Back to return to the Copyscreen.
3.Touch Black or Color to start the copyjob. Make a2-sided copy • Load the original print side down on the right front corner of the scannerglass. • Specify number of copies andsettings. • From the Home screen, touch Copy . Flick to the desired number of copies. • If the value for the 2–Sided option is 1:1, touch to select 1:2. • Touch Settings, scroll through the options, and then touch Resize to make sure Actual isselected. • From the Settings screen, specify paper size, paper type, quality, or othersettings. • 3. Touch Back to return to the Copy screen. 4. When prompted, load the second original and touchOK.
Scan You can scan documents, photos, and other paper types, and save them to your computer. After scanning to a computer is enabled, you can start scanning from the printer display or from the printer software on your computer. Scantoacomputer Before scanning to a computer, make sure you have already installed the HP recommended printer software. The printer and computer must be connected and turned on. In addition, on Windows computers, the printer software must be running prior to scanning. To enable the scan to a computer featureWindows ToenablethescantoacomputerfeatureWindows The scan to a computer feature is enabled by default from the factory. Follow these instructions if the feature has been disabled, and you wish to enable itagain. 1. Depending on your operating system, do one of the following toopen the HP printersoftware:
Windows 8.1: Click the down arrow in lower left corner of the Start screen, select the printer name, and then clickUtilities. • Windows 8: Right-click an empty area on the Start screen, click All Apps on the app bar, select the printer name, and then clickUtilities. • Windows 7, Windows Vista, and Windows XP: From the computer desktop, click Start, select All Programs, click HP, click the folder of your printer. • In the Scan section, select Manage Scan to Computer. • ClickEnable. • ToenablethescantoacomputerfeatureOSX • The scan to a computer feature is enabled by default from the factory. Follow these instructions if the feature has been disabled, and you wish to enable it again. • Open HP Utility. • Under Scan Settings, click Scan toComputer. • Ensure that Enable Scan to Computer isselected.
Toscananoriginalfromtheprintercontrolpanel • The scan to a computer feature is enabled by default from the factory. Follow these instructions if the feature has been disabled, and you wish to enable itagain. • Open HP Utility. • Under Scan Settings, click Scan toComputer. • Ensure that Enable Scan to Computer isselected. • Toscananoriginalfromtheprintercontrolpanel • Load the original print side down on the right front corner of the scannerglass. • TouchScan. • Touch a computer that you want to scanto. • Choose the type of scan youwant. • TouchOK. • ToscanadocumentorphototoafileWindows
1. Load the original print side down on the right front corner of the scannerglass. • 2. Double-click the printer icon on the desktop or do one of the following to open the printersoftware: • Windows 8.1: Click the down arrow in lower left corner of the Start screen, and then select the printername. • Windows 8: Right-click an empty area on the Start screen, click All Apps on the app bar, and then select the printer name. • Windows 7, Windows Vista, and Windows XP: From the computer desktop, click Start, select All Programs, click HP, click the folder for the printer, and then select the icon with the printer'sname. • In the Scan section, select Manage Scan to Computer. • ClickEnable. • ToenablethescantoacomputerfeatureOSX • Thescantoacomputerfeatureisenabledbydefaultfromthefactory.Folowtheseinstructionsif thefeaturehasbeendisabled,andyouwishtoenableitagain.
Open HP Utility. Under Scan Settings, click Scan toComputer. Ensure that Enable Scan to Computer isselected. To scan an original from the printer controlpanel Load the original print side down on the right front corner of the scanner glass. TouchScan. Touch a computer that you want to scanto. Choose the type of scan youwant. TouchOK. To scan a document or photo to a fileWindows Load the original print side down on the right front corner of the scanner glass. Double-click the printer icon on the desktop or do one of the following to open the printersoftware: Windows 8.1: Click the down arrow in lower left corner of the Start screen, and then select the printername.
Windows 8: Right-click an empty area on the Start screen, click All Apps on the app bar, and then select the printername. Windows 7, Windows Vista, and Windows XP: From the computer desktop, click Start, select All Programs, click HP, click the folder for the printer, and then select the icon with the printer'sname. In the printer software, click Scan a Document or Photo. Select the type of scan you want and then click Scan . Choose Save as PDF to save the document (or photo) as a PDF file. Choose Save as JPEG to save the photo (or document) as an image file. To scan an original from HP printer software OSX Open HP Scan. HP Scan is located in the Applications/Hewlett-Packard folder at the top level of the harddisk. Choose the type of scan profile you want and follow the on-screen instructions. Scan usingWebscan Webscan is a feature of the embedded web server that lets you scan photos and documents from your printer to your computer using a webbrowser.
This feature is available even if you did not install the printer software on yourcomputer. To enableWebscan Open the embedded webserver. Click the Settingstab. In the Security section, click AdministratorSettings. Select Webscan to enableWebscan. Click Apply and then click OK. To scan usingWebscan Webscan offers basic scan options For additional scan options or functionality, scan from the HP printersoftware. Load the original print side down on the right front corner of the scanner glass. Open the embedded webserver. Click the Scantab. Click Webscan in the left pane, change any settings, and then click Start Scan.
Change scan settingsWindows • You can modify any of the scan settings either for a singular use or save the changes to use permanently.These settings include options such as page size and orientation, scan resolution, contrast, and the folder location for savedscans. • Load the original print side down on the right front corner of the scanner glass. • Double-click the printer icon on the desktop or do one of the following to open the printersoftware: • Windows 8.1: Click the down arrow in lower left corner of the Start screen, and then select the printername. • Windows 8: Right-click an empty area on the Start screen, click All Apps on the app bar, and then select the printername. • Windows 7, Windows Vista, and Windows XP: From the computer desktop, click Start, select All Programs, click HP, click the folder for the printer, and then select the icon with the printer'sname. • 3. In the printer software, click Scan a Document or Photo.
Click the More link in the top right corner of the HP Scandialog. The detailed settings pane appears on the right. The left column summarizes the current settings for each section. The right column allows you to change the settings in the highlightedsection. Click each section at the left of the detailed settings pane to review the settings in that section. You can review and change most settings using drop-down menus.Some settings allow greater flexibility by displaying a new pane. These are indicated by a + (plus sign) at the right of the setting. You must either accept or cancel any changes on this pane to return to the detailed settingspane. When you have finished changing settings, do one of thefollowing. Click Scan You are prompted to save or reject the changes to the shortcut after the scan isfinished. Click the save icon to the right of the shortcut, and then click Scan. Create a new scan shortcutWindows You can create your own scan shortcut to make scanning easier. For example, you might want to regularly scan and save photos in PNG format, rather thanJPEG.
Load the original print side down on the right front corner of the scanner glass. • Double-click the printer icon on the desktop or do one of the following to open the printersoftware: • Windows 8.1: Click the down arrow in lower left corner of the Start screen, and then select the printer name. Windows 8: Right-click an empty area on the Start screen, click All Apps on the app bar, and then select the printer name. • Windows 7, Windows Vista, and Windows XP: From the computer desktop, click Start, select All Programs, click HP, click the folder for the printer, and then select the icon with the printer'sname. • In the printer software, click Scan a Document or Photo. • Click Create New Scan Shortcut. • Enter a descriptive name, choose an existing shortcut on which to base your new shortcut, and then click Create. • For example, if you are creating a new shortcut for photos, choose either Save as JPEG or Email as JPEG . This makes available the options for working with graphics whenscanning.
6. Change the settings for your new shortcut to meet your needs, and then click the save icon to the right of the shortcut. Tips for copy and scansuccess Use the following tips to copy and scansuccessfully: Keep the glass and the back of the lid clean. The scanner interprets anything it detects on the glass aspart of theimage. Load your original, print side down, on the right front corner of theglass. To make a large copy of a small original, scan the original into the computer, resize the image in the scanning software, and then print a copy of the enlargedimage. If you want to adjust scan size, output type, scan resolution, or file type, and so on, start scan from the printersoftware. To avoid incorrect or missing scanned text, make sure the brightness is set appropriately in thesoftware. If you want to scan a document with several pages into one file instead of multiple files, start the scan with the printer software instead of selecting Scan from the printerdisplay.