Download

1 / 11
110 likes | 214 Views
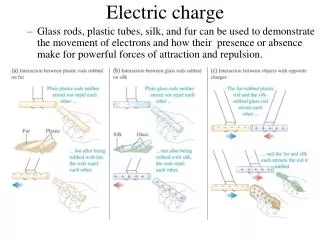
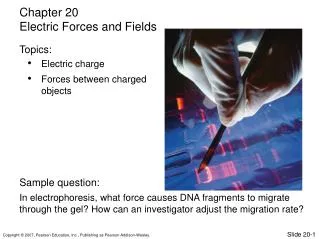
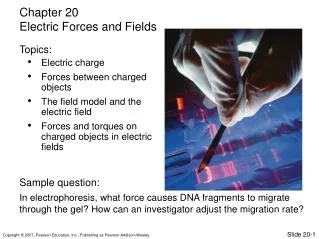
Chapter 20 (Week 1 Day 1) Electric Forces and Fields. Electric charge Forces between charged objects. Topics:. Slide 20-1. Briefly Go over Class Syllabus. Goals Understand and learn how to use the key concepts and equations to analyze a wide range of physical situations

E N D
Chapter 20 (Week 1 Day 1) Electric Forces and Fields • Electric charge • Forces between charged objects Topics: Slide 20-1
Briefly Go over Class Syllabus Goals • Understand and learn how to use the key concepts and equations to analyze a wide range of physical situations • Learn to work comfortably with doing algebra in symbols • Learn to apply math to physical situations • Problem solving emphasis is more on good solutions and reasoning than answers Slide 20-3
Briefly Go over Class Syllabus Homework • Readings • Warm-ups (Either on Paper or on Mastering Physics) - 4% • Paper Homework (Conceptual Worksheets + Solutions) - 7% • Mastering Physics (Web-based homework system) - 14% Exams • 3 midterm exams (will drop lowest) - 2 x 20% • Final Exam - 25% Class Participation • Clicker Questions + In-class activities - 10% Slide 20-3
Learning about the X-force Slide 20-3
Clicker Question • A charged rod is brought near a neutral metal sphere. Which of the following is true? A. There is an attractive force between the rod and sphere. B. There is a repulsive force between the rod and sphere. C. There is no electric force between the rod and sphere. Slide 20-2
Briefly Go over Class Syllabus • A charged rod is brought near a neutral metal sphere. Which of the following is true? A. There is an attractive force between the rod and sphere. Slide 20-3
Soda Can Narrow Aluminum Foil Strip Tape Foam Cup Building an X-force (charge) detector Construct an electroscope that can be used to test for the presence of charge, as shown and described below. • Tape a soda can to an inverted foam cup. • Bend the can opening so it sticks out of the can. • Cut a small 6 cm x 0.5 cm strip of aluminum foil, bend it over a pencil tip, and hook it over the can opening Slide 20-3
Creating top and bottom tapes Take a 10 cm piece of transparent tape and make a handle on the end by folding under the first cm of tape, sticky side to sticky side. Place this tape on the lab table. This is the base tape. Attach a second similarly prepared strip of tape onto the base tape. Label the tape’s handle “B” for bottom. Attach a third similarly prepared strip of tape onto the base tape. Label the tape’s handle “T” for top. Use your charge detector to determine if a tape is “charges.” Slide 20-3
Electric Charges and Forces, Part I Slide 20-8
Electric Charges and Forces, Part II Slide 20-9
Electric Charges and Forces, Part III Slide 20-10