Download

1 / 37
370 likes | 382 Views
Dive into the world of 3M ClearTekTM Touch Systems with a comprehensive session covering components, diagnostics, repair, support, and warranty information. Explore touch screen technology, historical perspective, system components, diagnostic tools, and a virtual tour. Learn about TouchWare™ drivers, touch screen construction, surface finishes, and calibration techniques. Discover the EX.II Electronics Platform and ClearTek controllers installation process. Get insights on error messages and troubleshooting techniques.

E N D
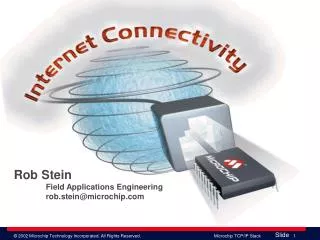
Presenters Paul Hatin, Manager - US Field Applications Engineering 3M Touch Systems
Session Overview • ClearTekTM Touch Screens “The Standard in Gaming” • Touch Systems Components • Diagnosing touch screen issues • Replacing and Repairing touch products • Do’s and Don’ts of supporting touch products • Warranty Overview
3M: Gaming Experts in Touch Historical Perspective 3M provided the “critical enabler” for the video slot revolution… the touch screen MicroTouch™ brand touch screens from 3M are on most video slot games 3M has been the premier touch supplier to gaming companies for over 17 years 3M is an innovative leader in developing new touch technology for future casino applications
ClearTekTM System Components Touch Screen All-glass screen overlay. • Curved touch screens: 9” to 29” diagonal • Flat touch screens: 6.4” to 24” diagonal Electronics Interprets and filters information sending data points to the system. Available Formats: • 1” x 2” or 2” x 3” • Serial or USB • Cased or Uncased TouchWare™ The TouchWare ™ Driver includes touch features, settings, a set of utilities, diagnostic tools and electronic documentation. Drivers support most popular operating systems:Win 95/98/2000, Win NT 4.0, XP, Me and Linux.
Glass overlays to match industry standard CRTs Ranging in size: 9” to 29” Variety of radius of curvatures to match popular CRT’s in the industry Cylindrical or spherical designs available Construction: All glass sensor with transparent conductive coating applied to top and bottom surface Narrow electrode pattern is printed along the edge on conductive layer Wires run to corners: Taped or untaped Surface Finishes Industrial True ClearTekTM Curved Touch Screen Picture of curved glass
ClearTekTM Profile Touch Screen Thin, sleek design provides easy integration for flat panel displays and flat CRT’s Narrow border Uniform surface Flat Sensors: Ranging in size from 6.4” - 24” Construction: All glass sensor with transparent conductive coating applied to top and bottom surface Narrow electrode pattern is printed along the edge on conductive layer Protective material applied over pattern Surface Finishes: True AR
ClearTek Scratch Resistance • A new ClearTek coating – CS3000 - was instituted several years ago • This new coating significantly improves scratch resistance • Went from a 5.5 mohs rating to a 6.5 mohs rating • See demonstration
3M performs a 25-point linearization process at the factory This accommodates for variances in the coating or the glass surface Serves to enhance the accuracy of the touch screen The linearization coefficients are stored in the NovRAM attached to the sensor Disconnecting the NovRAM cable loses the factory linearization data Not a practice 3M supports nor warranties Linearization Fundamentals
EX II Electronics Platform • A revolutionary mixed-mode, proprietary ASIC that provides: • Fast, precise touch response • Supports variety of serial communications in a small package • Embedded USB • Serial RS232 • TTL • 16k by 16k touch resolution • Improved power modes and regulatory compliance • Extended operating temperatures • On-board RAM for firmware flexibility • Downloadable firmware
EX II 1700 SC EX II 7700 SC ClearTek Controllers
Installing TouchWare™ Drivers • Follow the menus to install • Select Operating System and Touch technology • Respond to prompts to complete the installation
Once TouchWare™ has completely loaded . . . The TouchWare™ “splash” screen will appear Then follow the prompts to complete the installation process Installing TouchWare™ Drivers
MicroCal TouchWare & MT7.X Latest revision on 3M Touch Systems Web site www.3m.com/3mtouchsystems/downloads/drivers.jhtml Diagnostic Tools
Lab 1: Connect touch screen and controller Startup computer Open Touch Driver Find Controller (note type, version, etc) Calibrate the touch screen Discuss the results you see on the screen Drivers and Diagnostic Tools Tools needed: Touch Screen, EXII controller, communications cable and a laptop computer
Diagnostic Techniques Display Calibration Controller Touch Screen System
Check for Power +12 volts supplied through the orange wire +5 volts supplied through the serial connector (test only) Touch working verification Tap the touch screen: LED should flash Communications with the System Power on, system should find the controller If not, turn power off Determine why failure occurs according to the following slides Replace the touch screen and/or Controller Turn power back Diagnostic Techniques
Possible Error Messages Controller Not Found check controller power connections check controller LED (solid = on) Blinking LED 1 = Undefined, Contact 3M 2 = ROM Error Firmware Problem 3 = PWM Error, non recoverable 4 = NOVRAM Error or bad data 5 = HDW Error, Controller HDW 6 = Undefined, Contact 3M, non recoverable 7 = Cable NOVRAM bad data or cable not connected 8 = Linearization data in cable NovRAM is invalid Identifying Touch Problems
Do not open cased controllers - Voids the warranty - Leave serial cable intact - Possibly cause of the fault - Make note of the model number and serial number - Product must be returned in original packaging Identifying Touch Problems
If problem found, replace the complete controller Serial Controllers 14-88 Uncased, default comms: 9600,N,7,2 14-701 Cased, default comms: 9600,N,7,2 EXII-1010SC, default comms: 9600,N,8,1 EXII-1020SC, default comms: 9600,N,7,2 USB Controllers EXII-5000UCUSB protocols EXII-7000UC USB protocols EXII-1015SC and EXII-1025SC come with 26” cables Diagnosing Controller Issues
Necessary tools to replace controller - wire cutters - screw driver (flat and small Phillips) - socket driver (1/4” and/or 5/16” socket) - replacement cable ties - Static Strap Replacing the Controller
Replacement Options Uncased or Cased Uncased SMT3E Model shownCased EXII-10xxSC shown Replacing the Controller
Touch screen NOVRAM is keyed for the encased controller Use caution on uncased controller that the cable is oriented away from the LED IMPORTANT ! An incorrect connection can severely damage the controller Replacing the Controller
No touch screen present - Controller problem - Cable not connected - No power Touch Location Inaccuracies - Controller problem - Calibration - Linearization - Corner solder connections (soldered wire version) - Bad tail connection or problem with trace (Profile) Identifying Touch Problems
When to replace the touch screen? - Touch screen not found by controller Issue with NOVRAM connector, controller, or touch screen - Draw Command points out: Broken wires Blown NovRAM Damaged electrode pattern Faulty connections at corners Faulty connection at tail exit Severe scratch on surface of touch screen Other defect or damage Return to your integrator once fault has been verified Replacing the Touch Screen
Do not detach or cut cables Cables are part of the controller or the touch screen NOVRAM contains data specific to the touch screen it is connected to Detaching or cutting the cables will lose or void linearization data Definitely voids the warranty Replacing the Touch Screen
Align the touch screen to the tube or LCD Both horizontally and vertically Replacing the Touch Screen
Cover the Air Gap Use the black cloth tape Cover the perimeter of the touch screen Fully covering the space between the touch screen and the display Replacing the Touch Screen
Orange - +12v, 100ma max, 82 ma typ, 400 mv max ripple Gray - Power Supply Ground Green - Chassis Ground, as short as possible Gray/Green - Can be combined to Chassis Ground Preparing Power for the Controller
Do’s and Don’ts of Repair Don’ts Never cut off cables or NovRAM’s from touch screens Never use abrasive cleaning products Never “hot swap” monitors Never “hot swap” controllers Never “hot swap” touch screen Novram connector Do’s • Always unplug electronic equipment before working on it • When inserting the touch screen NovRAM to controller, be very careful to properly align the pins • Always use standard glass cleaning products • Isopropyl Alcohol • 3M Glass cleaner 051135-08888 • Always have a clean work area when replacing touch screens & handle with care
3M Touch Systems has no obligation under 3M Touch Systems’ warranty to replace or repair any Product, Software, or Software Media that has been modified or damaged through misuse, accident, neglect, or subsequent manufacturing operations or assemblies by anyone other than 3M Touch Systems Understanding the Warranty
The following modifications (though not limited to this list) will void 3M’s touch screen warranty: Cut cables Solder breaks on un-taped sensors (handling issue) Damaged surface on sensors Damage from shipping in container other than the original shipping container Damage due to improper integration Damage due to improper handling Controllers damaged by external physical forces Controllers subjected to excessive ESD hits Warranty Concerns
3M Touch Systems return policy (RA/RMA): Sensors or controllers as described in previous slide will not be accepted or credited All product must be returned in original packaging. Mated products such as sensors with NOVRAM adapter cables, or sensors with EX 7000 controllers, must be returned as a single unit If you have return questions, check with the integrator Warranty Concerns
3M Strengths 3M is a stable, reliable company to do business with Strong dedication to innovation, with ongoing R&D investments in new technology Strong protective overcoat, others may not have Rear Back shield to protect against High Voltage discharge and EMI issues Novram with 25 point factory linearzation data, which allows 1% accuracy. Summary
Questions and Answers