Download
1 / 20
200 likes | 231 Views
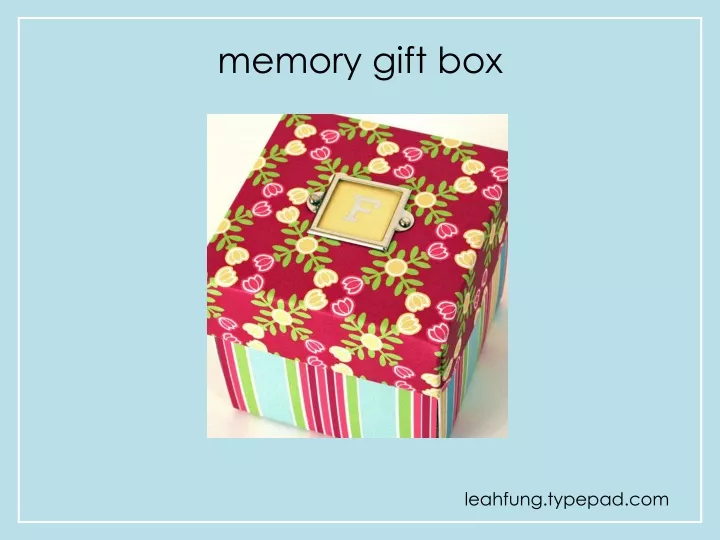
memory gift box. leahfung.typepad.com. memory gift box opened. creating the box top. trace box center on Tulip cut 1/8” larger than trace marks adhere to box top crease all scores but don’t assemble just yet. topper: bookplate or bow.

E N D
memory gift box leahfung.typepad.com
creating the box top • trace box center on Tulip • cut 1/8” larger than trace marks • adhere to box top • crease all scores but don’t assemble just yet
topper: bookplate or bow choose either the monogram bookplate or the patterned paper bow
monogram bookplate optionyou can skip this & do the bow if you like • center bookplate inside of unassembled box top • trace & punch holes • cut square out of Tulip to fit behind large square bookplate • apply rub-on to yellow side & adhere square to patterned paper side of box • attach bookplate with brads
assemble box 2 • apply adhesive where indicated in teal color • push in corners (1) • fold over end flaps (2) 1
paper bow optionyou can do this instead of the bookplate • cut five 1/2” x 12” strips across top of Laughter sheet • for each strip, mark a small dot 1/4" from one end then mark at 3 7/8” increments • punch 1/8” or 1/16” holes at each marking these are different papers just used for example
paper bow • take one strip & slip end hole onto brad prongs then point brad prongs away from you • take next hole on strip, loop up & toward you then twist outward 180 degrees then slip hole onto brad prongs • repeat the above till all 4 holes (& 3 loops) are on brad 1 2 3
paper bow • take another strip of paper & repeat steps 1- 3 on previous slide: slide hole onto brad, loop up, twist out & attach • repeat for remaining strips • open prongs of brad to securely hold all the strips • adjust loops for even spacing • adhere to box top using glue dots more examples: Christmas bows
bottom of box • punch out box (cross) • cut Stripe into three 12”H x 4”W strips – cut in direction of stripes • from one strip cut two 4.5”H x 4”W squares; trim if needed • adhere to opposite sides on shiny side of box • adhere 12”H x 4”W strip on top & across first 2 squares; trim first if needed
three center pages • cut one 4” x 12” strip from all papers • cut 3 7/8” sq out of strips: Smile (1), Lattice (2) • adhere 3 1/4” square photo to pages • punch & attach photo turns with brads • adhere pages to inside of box, solid sides up • on teal page attach two metal photo corners If you like the look of stitches, machine stitch (or add rub-ons or drawing that look like stitches) before adding the metal embellishments
papers for top & bottom pages • cut two 3 7/8”H x 4”W squares from Tulip strip • cut two 3/4”H x 4”W strips from Stripe strip • adhere Stripe strips to Tulip squares • don’t adhere squares to box just yet
top page • adhere green tag to solid side of Laughter & trim around edge with small scallop scissors • adhere button & mount tag to page with foam tape • punch hole in Joy chipboard, attach metal fastener with brad • cut 3” gray ribbon, thread through metal fastener & staple to page • adhere page to box
bottom page • attach metal fastener with brad to tag • mount tag to page using foam tape • cut circle out of Smile to fit behind bookplate • add rub-on to solid side • place bookplate on page, mark where to punch • punch holes, add paper circle & attach bookplate with brads • adhere page to box • as option, add diamond glaze to center of flower, let dry – don’t close box
papers for right-side pages • cut 4” square from Lattice strip & cut 4” x 3 7/8” square from Dot strip, trim if needed & adhere papers to box • cut 3 1/2” x 3 1/4“ from Dot strip (green)
first right page • adhere 3 1/4” square photo • add corner sticker
second right page • punch border in green square & adhere to page • adhere 3”H x 2 1/2”W photo • cut 1 1/2” ribbon, fold & staple behind chipboard letter • mount chipboard to page with foam tape
papers for left-side pages • cut 4” square from Circle Dots strip & cut 3 7/8” x 4” square from Happy Thoughts strip, trim if needed & adhere to box • cut 3 1/2” square from Flowers strip (pink) & cut 3 1/2” x 3 1/4“ from Dot strip (green)
first left-side page • adhere 3” square photo to pink square • adhere oval sticker, punch holes & attach eyelets • adhere pink block to Circle Dots page • as option, cover centers of flowers with diamond glaze, let dry – do not close box
second left-side page • punch border on green square & adhere to Happy Thoughts page • adhere 3”H x 2 1/2”W photo • mount sticker to corner of photo using foam tape • as option, cover center of flower with diamond glaze, let dry – do not close box