Download

1 / 39
390 likes | 413 Views
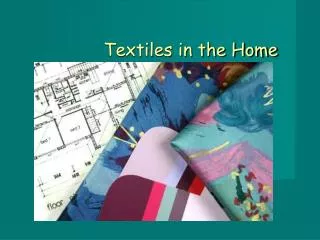
Learn about textiles used in interiors, including fibers from natural and manufactured sources like cotton, silk, nylon, and polyester. Discover characteristics, strengths, weaknesses, and weaving techniques to enhance your knowledge.

E N D
Textiles • Any products made from fibers Clothes Carpets Upholstery Sheets.
Fibers • Raw, thin, hair-like materials • Fibers come from either natural or manufactured sources.
NATURAL FIBERS Natural fibers come from plants (CELLULOSIC) and animals (PROTEIN).
Cellulosic Fibers: Plant sources(Cotton, Flax, Ramie) Strengths • Absorbent • Strong • Dyes well • Seldom damaged by insects Weaknesses • Burn easily • Stained by mildew • Yellow • Low in elasticity • Wrinkle easily • Shrink in hot water.
Cotton • Bed and bath linens • Rugs • Draperies • Upholstery
Flax plants (Linen) • Tablecloths • Kitchen towels • Draperies • Upholstery
Ramie (was the fabric used to wrap mummies!) • Most commonly blended with other fibers to help produce a silky luster to the fabric’s appearance
Protein Fibers: Animal Sources(silk and wool) Strengths • Burn slowly • Good elasticity and resiliency • Strong • Lustrous • Wrinkle resistant Weaknesses • Need to be careful in cleaning (dry clean) • Water spots easily • Poor resistance to sunlight (silk) • Eaten by moths (wool).
General characteristics of manufactured fibers (Synthetics) • Manufactured fibers are divided into 2 groups: cellulosic and non-cellulosic • Both contain oil products and other chemicals • Cellulosic also contains wood cellulose.
General characteristics of manufactured fibers Strengths • Launder well • Moth proof • Non-allergenic Weakness • Heat sensitive.
Cellulosicmanufactured fibers (Rayon and Acetate) Strengths • Drapes well • Dyes easily Weaknesses • Weak • Poor resistance to abrasion.
Non-Cellulosic manufactured fibers(Nylon, Polyester, Olefin, Acrylic) Strengths • Do not stretch or shrink • Resists creases and abrasion Weaknesses • Nonabsorbent • Creates static electricity.
Weaving Fabrics • Weaving involves interlacing two systems of yarns at right angles to each other. • Warp Yarn: lengthwise threads – up and down • Weft Yarn: crosswise threads (filling yarns) – left to right.
Grain - the direction the thread runs (crosswise or lengthwise)
Pile weave – have yarn loops or cut yarns that stand away from the base of the fabric. (Velvet, corduroy, terry cloth)
Nap – the fiber ends that stand up from the surface of fabric. Fabric color looks different from different direction.
Plain weave • Simplest weave • Over 1, under 1.
Plain weave variations Basket Weave: • Plain weave with multiple yarns • Over 2, under 2.
Plain weave variations Ribbed Weave: • Warp and weft yarns are different sized.
Twill Weave • Stronger than plain weaves • Over 2, under 2. Each succeeding row begins one yarn above or below the last one • Denim is the most common twill weave.
Satin Weave • The satin weave is smooth, slippery, and drapes well • It is less durable than other weaves • Over 4, under 1 • Successive rows begin 2 rows away from the last.
Jacquard Weave • It is used for damask, tapestry, and brocade fabrics • The over under pattern of the warp and weft yarns create a pattern in the fabric.
Non-woven fabrics • Knitted fabrics • Bonded: Made by applying heat, moisture and pressure to fibers. Ex. Felt • Leather
LAWS AND TEXTILES • Textile Fiber Products Identification Act: Fibers in a textile product must be labeled in order of predominance by weight. • Wool Products Labeling Act: Labels on wool products include the kind and amount of wool used, manufacturer, and country of origin. • Flammable Fabrics Act: Prohibits the sale of flammable fabrics. Many new flame-resistant finishes have been developed as a result of this law.
Weaving Sample YOU WILL NEED: • 2 pieces of construction paper, each a different color • 1 piece of CARDSTOCK • METAL RULER • TRIANGLE • CUTTING MAT AND XACTO KNIFE or • SCISSORS • GLUE
STEP ONE • Place ruler even with the top edge of the paper. • Draw a line across the paper here RULER
STEP TWO • Mark ½” increments on the line. • Use the triangle to draw vertical lines. • Start at the bottom and cut to the top line. • Put glue across here, and attach to cardstock.
STEP Three • Mark ½” increments. • Use the triangle to draw vertical lines. • Cut all the way across the paper. • Weave according to your pattern.