Download

1 / 12
120 likes | 283 Views
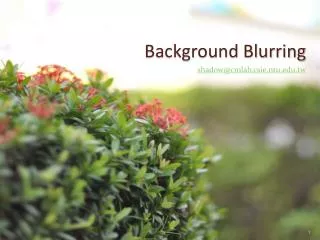
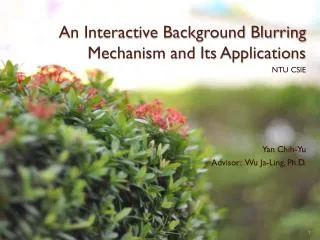
Background Blurring. shadow@cmlab.csie.ntu.edu.tw. Documentation. ./ 系統主要分成三部份,前兩塊產生出 depth 和 segment 的資訊之後,可以在第三部份根據不同參數設定產生出不同的效果 system 1_segmentation Tool1: lazy-snapping with simple UI Tool2: 光影魔術手 2_depthmap depth of background scene (3d-box) depth of each segment 3_refocusblur

E N D
Background Blurring shadow@cmlab.csie.ntu.edu.tw
./ 系統主要分成三部份,前兩塊產生出depth和segment的資訊之後,可以在第三部份根據不同參數設定產生出不同的效果 • system • 1_segmentation • Tool1: lazy-snapping with simple UI • Tool2: 光影魔術手 • 2_depthmap • depth of background scene (3d-box) • depth of each segment • 3_refocusblur • camera parameter • refocusing (inpainting, defocus blur) • sample // sample input, parameter and result
Segmentation • Lazy snapping • Tool1: preprocessing(resize for mean shift ) + lazy snapping • Lzsegment.m • Input : parameter file name 先做preprocessing,這裡可以用meanshift或是直接downsample成64色階,並且在meanshift的地方resize為五分之一加快速度, 讀取stroke_1.bmp, stroke_2.bmp…等前後景筆劃圖,前景是紅色,後景是藍色。然後執行lazy snapping處理 ◎每個segment都存一個灰階的bmp檔,檔名分別是seg_1.bmp, seg_2.bmp…沒有先後順序。將每個segment扣除剩下的background的部份,即是seg_segN.bmp ◎需要libgil2的library • Tool2:光影魔術手 • 每個segment都存一個png檔,檔名分別是obj_1.png, obj_2.png…將這些png檔的alpha值轉成bmp, 並且扣除只剩下background的部份,即是seg_segN.bmp
Depth map • depth.m(function depth(parafilename)) • Input: • parameter file name • dep_1.dat, dep_2.dat, …dep_(segN-1).dat ★ 每個dep_n.dat的內容: nxny p1x p1y p2x p2y … ★ n表示normal vector, 預設是 (0,0), vector方向代表物體在平面上的法向量方向,長度表示深度變化量 ★ p1,p2…是user劃下的筆劃座標,即此segment的深度參考點,預設是segment最下方的點。如果沒有p1,p2…系統會自動取segment最下方一列的點作為參考點。 • Output: • dep_1.bmp, dep_2.bmp … dep_segN.bmp
Refocus Blur • refocus.m ( function [finalresult]=defocus(parafilename) ) • Get parameter from file, and load the segment/depth bmp files • Get the focus position from focusposition.dat • Compute diffusion blur circle diameter for each pixel • Devide image into two parts, the part in front of the focus, and run defocus_blur.m • Use alpha.m to get alpha map, and find the pixels to run inpaint.m • Use the result by inpaint.mto call defocus_blur.m • Combine the front part and back part by alpha map • return the result image
others • Inpainting function needs the estexemplarhelper.c run mexestexemplarhelper.cbefore the function call at first time The inpainting code (inpaint.m) is from http://www.cc.gatech.edu/~sooraj/inpainting/ • Meanshift code is downloaded from • http://www.caip.rutgers.edu/riul/
Input parameter file • 1.dirnamediratory of the files, include '/' on the tail, ex: 'sample1/' • 2.imagename file name of input image, ex: test.jpg • 3.segN number of segment image, include the background. ex: 2 (foreground*1+background) • 4.vx position of vanish point, must be in the rear wall, • 5.vy but can be outside of the image • 6.ax • 7.ayleft_top position of the rear wall • 8.bx • 9.byright_bottom position of the rear wall • 10.dc_f lens focal length,(mm) ex: 50 mm, 100 mm ...etc. • 11.dpmax the depth of pixels with color level 255 in depth map, (mm) • 12.dnear the depth of pixels with color level 0 in depth map, (mm) • 13.dc_N the aperture number • 14.thr=250 threshold of bokeh color level • 15.light_e=0.5 little constant number for light_weight function • 16.lens shape default setting 0 is flat disk
Camera parameter • dc_f相機的焦距,單位是mm,數值越大景深越淺, 建議在50~100之間 • Dpmax rear wall距離成像平面的距離,建議為5~50公尺 (5000~50000) • Dnear場景裡距離成像平面最近的物體距離, 建議為1公尺,至少要在兩倍焦距以上 • dc_N光圈值,數值越大,光圈孔隙越小,景深越深, 為達到淺景深效果建議值在1.4~2.8之間,越小效果越強 • thr=250將pixel產生散景效果的臨界值,建議不要低於240 • light_e=0.5 weight function的明度微調參數,為一個大於0的值, 數值越大明度影響越低,建議為0.5~1之間 • lens shape 光圈孔隙的形狀,預設為0 對應到refocus/lens/ 資料夾底下的0.bmp, 1.bmp
Sample • ./ • parameter01-.dat • ./sample01 • original image • seg_1.bmp seg_2.bmp … • dep_1.dat dep_2.dat … • 可由UI產生 • focusposition.dat • 可由UI產生,給定要聚焦的點,可以為單一或是多個點,將會取其對應到的深度平均值,格式為 x1 y1 x2 y2 … • dep_1.bmp dep_2.bmp …
執行: • 用system的前兩步驟產生出前頁所述的參數和bmp files,並放在所屬資料夾下 • result = refocus(parameter file name);