Download
1 / 70
710 likes | 726 Views
Learn how to submit expenses in Oracle for reimbursement. Follow detailed instructions from logging in to creating reports and managing delegates. Get expert guidance for a hassle-free process.

E N D
How to Submit Expenses in Oracle Aaron W Howard BRET Travel Coordinator aaron.w.howard@Vanderbilt.edu
Required Reading • Students are responsible for knowing and adhering to VU Travel Policy • Failure to adhere to the Policy may render your expenses non-reimbursable VU Travel and Business Expenses Policy BRET Student Travel Procedures BRET Travel Webpage
One on One Help Is Available! • Start to finish Expense report creation • Bring a digital copy of your forms and receipts • Email aaron.w.howard@vanderbilt.edu to set up an appointment • If you are receiving 1on1 help please do not submit your report without asking first
Table of Contents • Logging In • Set Up & adding a Delegate • From Expense Page • Opening a New Report • Expense Items • Financials • Expenditure Organization • Split billing between sources • Submitting your report • Checking approval Process • Reviewing Old Reports
You will need • Financial Approval Forms • Completed Intent to Travel • Graduate School Award if applicable • Copy of Outside Reimbursement • Image Receipts • Scanned(preferred) or photographed • Can be Uploaded Via the Oracle App iOSAndroid Students can submit expenses as soon as you have these Don’t have to wait until after traveling
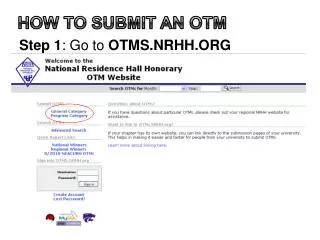
Logging into Oracle VU uses Oracle for all Expense reporting • https://www.vanderbilt.edu/skyvu/ • If you cannot log in let an Admin know so we can enter you into the system • Must use University SideVUnet ID • If you do not know your password call VUIT3-9999
https://www.vanderbilt.edu/skyvu/ Open Oracle
First Time Oracle Setup First Time in Oracle, Student should make sure their Account Information is Correct • Open the Expense Tab • If you’re denied access, contact the BRET Travel Coordinator • Check direct deposit information for accuracy • Click on Manage bank account • This information was Imported from Payroll • Set up any Delegates that your Dept. Requires
Welcome to the Oracle Home page • 2 tabs to remember • Expenses tab • Where you will file your reimbursement • Concur tab • Where you will Purchase your flights
Common Oracle Error When you first open the Oracle expense tab you might be confronted with an error • “You do not have permission to access expense related functions” • If you receive this error please contact aaron.w.howard@Vanderbilt.eduwith your name, VUnet id and Department. • Might take a day or 2 to get processed.
Travel and Expense Page When you open the expense tab, you will see 1 of 2 pages depending on if it is your first time. Click on the box that best resembles what you see to open a hyperlink.
This is the “Product Tour” Page. • You will see this page the first time you access the Expense Tap • If you do not see this page you can still find the relevant bits on the expense page
TO DO Make Sure you Bank information is Correct Manage Delegates Create Expense Report
TO DO Make Sure you Bank information is Correct Manage Delegates Create Expense Report 1. Check Direct Deposit • This is where your reimbursements will be deposited • Directly imported from HR so it should be the same as your paycheck. • May be the wrong account if you have multiple Direct Deposits in the HR system
TO DO Make Sure you Bank information is Correct Manage Delegates Create Expense Report 2. Set up a Delegate • Why Set up a Delegate? • A Delegate is someone who can view and edit your reports • Fixing Reports • If your report gets rejected a delegate can go into your report and fix any errors you made. Ensures a faster reimbursement. • Audit Reports • ever so often grants will be audited for rule compliance. Students probably don’t want to have to deal with that. A Delegate can go and retrieve that information for you.
To Set up A Delegate In the Delegates and Permission Tab • Click on the • Type in the Name of the Delegate • Click on the name • Check that the full name populates the field • Save and close.
Step 2; Add the Delegate Hit the Plus button Type in the name Click on the name from the drop own Save and close
This is the Delegates and Permissions Page Click on the + button
2. Type in the first and last name of the Delegate 3. Select their name from the drop down tab.
The name should populate the field Click “Save and Close”
TO DO Make Sure you Bank information is Correct Manage Delegates Create Expense Report 3. Create Expense Report Once you’ve check your bank information and added any delegates required you are ready to start your expense report. CLICK HERE TO GO TO EXPENSE REPORT
If you no longer see the welcome page you can still access your bank information and manage your delegates via the right side bar. Manage Delegates page
You can start a new expense report by opening the Reports Page and clicking on the plus button.
Starting your Expense Report We are going to start the expense Report by filling in Pertinent information • Fill in Purpose with Conference Name, Month, Year, either it is pre/post travel • I recommend limiting oneself to 2 reports; Pre and post. • Attach Financial Information • Intent to travel, Grad School Awards, Any Rewards or Relevant Emails. • (NEW) Documentation Conference Dates, screen cap of Website. • Save • Create an Expense Item by clicking on the +
3) Save 1) Input Purpose 2) Attachments 4) Start Expense Item
1) Input Purpose • Purpose Should Include: • The Conference Name • Month and Year of Travel • State either it is Pre or Post Travel
2) Attachments • Attachments should include Financial Information: • Intent to Travel • Graduate School award • Expense Reports for VKC • Notice or Copy of 3rd-Party Scholarships • Emails from Financial Advisors • Proof Of Conference (Schedule Screenshot)
2) Attachments • Please make all attachments self evident by the file’s name before uploading. • Intent forms should include the word “intent” • Receipts should include type of expense and Value • This will hasten the approval process and ensure you receive your reimbursement in a timely manner.
3) Save Save early and often. You don’t want to lose the progress you have made
4) Start Expense Item Start your expense item by clicking on the plus button.
Creating an Expense Item • Enter the date of Purchase (as it is on the Receipt) • Select “GENERAL EXPENSE” • Select expense Type • Important for travel; Conference, Membership and Dues, and the “Domestics”/”Foreign” • Put in the Amount • Enter the Merchant Name • Enter Financial Information • Save and Create Another/ Save and Close
Enter the Date as it appears on the Receipt Template will Always be General Expense All expense Items will start off the same until you get to expense type.
3) Expense Types to Know • Conference • Membership and Dues • Mileage • Domestic/Foreign • Airfare • Hotel Accommodations • Breakfast, Lunch, Dinner, Snack • Taxi/ Car Service When you choose your expense type the page will populate with all the important fields. Use the hyperlinks provided to get specific instructions
Conference 4) Amount: as it Appears on the Receipt 5) Number of days: Length of Conference 6) Description: leave blank 7) Merchants name: Conference Organizer 8) Attachments: Receipts and Conference Schedule Create another Expense Item
Membership and Dues 4) Amount: as it Appears on the Receipt 5) Number of Days: Duration of Membership 6) Description: tell us why you need the Membership, why it is important to this travel 7) Merchants Name: Organization 8) Attachments: Receipt, Price difference Create another Expense Item
Mileage 4) Trip Distance: One Way 5) Description: leave blank 6) Starting Location: VU or your place 7) Destination: City of Conference 8) Attachments: Google Maps of Route, Flight price comparison if over 1000 miles total. *Create a separate expense item for each way **Amount, while not visible here, should show up on the report page. Create another Expense Item
Domestic/ Foreign Airfare 4) Amount: as appears on receipt 5) Description: leave blank 6) Merchant Name: Airline 7) Flight Type: Foreign or Domestic 8) Flight Class: Coach 9) Ticket number: as appears on receipt 10) Departure City: BNA 11) Arrival City: 12) Passenger name: your name 13) Attachments: Receipt, price comparison for extended stays If you cannot find your receipt you can search outlook for “world trav” or call (877)271-9258 Create another Expense Item
Domestic/ Foreign Hotel Accommodations 4) Amount: Amount charged. If there was a deposit charged, make a separate expense 5) Number of Days: Nights in the Hotel 6) Daily Amount: Auto filled. leave be 7) Description: Leave blank 8) Merchant name: Hotel Company 9) Check Out Date: as appears on receipt 10) Attachments: Receipts, Card statement if receipt does not include Credit Card number *If you split a hotel room with someone else and you need to split the billing info please contact Aaron for assistance. Create another Expense Item
Domestic/ Foreign Breakfast, Lunch, Dinner, Snack 4) Amount: As appears on receipt 5) Number of Days: 1 6) Daily Amount: Auto filled. leave be 7) Description: leave blank unless expensive and needs explanation 9) Merchant Name: Restaurant Name 10) Attachments: Receipts If you purchased alcohol with your meal just subtract the cost of alcohol from the amount and note the changes in the description Create another Expense Item
Domestic/ Foreign Taxi/Car Service 4) Amount: As appears on receipt 5) Number of Days: 1 6) Daily Amount: Auto filled. leave be 7) Description: leave blank 9) Merchant Name: Ride Company 10) Attachments: Receipts Create another Expense Item
Review your report: Make sure your report lists the correct amount and all of your receipts are attached. Save your progress
Removing Expense Items: If you need to remove an expense item you can click on the Xs to the right. This will not delete the item. It will just remove it to the expense item page. Expense item descriptions: Approvers need to be able to find all important information quickly. If you add unnecessary descriptions you slow down the approval process.
Putting in Financial Information • Once you have all of your expense items created it is time to put in the financial information. • Financial information is defined per item • Once you put it in once you can copy it to other items. • Your expense report isn’t complete until the billing information is added. • If you need assistance with billing information Reach out Before submitting your report. Reports cannot be edited if they have been submitted.
Finding your Billing Information You will Need your Intent to Travel Form and Graduate School Award • Intent has billing information in the middle • Grad school has it highlighted as the bottom
Billing information: where does it go? • Get Your intent to Travel COA COA goes into Account Number Project Number Goes into Project Number. Find this is on the expense item
Fixing a Broken COA • When you receive a COA from a financial administrator it probably be Broken, an incomplete part of the COA. • When you put in your information you need to have the complete COA • You can use Oracle’s built in tool to completing a COA or you can understand the structure and complete it yourself
Understanding the COA • 182.05.18410.6305.005.000.000.0.0 • When you receive a COA you might only get the Blue numbers • The Red needs to filled in with… • 6305 if domestic travel • 6310 for foreign Travel • 6725 for conference and memberships • Fill in the Yellow with Zeros • Yellow is anything on the tail end that was left off 1 2 3 6 7 8 5 4 1 9 2 3 4 5 6 7 8 9
Entering the Account • Once you know what the whole COA looks like you can enter it in. • If you have the whole thing in text you can copy and paste. • Incomplete COAs will result in an error • If you have part of a COA Use the Blue box to pull up a data entry tool. *If this is too much for you, contact Aaron and he can fix it for you.
Entering a Project Number • Must be Accompanied by an Account/COA • If your intent does not have the COA please contact you Financial Advisor to get it. • Check the description to make sure you enter the correct number. • Needs a Task Number
Expenditure Organization • It helps if you do this last so we will cover it later. Skip to later