Download
1 / 19
190 likes | 357 Views
Tips for Creating a Successful Presentation Poster. February 18, 2008. Before you begin Know the Setting. Is your poster one of many: you may want to attract attention; using backgrounds images, interesting title or interesting photos. “Eye Catchers”. (casual range 3-5ft.)

E N D
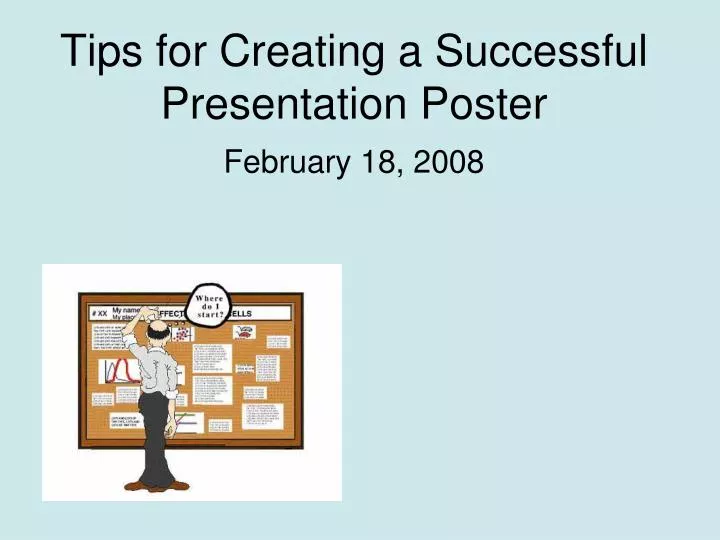
Tips for Creating a Successful Presentation Poster February 18, 2008
Before you beginKnow the Setting • Is your poster one of many: you may want to attract attention; using backgrounds images, interesting title or interesting photos. “Eye Catchers”. (casual range 3-5ft.) • Is your poster one of a few: you may want to have more details in methods or graphic (intimate range 2-3ft. • Is your poster displayed all day: Make sure you have just enough details to explain your work. • Is your poster or for an hour “Cocktail setting”: Make sure your reader can finish the poster. Be prepared to answer question posed in your display.
Before you beginThe Viewer • Aim your posters for the middle of the road viewer. • Experts: they are very familiar in your area and already know the science. • Target Audience: People in your general field of interest…. they require that you supply context for your work. • General Public: bonus audience that can provide their point of reference.
Before you beginWhat are your saying??? • Determine the one essential concept you would like to get across to the audience. • Re-read your abstract once again - are those statements still accurate? • A visual presentation of your research. • Concise and focused (not a presentation of your like’s work!) • Say what you want to say…. say it… say what you said.
Hey what are they doing here? • There are an awful lot of posters here! Make it interesting as well! • Viewers are looking for interesting or specific topics, put that in your title!!! • People are scanning the posters looking for keywords of interest. By using short well formed paragraphs viewers need only back up a short ways to read the relevance of the text. • Most people will skim the poster and read the conclusion. MAKE THAT COUNT!!
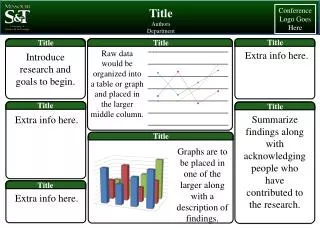
Flow of the Poster • Title at the top: can be seen over the crowd. • Top to bottom left to right: crowd flow prevents users from going back to beginning. • Three to five columns: shorter sentences and narrow columns narrow makes text easily read. • Use visual clues when need: arrows, numbers, space or text boxes when there is no clear break can help the viewer follow your story.
Order of the Poster • Title, Acknowledgements • Intro, Hypothesis, Overview • Methods, Techniques, Approach • Supporting Data, Charts, Graphs, Relevant Photos • Conclusion, Results • References • Other features: Backgrounds, Interesting photos
Title, Acknowledgements • This part of the poster includes the title of the work, the authors names, the institutional affiliations, and the poster number. • The title should say what the poster talks about and readable from 15-20 ft. • Always include grant sponsors
Intro, Hypothesis, Overview • What story is the poster going to tell me? • This section should pose the hypotheses of the research. • Read the Conclusion, does it make sense with the Intro said.
Methods, Techniques, Approach • Not always necessary helps with unconventional or complex concepts. • Can help readers follow the following data. • Explains how the data was collected or how results were calculated. • Shorten this section by using reference for less critical techniques.
Supporting Data, Charts, Graphs, Relevant Photos • Charts and graphs put a lot of information in a small space. • Charts and Graphs should stand on their own. If you need to explain a graphic break to make it work, break it down. • Graphics should have a title and/or meaningful caption. • Label graphics with legible headings, captions, and axis titles. • If you found an interesting effect, identify it explicitly in the title.
Conclusion, Results • Read the Intro do they correspond… does that sound familiar. • Do not merely repeat the results;state the interpretations. Commit yourself!! • Summaries merely restate results. • Conclusions interpret the results and identify their significance. • This is your chance to make an impression, if it is interesting say it that way.
References • For those that need to know, tell them where to get more info. • For better flow the bottom right hand corner is a natural spot for this information. • Cite only what is relevant to your research. • While web links are fun they are usually difficult to remember and can go out of date or disappear without notice.
Other features: Backgrounds, Interesting photos, Images • Don’t let a good poster be ruined by a must have background. • Don’t over do the resolution…. most printers are just fine with 150/300 dpi. • Resize your images and graphics before importing them into your poster. This will reduce their size and can increase clarity. • If you use a logo…. ask for one, they are generally higher quality.
A few words onText, Space &Text boxes • Space is powerful. Don’t fill your poster so full that it is difficult to follow. • Keep fonts consistent • Titles 65-108pt visible from 15-20 ft. • Subheadings 36-54pts visible from 5-8 ft. • Body text 18-27pts visible from 3-5 ft. • Avoid non-standard fonts (symbols) they can lead to grief when printing and really don’t add much to the poster.
Putting it together • First draft: Big Chief Tablet… plan it out on paper before committing time on a computer. • B&W version: Type your Intro, Conclusion and all other long passages of text into a word processor first. Others can proof read this while you are working on your layout. • Assemble all elements into one folder before beginning. • Have a couple different people review your poster. • Start early, one week minimum.
A few words on… continuedText, Space &Text boxes • Use text boxes or space to define sections. • Place text boxes far enough from the text so that it is legible. • On a background white or light text areas can standout. • Use visual grammer... Don’t tell show.
Tips for our Plotter • Leave an one inch margin. • Reformat pictures for printing (150-200 dpi) looks fine • Max size is 36X54 in PowerPoint. • Put document on computer before opening • Always do a “Print Preview” • Leave 3-4 hours for printing, typical is 60-90 minutes, in case of problems
Reference Links • “How to create a poster that graphically communicates your message”: Kathryn Tosney, Professor of Biology, The University of Michigan. Great visual reference using Positive and Negative examples to illustrateposter building concepts.http://www.biology.lsa.umich.edu/research/labs/ktosney/file/PostersHome.html • “Developing a Poster Presentation ”: Jeff Radel, University of Kansas Medical Center. Step by step text guide basics to creating display posters.http://www.kumc.edu/SAH/OTEd/jradel/Poster_Presentations/PstrStart.html • “How to Write a Scientific Poster”: The American Physiological Society. Reference links to skill building web pages for presentations.http://www.the-aps.org/careers/careers1/gradprof/gposter.htm • “How to make a Poster Presentation in PowerPoint”: By Gericke Sommerville, March 21,2003. Poster guide for participants in the Front Range Student Ecology Symposium.