Download
1 / 33
330 likes | 347 Views
Enhance your document appearance with fonts, line spacing, alignment, and more in Microsoft Office Word 2013. Explore indents, bullets, and styles to create visually appealing content.

E N D
Objectives • Format with fonts • Use the Format Painter • Change line and paragraph spacing • Align paragraphs • Work with tabs Microsoft Office Word 2013 - Illustrated Complete 2
Objectives • Work with indents • Add bullets and numbering • Add borders and shading • Insert online pictures Microsoft Office Word 2013 - Illustrated Complete 3
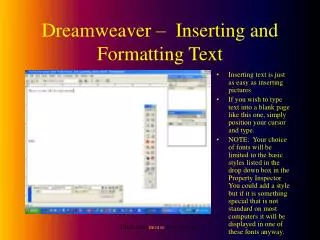
Format with Fonts • Formatting text with fonts is a powerful way to enhance the appearance of a document • A font is a complete set of characters with the same typeface or design Microsoft Office Word 2013 - Illustrated Complete 4
Format with Fonts • Changing the size of text, or the font size, helps determine the impact of text • Font size is measured in points • A point is 1/72 of an inch • 11-point Calibri is the default font size and font for a new Word document • You can also change the font color Microsoft Office Word 2013 - Illustrated Complete 5
Format with Fonts • Font list and Font Color Palette Microsoft Office Word 2013 - Illustrated Complete 6
Use the Format Painter • Font styles • Make text darker and thickerby applying bold • Slant text by applying italic • Underlinetext for emphasis • The Format Painter allows you to copy the format setting applied to selected text to other text Microsoft Office Word 2013 - Illustrated Complete 7
Use the Format Painter • Font tab in Font dialog box Microsoft Office Word 2013 - Illustrated Complete 8
Change Line and Paragraph Spacing • Adding white space to a document can make it easier to read • Increase space between lines using the Line and Paragraph Spacinglistarrow • Increase space between paragraphs using the Before and After text boxes in the Paragraph group on the Page Layout tab Microsoft Office Word 2013 - Illustrated Complete 9
Change Line and Paragraph Spacing Microsoft Office Word 2013 - Illustrated Complete 10
Change Line and Paragraph Spacing • Formatting with Quick Styles • Apply multiple format settings in one step with a style • Use styles to give your document a more cohesive look • A style is a set of format settings that are named and stored together • Styles can include character and paragraph format settings • Apply Quick Styles by selecting a style from the Quick Styles gallery Microsoft Office Word 2013 - Illustrated Complete 11
Change Line and Paragraph Spacing • Each Quick Style set includes styles for a title, several heading levels, body text, quotes, and lists • Each Quick Style Set has a different design Microsoft Office Word 2013 - Illustrated Complete
Align Paragraphs • Paragraphs are aligned relative to the left and right margins • Left-aligned text is flush with the left margin and has a ragged right edge • Text is left-aligned by default • Right-aligned text is flush with the right margin • Centered text is positioned evenly between the margins • Justified text is flush with both the left and right margins Microsoft Office Word 2013 - Illustrated Complete 13
Align Paragraphs • Modified paragraph alignment Microsoft Office Word 2013 - Illustrated Complete 14
Align Paragraphs • Indents and Spacing tab in the Paragraph dialog box Microsoft Office Word 2013 - Illustrated Complete 15
Align Paragraphs • Format a document using themes • A theme is a complete set of theme colors, fonts, and effects • Preview a theme before applying it • Applying a Theme changes all content that uses theme colors, font and table styles, and graphics effects • Click the Themes button in the Themes group on the Page Layout tab to select and apply a theme Microsoft Office Word 2013 - Illustrated Complete
Work with Tabs • Tabs help you to align text vertically at a specific location on a page • A tab stop is a point on the horizontal ruler that identifies a text alignment location • Text can be aligned to the left, right, or center of a tab stop, or aligned with a bar character or decimal point • Set tabs using the Ruler Microsoft Office Word 2013 - Illustrated Complete 17
Work with Tabs Microsoft Office Word 2013 - Illustrated Complete 18
Work with Tabs • Types of tabs Microsoft Office Word 2013 - Illustrated Complete 19
Work with Indents • Indenting a paragraph moves the edge of the paragraph in from the left or right margin • Indent the entire left or right edge of a paragraph • Indent just the first line • Indent all lines except the first line • Indent the left edge of a paragraph to the left of the left margin • Indent markers on the horizontal ruler identify the indent settings for the paragraph in which the insertion point is located Microsoft Office Word 2013 - Illustrated Complete 20
Work with Indents • Applying Word Text Effects and Typography feature • Allows you to add visual appeal by adding special text effects such as outlines shadow, reflections, and glows • WordArt – preformatted combined text effects Microsoft Office Word 2013 - Illustrated Complete 21
Work with Indents Microsoft Office Word 2013 - Illustrated Complete 22
Work with Indents • Types of indents Microsoft Office Word 2013 - Illustrated Complete 23
Add Bullets and Numbering • Formatting paragraphs with bullets and numbering can help to organize ideas in a document • A bullet is a character, often a small circle, that appears before the items in a list to add emphasis • Numbering the items in a list helps to illustrate sequence and priority Microsoft Office Word 2013 - Illustrated Complete 24
Add Bullets and Numbering • Use the Bullets button or Numbering button in the Paragraph group on the HOME tab to apply bullets or numbering to paragraphs Microsoft Office Word 2013 - Illustrated Complete 25
Add Bullets and Numbering • Creating multilevel lists • To create a hierarchical structure in a list, apply a multilevel list style • Click the Multilevel List list arrow to select and apply a multilevel list style • Format an existing list • Demote items using the Increase Indent button • Promote items using the Decrease Indent button Microsoft Office Word 2013 - Illustrated Complete 26
Add Borders and Shading • Adding borders and shading to text can help to enhance the information in a document • A border is a line added above, below, to the side of, or around words or paragraphs • Shading is a color or pattern that is added behind words or paragraphs • Use the Borders button or the Shading button in the Paragraph group on the Home tab Microsoft Office Word 2013 - Illustrated Complete 27
Add Borders and Shading • Borders tab in Borders and Shading dialog box Microsoft Office Word 2013 - Illustrated Complete 28
Add Borders and Shading Microsoft Office Word 2013 - Illustrated Complete 29
Add Borders and Shading • Highlighting text in a document • Highlighting is transparent color that is applied to text using the Highlight pointer • Highlighting is most effective when a document is viewed on screen • Highlighting does print • To highlight text, click the Text Highlight Color list arrow in the Font group on the Home tab, select a color, then select the text Microsoft Office Word 2013 - Illustrated Complete 30
Insert Online Pictures • Clip art is a collection of graphic images that you can insert in a document • Office.com Clip art images are royalty-free photos and illustrations you can add to a document using the Online Pictures command on the INSERT tab Microsoft Office Word 2013 - Illustrated Complete 31
Insert Online Pictures • Office.com Clip Art window Microsoft Office Word 2013 - Illustrated Complete 32
Summary • Enhance documents with formatting • Format characters: • Font, font size, font styles, font effects, and character-spacing • Format paragraphs • Alignment, line spacing, paragraph spacing, tabs, indents, bullets, numbering, borders, and shading • Insert clip art images into a document • Choose appropriate formatting for the document’s purpose and audience • Take care not to over format a document Microsoft Office Word 2013 - Illustrated Complete 33