Download
1 / 14
150 likes | 291 Views
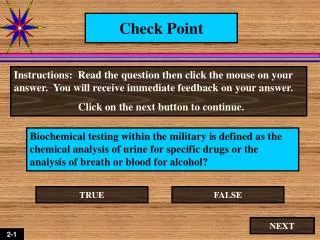
Project Check Point 3. Audio Interface Jeff Du. Overview. Project specs and overview next Tue. Mid-term next Thurs. This audio interface lab is REALLY easy. Norm is kind enough to provide most of the logic blocks.

E N D
Project Check Point 3 Audio Interface Jeff Du
Overview • Project specs and overview next Tue. • Mid-term next Thurs. • This audio interface lab is REALLY easy. • Norm is kind enough to provide most of the logic blocks. • You just need to do some wire wrap and control logic for A to D.
Audio Interface(high level) Main Control FSM Collision SRAM Packet Logic UART IN FIFO UART OUT FIFO Audio Out interface Audio In interface D To A A To D
Audio Interface(this lab) Xilinx Board Xilinx Chip Audio Out Control Logic Audio In Control Logic D to A Circuits A to D Circuits Oscilloscope Function Generator
Analog To Digital Chipset (1) • We will use the ADC08161 and a discrete pack that contains some capacitors • PIN: • Input(1), Function Gen. CS.L(13), Vref(11), GND(10) to GROUND, (6, 7, 9, 18) unused, (12, 19, 20) to the discrete pack, DataOut(2-5, 14-17) connect to the SRAM. (Look at www.national.com/ds/AD/ADC08161.pdf P14) • RD.L (read input), pin 8, should be controlled the xilinx chip. • You need to connect DataOut to the DataIn for the SRAM, D0 to D0, D1 to D1, ……….
Analog To Digital Chipset (2) • RD.L should be low for 200ns – 400 ns for a correct conversion. • Since we are using 8 KHz clock(each cycle is 125ns), we should delay the RD.L signal for 2-3 cycles. • For details, read page 12 section 2.2 on the spec. • ADC generates 16 bit unsigned number!
Function Generator • Connect the ground to the borad • Connect the signal to the input pin(1) of the ADC chip. • MAKE SURE the p-to-p voltage is around 2 V, or you can burn the chip. • You can generate any wave form, but you need to see some oscillation on the oscilloscope.
Digital To Analog Chipset (1) • We will use the AD1886 DAC, a amplifier and two discrete packs. • Since I can’t copy the connection picture, you can just look it up online. • Only three wires to the xilinx chip, LL, DL and CLK
Digital To Analog Chipset (2) • DL, sometimes called LD, is Data Left. • Serial input to the DAC • We only use half of the DAC, so we ignore DR. • LL.L, the falling edge of the LL causes the last 16 bits clocked into the serial register shifted into the DAC • Clock is just a 8 MHz clock. • DAC takes two’s compliment.
Oscilloscope • Connect the ground together, and connect the clip to the output of the Amplifier. • Then hit AUTO SCALE. • You should see the wave form generated by the function generator.
What to remember • Do wire wrapping before lab, it takes a while. (it’s hard to make it neat, cuz the distance between the pin is very short.) • Understand what each chip does, and the control signals • Understand why was the control signal setup that way, and why it works, or why it doesn’t work.
Some Final notes • This lab is easy, this means: • Don’t worry about it! • It’s not gonna be nearly as hard as the previous check points. • You should spend more time to prepare the midterm than this lab. (Most of you will do that anyways.) • It gives you a chance to catch up on the previous labs. • GOOD LUCK ON THE MIDTERM!!!