Download
1 / 47
490 likes | 768 Views
Poster Making. 2002 Resident Research Course Adam Schlichting. C:WINDOWSDesktop. Last Update: 10-21-02. Overview: Programs. Printing a poster from MS Word Printing a poster from MS Publisher. MS Word. Producing a 2’ X 3’ Poster Open Word Document

E N D
Poster Making 2002 Resident Research Course Adam Schlichting C:\WINDOWS\Desktop Last Update: 10-21-02
Overview: Programs • Printing a poster from MS Word • Printing a poster from MS Publisher
MS Word • Producing a 2’ X 3’ Poster • Open Word Document • From the File menu select Page Setup… • “Page Size” tab input 7.23” X 11” • Create Poster
MS Word • Printing a 2’ X 3’ Poster • From the File menu, select “Print” • Select the Design Jet 755CM (C3198B) printer from the drop-down menu
MS Word • Printing a 2’ X 3’ Poster (continued) • Select “Properties” • Select “Fit to this page…” • Click “More sizes” and input 24” X 36” • Select Application page size • Click “More sizes” and input 7.23” X 11” • Select Paper source as 36” roll
MS Word • Printing a 2’ X 3’ Poster (continued) • In the Advanced tab, select Autorotate • Click “OK”
MS Word • Printing a 2’ X 3’ Poster (continued) • In the print menu, click “OK”
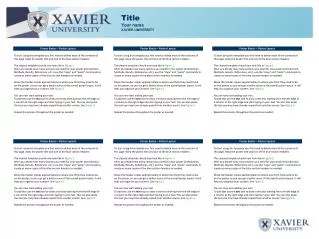
MS Publisher • Producing a 36” X 72” Poster • Create PowerPoint slides • Choose a MS Publisher template that best correlates number of slides with number of spaces in the template, from C:\WINDOWS\Desktop\desktop items\Poster Templates\Blank templates • Currently we have poster templates for 15, 16, 18, 21, and 25 slides; title and authors should be on additional slides
MS Publisher • Producing a 36” X 72” Poster (continued) • From the “View” menu in PowerPoint, select “Slide Sorter”
MS Publisher • Producing a 36” X 72” Poster (continued) • Copy each slide from PowerPoint into the corresponding space in MS Publisher
MS Publisher • Producing a 36” X 72” Poster (continued) • Type the poster title, authors, and institutions into the banner at the top of the poster • ACEP Recommendations: • Title: 72 point, Bold, Italicized • Names of Authors: 48 point, Bold, Italicized • Name of Institution(s): 36 point, Bold, Italicized
MS Publisher • Unique backgrounds • Highlight the blue background and hit delete • From the “Insert” menu in Publisher, click “Picture”…. “From file”
MS Publisher • Unique Background • Locate the picture and click insert
MS Publisher • Unique Background • Manually resize the picture • From the “Arrange” menu click “Send to back”
MS Publisher • Printing a 36” X 72” Poster • Ensure the correct printer is attached to the computer • Use Computer B in the “Cave” • From the “File” menu in MS Publisher, select “Print”
MS Publisher • Printing a 36” X 72” Poster • Select the Design Jet 755CM(C3198B) printer from the drop-down menu
MS Publisher • Printing a 36” X 72” Poster (continued) • Select “Properties” • Select Landscape Orientation • Select Paper source as 36” roll • Select Application page size 36” X 18” • Select “Fit to this page…” and input 72” X 36”
MS Publisher • Printing a 36” X 72” Poster (continued) • In the Advanced tab, select “…in computer” and “Autorotate” • Click “OK”
MS Publisher • Printing a 36” X 72” Poster (continued) • In the print menu, click “OK”
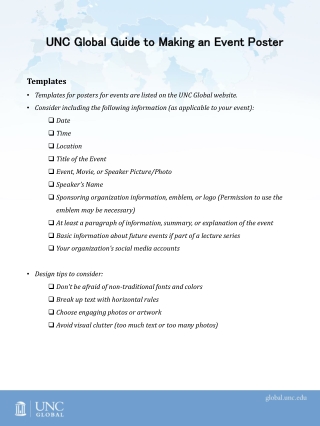
General Suggestions for Preparing Posters • Easily read from a distance of 4 feet • Organize to correspond with abstract • Title • Study Objectives • Design • Type of Participants • Edit material down to essential words • Use tables and lists whenever possible • Interventions • Measurements • Results • Conclusion