Download
1 / 27
270 likes | 457 Views
Master Schedule Building. A Quick Overview. Presented by the MIS Department Northwest Regional ESD. The Goal of this Training. Over-view of the scheduling process. Provide helpful documentation. Is NOT meant to be a comprehensive training.

E N D
Master Schedule Building A Quick Overview Presented by the MIS DepartmentNorthwest Regional ESD
The Goal of this Training • Over-view of the scheduling process. • Provide helpful documentation. • Is NOT meant to be a comprehensive training. • Everyone should attend a full-blown Master Schedule Building Workshop.
What do you need to make a good schedule? • Good data • A good team • A good process
Scheduling Philosophy: STUDENTS E A C H E ROOMS S Schedule around the Students – not the teachers! The children’s needs come first. The schedule is designed to deliver the curriculum to the student.
Establish a Scheduling Team – Why? • Division of labor • Developing backup plans • Provide more options for problem solving
Who should be involved in the Scheduling Team? • Administration official(s) • Guidance counselors. • Software Technicians. • Department Chairs/Lead Teachers. Like to haves: Teacher notes on how they’d like to have the course they teach scheduled (for example, German language courses taught by a teacherplaced back to back, if they also happen to teach math).
Balance Issues – How to minimize conflict? • A conflict - 2 or more courses that meet only in the same time period. • On the first run of the schedule builder, allow seats to overfill. • Change the Master Schedule.
Scheduling Time-line • It is important to develop a scheduling time-line. • Start at the end, and work your way forward. • Establish when you want to have schedules to the students.
Phases of the Scheduling Process: Phase 1 – Preliminary Tasks Phase 2 – Tally Phase 3 – Construction Phase 4 – Analysis & Adjustment Phase 5 – Final Tasks Invest time in Phases 1 – 3, to avoid too much time spent in Phase 4.
Phase 1 – Preliminary Tasks Review & update Curriculum • Determine which courses will be offered this year. Review parameters & constraints • List all school parameters • List all constraints • Note team-teaching arrangements, where applicable.
Understand the factors that impact the Master Schedule • Curriculum • Number of courses vs. number of students • Percentage of Singletons & Doubletons • Average number of courses selected by a student • Average student density (percent of time scheduled for class) • Parameters • Number of periods in a day (more periods add flexibility, but shorten the class) • Number of days in the cycle (more increases complexity & potential for conflict) • Organization • Facilities • Staff • Constraints
Constraints • A constraint is any existing condition which limits or restricts the scheduler in placing course sections in the Master Schedule. • Examples: Curricular Constraints • Locked in Singletons, Doubletons & Multi-section courses. • Double period lab sessions • Work study programs • Blocks • Dovetailing courses
More Constraints • Examples: Teacher Constraints • Part-time/shared-time teachers • Team teaching • Interdisciplinary teaming • Period assignment requests by teachers • Negotiated agreements • Facility Constraints • Specialty rooms used by several teachers • High room density • Shared rooms • Other constraints • Late arrival • Early dismissal
There are three key criteria that determine how well the Master Schedule has been constructed: • How well the student course selections have been satisfied. • The extent to which there is acceptable enrollment balance in multiple section courses. • The extent to which the Master Schedule is able to satisfy teacher requests related to course assignment preference.
Phase 2 – Tally • Advertise Curriculum, collect student course selections, & print initial tally • Edit student course selections • Finalize course offerings & make sectioning decisions
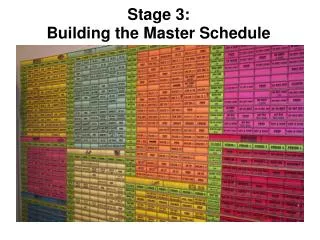
Phase 2 – Tally (continued) • Print final tally & conflict matrix • Determine resource needs & review assignments • Prepare Schedule Board, section chips, & Order of Placing Sections.
The Importance of section chips • Contributes to the visual effect. • Provides a wealth of data that would otherwise have to be looked up. • The chips can be different shapes and should be different colors.
The Importance of ‘Order of Placing Sections’ • The ‘Order of Placing Sections’ is the Master Schedule building “game plan.” • It ensures that there will be a flow and a logical sequence. • The tally provides much of the information.
Phase 3 – Construction • Build the Master Schedule • Use the conflict matrix. • Courses to be offered, the number of course sections for each course, and the teacher & room assignments are extremely important. • Use the Schedule Board to assist in visualizing the process • Make sure that you have someone record it! • A digital camera works well for this. It’s important to look for errors/problems all along the process.
The “Ideal Schedule” • The “Ideal Schedule” would have all core classes in the morning, followed by Physical Education and Electives in the afternoon. • The Problem – It can’t work, due to constraints such as teacher availability and rooms. • The Goal – Spread out the core classes evenly throughout the day.
Order of schedule building: Try to do the following in the same sitting: • Singletons • Doubletons • Constraints
Order of schedule building, Pt 2: Do the following in a different sitting: Multiple section courses • Offer each section in as many periods as possible! • Place the section in the period with the fewest seats allocated for the grade(s) involved.. • Visually scan your Board to make sure that the sections are offered in different periods throughout the year. • Visually scan your Board to make sure that the sections are offered in different periods throughout the day.
Phase 4 – Analysis & Adjustment • The Master Schedule Board has been built – now it is time to load the software. • Use a computer software program to load (schedule) the students. • Use reports from the software program to analyze the results, and then adjust the Master Schedule accordingly.
Phase 4 – Analysis & Adjustment Load students into Master Schedule: • Students are loaded into the Master Schedule by combining input from the courses & sections to be offered and the student course selections. • This process may be repeated one or more times, depending upon the quality of the Master Schedule that you built. • The better the Master Schedule, the fewer times you will have to load the students to get the best results.
Phase 4 – Analysis & Adjustment Analyze results & adjust Master Schedule. • If the scheduling results are not as good as you need, make changes to the Master Schedule and load the students again. • Things can get worse, as well as better….
Phase 4 – Analysis & Adjustment Resolve final conflicts by adjusting individual student course selections. • If necessary, resolve final conflicts by adjusting student course selections. This is a last resort! • When possible, adjust the Master Schedule to fit the needs of the students.
Phase 5 – Final Tasks The Master Schedule has been adjusted so that you have the scheduling results that you want. After these final tasks, you are ready to start school. • Identify & assign study halls. • Produce final reports.