Download
1 / 57
630 likes | 869 Views
Technical Training Program. 1400. LI159Bx. 1200. LI158Bx. Simplification of controls. INTRODUCTION to the Session. Welcome to the session Let’s introduce ourselves … Our training structure…. Return to first page. INTRODUCTION to the program:.

E N D
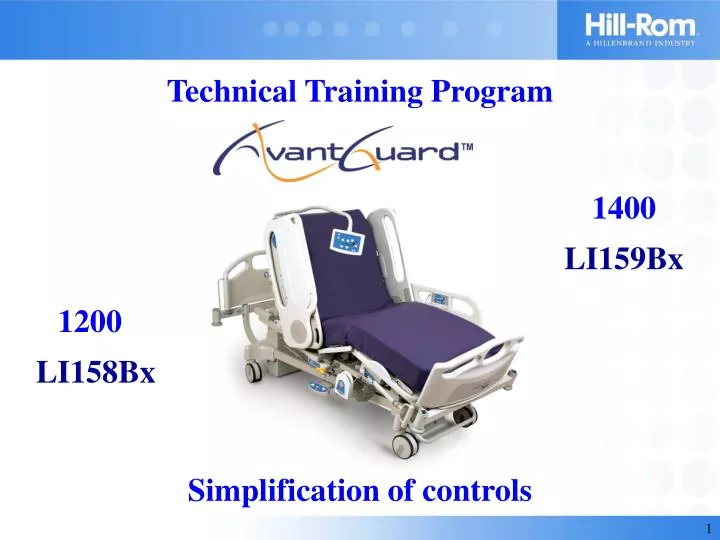
Technical Training Program 1400 LI159Bx 1200 LI158Bx Simplification of controls
INTRODUCTIONto the Session • Welcome to the session • Let’s introduce ourselves … • Our training structure… Return to first page
INTRODUCTION to the program: - In May 2002, the brand new AvantGuard™ bed, LI158Ax/ LI159Ax, were launched in Europe. - In January 2004, new versions of these beds were launched, with the following engineering identification numbers: LI158Bx/LI159Bx. Return to first page
Objectives of the program After completing this program, you will be able to: - Indicate the main reasons for these LI158Bx / LI159Bx beds -List the differences between the AvantGuard™ LI158Ax/ LI159Ax and the LI158Bx/LI159Bx beds. - Describe the different configurations and options available for the AvantGuard™ bed models LI158Bx / LI159Bx. - Use the LI158Bx and LI159Bx beds. - List the electrical components that are different between the AvantGuard™ LI158Ax/LI159Ax and the LI158Ax/ LI159Bx beds. - Describe the specific markings available to avoid mixing the electrical components of the AvantGuard™ LI158Ax/ LI159Ax with the LI158Bx/LI159Bx beds. Course duration: approximately 4 hours Return to first page
Objectives of the program This Program can ALSO be used as a self-directed Training Program Return to first page
Module 1: Why ? Module 2: New controls Module 3: Configurations Module 4: Operation Module 5: Changes Navigation Content of the Program Module 1:Reasons for change Module 2:New Controls Module 3:Different configurations Module 4:Operation of the beds Module 5:Technical changes Return to first page
Module 1: Reasons for change Module 1: Why ? Module 2: New controls Module 3: Configurations Module 4: Operation Module 5: Changes Objectives of this module After completing this program, you will be able to: - Indicate the main reasons reasons that lead to the development of the AvantGuard™ LI158Bx and LI159Bx beds. Module duration: approximately 30 mn Return to the content
Module 1: Reasons for change Module 1: Why ? Module 2: New controls Module 3: Configurations Module 4: Operation Module 5: Changes WHY ? A compilation of remarks from customers and Hill-Rom employees brought out the following points: USAGE COMPLEXITY and ERGONOMIC ISSUES !! Return to the content
Module 1: Reasons for change Module 1: Why ? Module 2: New controls Module 3: Configurations Module 4: Operation Module 5: Changes COMPLEXITY OF THE CONTROLS • The quantity/number ofpatients buttons appears to be excessive. • The lock-out system is confusing. • The symbols/pictograms are not always comprehensible. • The patient/caregiver buttons are not differentiated enough > colour. • The Key used for the function management mode does not seem to be strong enough. Also its use is not intuitive. • The electrical function and Trend/Rev Trend management mode is not intuitive and requires 3 steps (insert key/peg into the opening, activate trend/rev.trend & confirm) ERGONOMIC ISSUE • Too much bending (resulting from the use of a peg/key) Return to the content
Module 1: Reasons for change Module 1: Why ? Module 2: New controls Module 3: Configurations Module 4: Operation Module 5: Changes Questions / Comments : Return to the content
Module 2: New controls Module 1: Why ? Module 2: New controls Module 3: Configurations Module 4: Operation Module 5: Changes Objectives of this module After completing this program, you will be able to: - List the new controls available on the AvantGuard™ LI158Bx/LI159Bx beds. - Identify the proper function for each buttons on the different controls. - List the differences between the AvantGuard™ LI158Ax/LI159Ax and the LI158Bx/LI159Bx beds Module duration: approximately 30 mn Return to the content
Module 2: New controls Module 1: Why ? Module 2: New controls Module 3: Configurations Module 4: Operation Module 5: Changes The NEW CONTROLS available: • A two-sided control on flexible arm: • Patient face: front side • Caregiver face: back side • Hand Pendants: • Patient hand pendant • Caregiver hand pendant • Lateral Caregiver Units: • With Emergency Trendelenburg • Without Emergency Trendelenburg Return to the content
Module 2: New controls Module 1: Why ? Module 2: New controls Module 3: Configurations Module 4: Operation Module 5: Changes Control Unit on flexible arm • Control Unit on flexible arm: version 1400 / LI159Bx • Caregiver controls Patient controls Return to the content
Module 2: New controls Module 1: Why ? Module 2: New controls Module 3: Configurations Module 4: Operation Module 5: Changes Control Unit on flexible arm • Control Unit on flexible arm: version 1200 / LI158Bx • Caregiver controls Patient controls Return to the content
Module 2: New controls Module 1: Why ? Module 2: New controls Module 3: Configurations Module 4: Operation Module 5: Changes Hand Pendants • Hand Pendant : version 1400 / LI159Bx • Caregiver hand pendant Patient hand pendant Return to the content
Module 2: New controls Module 1: Why ? Module 2: New controls Module 3: Configurations Module 4: Operation Module 5: Changes Hand Pendants • Hand Pendant : version 1200 / LI158Bx • Caregiver hand pendant Patient hand pendant Return to the content
On battery: goes OFF approximately 1min after the last function activated Enable control Goes OFF approximately 1min after the last function activated Module 2: New controls Module 1: Why ? Module 2: New controls Module 3: Configurations Module 4: Operation Module 5: Changes Indicators • Purpose of the LED indicators • Bed NOT in the low positionMains OR Battery power Return to the content
Left side Right side Module 2: New controls Module 1: Why ? Module 2: New controls Module 3: Configurations Module 4: Operation Module 5: Changes Lateral Caregiver Units • Lateral Caregiver Units : • With Emergency Trend Without Emergency Trend Return to the content
Patient controls Caregiver controls Module 2: New controls Module 1: Why ? Module 2: New controls Module 3: Configurations Module 4: Operation Module 5: Changes Some illustrations on thebed Return to the content
Functions enabled Functions locked out Module 2: New controls Module 1: Why ? Module 2: New controls Module 3: Configurations Module 4: Operation Module 5: Changes Some illustrations on the bed Return to the content
Module 2: New controls Module 1: Why ? Module 2: New controls Module 3: Configurations Module 4: Operation Module 5: Changes Some illustrations on thebed NEVER 3 controls together on the bed !! CAUTION: It is NOT possible to have 3 controls on the bed due to the MAXIMUM POWER available from the control box: electrical consumption would be too high ! Return to the content
Module 2: New controls Module 1: Why ? Module 2: New controls Module 3: Configurations Module 4: Operation Module 5: Changes Identification exercise: Questions / Comments : Return to the content
Module 3: Different configurations Module 1: Why ? Module 2: New controls Module 3: Configurations Module 4: Operation Module 5: Changes Objectives of this module After completing this program, you will be able to: - Describe the different configurations and options available for the AvantGuard™ LI158Bx and LI159Bx beds. Module duration: approximately 30 mn Return to the content
Module 3: Different configurations Module 1: Why ? Module 2: New controls Module 3: Configurations Module 4: Operation Module 5: Changes Controls(one choice) AvantGuard™ 1200 / LI158Bx - one two-sided control on flexible arm - one Caregiver pendant - one two-sided control on flexible arm + one Caregiver pendant - one two-sided control on flexible arm + one Patient pendant - two Caregiver pendants - one Caregiver pendant + one Patient pendant AvantGuard™ 1400 / LI159Bx - one two-sided control on flexible arm + one Caregiver pendant -one two-sided control on flexible arm + one Patient pendant - two Caregiver pendants - one Caregiver pendant + one Patient pendant Return to the content
1 caregiver control + 1 patient control (not shown) Module 3: Different configurations Module 1: Why ? Module 2: New controls Module 3: Configurations Module 4: Operation Module 5: Changes Value packages(BASE configuration) Return to the content
Module 3: Different configurations Module 1: Why ? Module 2: New controls Module 3: Configurations Module 4: Operation Module 5: Changes Value packages(One choice) Return to the content
OPTIONS AVANTGUARD 1200 AVG1200 AVG1210 AVG1220 AVG1230 AVG1240 AVG1250 AVG1260 AVG1270 European Plug (base) Switzerland Plug 1 choice 1 choice 1 choice 1 choice 1 choice 1 choice 1 choice 1 choice UK Plug 120V 1 choice 1 choice 1 choice 1 choice 1 choice 1 choice 1 choice 1 choice 230V (base) 2 Accessory holders with 2 hooks 2 Accessory holders with 6 hooks 1 choice 1 choice 1 choice 1 choice 1 choice 1 choice 1 choice 1 choice 2 Rails for accessories Battery Yes or No Yes or No Yes or No Yes or No Yes or No Yes or No Yes or No Yes or No 150 mm double band casters 150 mm single band casters (base) 1 choice 1 choice 1 choice 1 choice 1 choice 1 choice 1 choice 1 choice 150 mm antistatic twin casters 150 mm antistat.single casters Variable height range 40cm to 80cm 1 choice 1 choice 1 choice 1 choice 1 choice 1 choice 1 choice 1 choice Variable height range 45cm to 85cm Steering wheel in bed foot Steering wheel in bed head (base) 1 choice 1 choice 1 choice 1 choice 1 choice 1 choice 1 choice 1 choice 5th wheel 1 Caregiver pendant (base) 1 Control on flexible arm 1 Caregiver pendant + 1 Patient pendant 1 choice 1 choice 1 choice 1 choice 1 choice 1 choice 1 choice 1 choice 2 Caregiver pendants 1 Control on flexible arm + 1 Patient pendant 1 Control on flexible arm + 1 Caregiver pendant Module 3: Different configurations Module 1: Why ? Module 2: New controls Module 3: Configurations Module 4: Operation Module 5: Changes Value packages(Options: AVG 12xx) Return to the content
OPTIONS AVANTGUARD 1400 AVG1400 AVG1410 AVG1420 AVG1430 European Plug (base) Switzerland Plug 1 choice 1 choice 1 choice 1 choice UK Plug 120V 1 choice 1 choice 1 choice 1 choice 230V (base) 2 Accessory holders with 2 hooks 2 Accessory holders with 6 hooks 1 choice 1 choice 1 choice 1 choice 2 Rails for accessories 150 mm double band casters 150 mm single band casters (base) 1 choice 1 choice 1 choice 1 choice 150 mm antistatic twin casters 150 mm antistat.single casters Variable height range 40cm to 80cm 1 choice 1 choice 1 choice 1 choice Variable height range 45cm to 85cm One Caregiver pendant & One Patient pendant (base) 2 Caregiver pendants 1 choice 1 choice 1 choice 1 choice One control module on flexible arm + One Patient pendant One control module on flexible arm + One Caregiver pendant Module 3: Different configurations Module 1: Why ? Module 2: New controls Module 3: Configurations Module 4: Operation Module 5: Changes Value packages(Options: AVG 14xx) Return to the content
Module 3: Different configurations Module 1: Why ? Module 2: New controls Module 3: Configurations Module 4: Operation Module 5: Changes Controls Note: In any case, always refer to the updated sales brochures to make sure you’re using the right information! Questions / Comments : Return to the content
Module 4: Operation of the beds Module 1: Why ? Module 2: New controls Module 3: Configurations Module 4: Operation Module 5: Changes Objectives of this module After completing this program, you will be able to: - Use all the functions of the LI158Bx and LI159Bx beds. Module duration: approximately 1 hour Return to the content
Module 4: Operation of the beds Module 1: Why ? Module 2: New controls Module 3: Configurations Module 4: Operation Module 5: Changes Reminder: operation of the LI158Ax / LI159Ax AvantGuard™ bed • Reminder :Function locking/enabling sequence: • Press the enable key in the red opening of the right-hand or left-hand lateral caregiver unit. • The LEDs flash on the control unit (except Trendelenburg/Reverse Trendelenburg and low VH position: continuous). • Select the functions to be locked out (LEDs go off) or enabled (LEDs will begin to flash again) by pressing the buttons of the relevant functions. • Press the enable key again to validate (or automatic return after about 1 minute). Only the LEDs of the activated functions remain lit. Return to the content
Module 4: Operation of the beds Module 1: Why ? Module 2: New controls Module 3: Configurations Module 4: Operation Module 5: Changes Reminder: operation of the LI158Ax / LI159Ax AvantGuard™ bed Reminder :Function locking/enabling sequence: Note: same operation with the optional Lateral Caregiver Unit with buttons available since October 14, 2003. Just press the button corresponding to the action required. Return to the content
Note: the button « Head up only» no longer exists Module 4: Operation of the beds Module 1: Why ? Module 2: New controls Module 3: Configurations Module 4: Operation Module 5: Changes Operation: LI158Bx and LI159Bx beds • Function locking/enabling procedure: • - Press the enable control on the right-hand or left-hand lateral caregiver unit to activate “Function Management” mode. • - Press the button corresponding to the function to be locked out or enabled. • - Depending on the initial situation, the relevant LED illuminates (function • locked out) or goes off (function enabled). • - Press the enable control again to exit the “Function Management” mode. • Note: if the last step is omitted, Function Management will be deactivated automatically after approximately 1 minute. Return to the content
Module 4: Operation of the beds Module 1: Why ? Module 2: New controls Module 3: Configurations Module 4: Operation Module 5: Changes Operation: LI158Bx and LI159Bx beds • Trend / Rev Trend , Chair and flat position • - Press the enable control on the right-hand or • left-hand lateral caregiver unit to activate “Function Management” mode. • - Press the button corresponding to the function to be activated and maintain until the required position is reached. • - Release the button. • - Press the enable control again to • deactivate the “Function Management” • mode. • Note: if the last step is omitted, Function Management will be deactivated automatically after approximately 1 minute. Return to the content
Module 4: Operation of the beds Module 1: Why ? Module 2: New controls Module 3: Configurations Module 4: Operation Module 5: Changes Operation: LI158Bx and LI159Bx beds • Hi-Low function by pedal • Note: the Hilow pedal is a caregiver function, so it’s operational ONLY when the enable control is pressed. • Note: the Hilow pedal is active even if the Hilow function is locked out. • - Press the enable control on the right-hand or • left-hand lateral caregiver unit to activate the “Function Management” mode. • - Press the bed UP or DOWN control of the pedal and maintain until the required position is reached. Then release the pedal. • - Press the enable control again to deactivate “Function management” mode. • Note: if the last step is omitted, Function Management will be deactivated automatically after approximately 1 minute. Return to the content
Module 4: Operation of the beds Module 1: Why ? Module 2: New controls Module 3: Configurations Module 4: Operation Module 5: Changes Operation: LI158Bx and LI159Bx beds • Chair and flat position :Additional Info: • Once the bed is in the Chair position: if the “bed flat” button is continuously pressed, the sleep surface sections go to the flat position and ADDITIONALLY the bed goes down to it’s lowest position. • Note: All movements will stop if the “bed flat” button is released. Return to the content
Module 4: Operation of the beds Module 1: Why ? Module 2: New controls Module 3: Configurations Module 4: Operation Module 5: Changes Operation: LI158Bx and LI159Bx beds Hands-on exercises: While referring to the User Manual, operate the different functions of the bed. Questions / Comments ? Return to the content
Module 5:Technical changes Module 1: Why ? Module 2: New controls Module 3: Configurations Module 4: Operation Module 5: Changes Objectives of this module After completing this program, you will be able to: - List the electrical components that are different between the AvantGuard™ LI158Ax/LI159Ax and the LI158Ax/LI159Bx beds - Describe the specific markings available to avoid mixing the electrical components of the AvantGuard™ LI158Ax/LI159Ax with the LI158Bx/LI159Bx beds Module duration: approximately 1 hour Return to the content
Module 5:Technical changes Module 1: Why ? Module 2: New controls Module 3: Configurations Module 4: Operation Module 5: Changes Electrical diagrams 1400 / LI159Bx with control uniton flexible arm Return to the content
Module 5:Technical changes Module 1: Why ? Module 2: New controls Module 3: Configurations Module 4: Operation Module 5: Changes Electrical diagrams 1400 / LI159Bx without control uniton flexible arm Return to the content
Module 5:Technical changes Module 1: Why ? Module 2: New controls Module 3: Configurations Module 4: Operation Module 5: Changes Electrical diagrams 1200 / LI158Bx with control uniton flexible arm Return to the content
Module 5:Technical changes Module 1: Why ? Module 2: New controls Module 3: Configurations Module 4: Operation Module 5: Changes Electrical diagrams 1200 / LI158Bx without control uniton flexible arm Return to the content
Module 5:Technical changes Module 1: Why ? Module 2: New controls Module 3: Configurations Module 4: Operation Module 5: Changes Electrical diagrams - If the Control Unit on flexible Arm is ordered as an accessory(after delivery): it’s connected to the Lateral Caregiver Unit as on the previous AvantGuard™ beds Return to the content
Module 5:Technical changes Module 1: Why ? Module 2: New controls Module 3: Configurations Module 4: Operation Module 5: Changes Electrical diagrams Questions / Comments ? Return to the content
Module 5:Technical changes Module 1: Why ? Module 2: New controls Module 3: Configurations Module 4: Operation Module 5: Changes Technical differences between AvantGuard™ LI158Ax / LI159Ax and LI158Bx / LI159Bx beds Operation management: - The CPLD (Complex Programmable Logic Device)has a different internal configuration. - So,the control box is differentfrom the one used on the AvantGuard™ LI158Ax / LI159Ax beds. - Thenew controlbox isNOT interchangeablewith the one used on the AvantGuard™ LI158Ax / LI159Ax beds. Return to the content
Module 5:Technical changes Module 1: Why ? Module 2: New controls Module 3: Configurations Module 4: Operation Module 5: Changes Technical differences between AvantGuard™ LI158Ax / LI159Ax and LI158Bx / LI159Bx beds New parts: - To avoid installing the new control box on LI158Ax / LI159Ax beds, the new control boxhas also adifferent Part number: QD2247 (230V)(QD1602 on LI158Ax / LI159Axversions) Return to the content
Module 5:Technical changes Module 1: Why ? Module 2: New controls Module 3: Configurations Module 4: Operation Module 5: Changes Technical differences between AvantGuard™ LI158Ax / LI159Ax and LI158Bx / LI159Bx beds New parts: - AFTER SALES: The corresponding after sales part numbers are: - AG0121 (230V) - AG0076 (100V) - AG0077 (120V) Return to the content
AG0048 indicated on the sticker Module 5:Technical changes Module 1: Why ? Module 2: New controls Module 3: Configurations Module 4: Operation Module 5: Changes Technical differences between AvantGuard™ LI158Ax / LI159Ax and LI158Bx / LI159Bx beds New parts: - FOR AFTER SALESonLI158Ax / LI159Axbeds: The LI158Ax / LI159Axcontrol boxes(AG0048)are easily identified by aroundorangestickeron the top cover Return to the content
Module 5:Technical changes Module 1: Why ? Module 2: New controls Module 3: Configurations Module 4: Operation Module 5: Changes Technical differences between AvantGuard™ LI158Ax / LI159Ax and LI158Bx / LI159Bx beds New cabling: - To allow the connection of the Control Unit on Flexible arm, a junction box has been added in the central rail used to direct the cables. - This junction box frees the connections on the two Lateral Caregiver Units and allows the hand pendant to be connected on either side of the bed. Excess cable is stored by positioning the cable in a “S” inside the central conduit. Return to the content
Module 5:Technical changes Module 1: Why ? Module 2: New controls Module 3: Configurations Module 4: Operation Module 5: Changes Technical differences between AvantGuard™ LI158Ax / LI159Ax and LI158Bx / LI159Bx beds New cabling: - This junction box is for connection of the Control Unit on Flexible arm cableONLY, and is present on the bed ONLY when the Control Unit on Flexible arm is ordered with the bed. - If the Control Unit on flexible Arm is ordered as an accessory(after delivery): it’s connected to the Lateral Caregiver Unit as on the AvantGuard™ LI158Ax / LI159Ax beds (see electrical diagrams). Return to the content