Download
1 / 35
490 likes | 822 Views
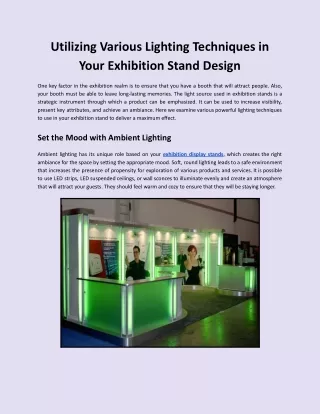
Lighting Techniques. How does light change what we capture in a photo? Emotions? Messages? How can light help a photo? How can it be a detriment?. More Examples. Different Lighting Techniques. Why is this important?. Split Lighting. How?.

E N D
Lighting Techniques How does light change what we capture in a photo? Emotions? Messages? How can light help a photo? How can it be a detriment?
Split Lighting
How? • Pretty simple! Your light source is directly to the side, so that only one side is lit.
Loop Lighting • Small shadows under the nose and cheeks
How? • To create loop lighting, the light source must be slightly higher than eye level and about 30-45 degrees from the camera and slightly above their eye level • The shadows on the cheeks and nose do not meet, they are separate
Rembrandt lighting is so named because the Rembrandt the painter often used this pattern of light in his paintings, as you can see in his self portrait here. Rembrandt lighting is identified by the triangle of light on the cheek. Unlike loop lighting where the shadow of the nose and cheek do not touch, in Rembrandt lighting they do meet which, creates that trapped little triangle of light in the middle. • To create proper Rembrandt lighting make sure the eye on the shadow side of the face has light in it and has a catch light, otherwise the eye will be “dead” and not have a nice sparkle. Rembrandt lighting is more dramatic, so like split lighting it creates more mood and a darker feel to your image.
How? To create Rembrandt lighting the subject must turn slightly away from the light. The light must be above the top of their head so that the shadow from their nose falls down towards the cheek.
Butterfly Lighting • Butterfly lighting is named for the butterfly shaped shadow that is created under the nose by placing the main light source above and directly behind the camera. The photographer is basically shooting underneath the light source for this pattern.
Description… • Broad lighting is when the subject’s face is slightly turned away from centre, and the side of the face which is toward the camera (is broader) is in the light. • This produces a larger area of light on the face, and a shadow side which appears smaller. • It is often used in portraits
How? • To create broad lighting the face is turned away from the light source. Notice how the side of the face that is towards the camera has the most light on it and the shadows are falling on the far side of the face, furthest from the camera. • Simply put, broad lighting illuminates the largest part of the face showing.
Narrow Lighting • Short lighting puts the side turned towards the camera (that which appears larger) in more shadow. Turned toward camera
How? • In short lighting, the face is turned towards the light source this time. • Notice how the part of the face that is turned away from the camera has the most light on it and the shadows are falling on the near side of the face, closet to the camera. • Simply put short lighting has shadows on the largest part of the face showing.