Download

1 / 38
380 likes | 503 Views
Technology Infused Lessons. (A World Class Presentation). Important Skills to Learn include!. Learning the Class Rules and Organization Parent Orientation File Structure on the Computer Saving, Moving, and Deleting. Resizing and Moving Graphics Objects

E N D
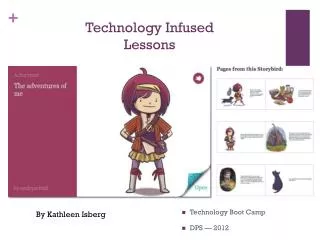
Technology Infused Lessons (A World Class Presentation)
Important Skills to Learn include! • Learning the Class Rules and Organization • Parent Orientation • File Structure on the Computer • Saving, Moving, and Deleting. • Resizing and Moving Graphics Objects • Enter equations and Organization Charts • How to Prepare the Final Portfolio
Unit Activities • Lesson 1: • Class Rules and Organization • Technology-Infused Lesson 1: • A PowerPoint Presentation highlighting and illustrating the Class Rules and Organization
No Food! Place all food in Trash
No Drinks! Sugar and moisture destroys computer parts!
Before Complaining to the TA Check the following items: If you haven’t checked the above items expect no sympathy from my aid. Is it turned on? Is it plugged in? Does it have paper?
Always Save Before Printing! If the computer freezes you could lose all your work.
Don’t Wait for the last five minutes of Class to start Printing!
Unit Activities • Lesson 2: • Parent Orientation • Technology-Infused Lesson 2: • A PowerPoint Presentation highlighting and illustrating the Class With a course overview for Parents
Parent Orientation We appreciate all of your support.
Welcome to Keyboarding • Course Overview • Course Objectives • Expectations for Students • Resources
Course Overviewfor Typing • Semesters: Two • All Grade Levels • Prerequisite: None • Satisfies the Practical Art Requirement • Provides Student with a Life Skill
Course Objectives This course will teach students to: • Use the touch typing method. • Use word-processing software to produce letters, manuscripts and other documents. • To work with graphics in documents.
Course Description • A prerequisite for all office career programs. • Includes the use of manipulative parts of the machine, correct techniques, and development of keyboard mastery.
Course Description • Stresses the typing of business correspondence, reports, rough drafts, and tabulations in acceptable form within definite time periods. • Students who achieve the objectives of the course, according to a prescribed checklist, will be issued a certificate of proficiency.
General Objectives • Name parts of the machine • Display correct body posture, proper hand and finger position, and the established form of key stroking. • Demonstrate mastery of the keyboard by correctly using the touch system to type letters, numbers, and symbols.
General Objectives • Use accepted procedures to make corrections • Type paragraphed copy containing all letters of the alphabet at the rate of 40 gross words per minute with no more than three errors on the three-minute timing. • Type number-symbol sentences at the rate of 30 gross words per minute with no more than two errors on a two-minute timing.
General Objectives • Produce office communications in acceptable form in defined time periods; i.e., business letters, interoffice memoranda, final copies from rough draft, and tabulations. • Demonstrate dependability, responsibility, ability to get along with others, and pride in work.
Distribution of instructional time • Keyboarding 30% • Accuracy & speed building 30% • Production work 40%
Expectations for Students Take notes during class Take responsibility for completing all assignments. Continue to strive for superior performance Be on time
Resources Students will use computers at their desk and will help each other when necessary. Students will use individualized software which will track their progress and fine tune the lessons.
Unit Activities • Lesson 3: • Use of Files on the Computer • Technology-Infused Lesson 3: • A PowerPoint Presentation highlighting and illustrating the Methods of Opening, Saving, Moving, and Deleting Files.
File Structure on the Computer Saving files Moving files Deleting files
Saving my work? Yes you need to save your work. The question is where and how. First lets answer the how. Click on the File drop down menu and then Save As or use the shortcut Alt A Where it says File name type in the name you want to give your document. Then click on the Save button.
Where do we save our work? One way is to save your work on your own diskette. By clicking on the Save In box you can choose to save on the 3½ Floppy (A:). Otherwise, save your work in a folder with your name on it located in C:\My Documents or in C:\Windows\Personal. To make a folder of your own be sure you are in one of the above locations by checking the Save In box, then click on the Create New Folder button on the Save As menu and type in your name. After you click OK the folder will appear. To use it just double click on the folder with your name and save your work there
Why is my work erased? Generally others will not erase your work. However, inexperienced students many times will erase their own work by trying to retrieve their work using the Save As button rather than the Open button. By doing this they write over their own work and lose it.
General Rules of Saving 1) Always save before printing. 2) Save important documents while you are working so that you don’t lose everything if something happens. 3) Be sure to remember or write down the location of important documents.
Unit Activities • Lesson4: • Resizing and Moving Graphics Objects • Technology-Infused Lesson 4: • Applying the principles of Resizing and Moving Graphics Objects across many graphic utilizing programs.
How about copying and inserting pictures into my documents? It depends a little on where you got the pictures and how you’ll be using them. A good Internet source for pictures is to do a picture search on AltaVista: http://www.altavista.com/cgi-bin/query?mmdo=1&stype=simage Right-clicking on the picture you want allows you to Copy it. Then right-click in your document and choose Paste. By dragging and dropping the sizing boxes in the corners of the picture you can adjust the picture size. (Don’t forget to credit your source) Another method is to do a screen capture by hitting the Print Screen key. This is like taking a snapshot of your whole screen. Paste the snapshot into a picture utility like Paint and select the part you want. Copy the selection and paste it into your document. There is much, much, much more to pictures and graphics but that’s a class in itself
Los Angeles High School VILLA IVLILLA the Toga.htm
Unit Activities • Lesson 5: • Use of International Characters and Formulas • Technology-Infused Lesson 5: • A PowerPoint Presentation highlighting and illustrating the Methods of using International Characters and Formulas